Avastar supports working with Joint positions while the Slider system is also active. The goal is to provide a true what you see is what you get system. However at the moment (August-2016) you have to follow a very strict workflow to get things working correctly:
Prepare your Blend file for Joint Offset usage
- Create a new Avastar character or open a blend file with an existing character.
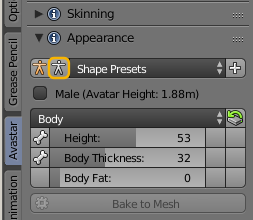
- Open the Tool Shelf and set the slider system to SL Restpose by clicking on the white Stickman icon (see image)
Note: you currently can not see if you are in SL Restpose. But you can click on the Stickman icon just to be sure you are in the right mode. We work on improving this.
Edit your joint positions
You have basically 2 options to edit the joint positions. You either can do this in Armature Pose mode or in Armature Edit mode. Lets start with editing in pose mode:
Editing in Pose mode
When you work in Pose mode then you can edit your character visually because the rigged meshes instantly follow the editing of the pose bones.
- Select the Armature in Pose mode
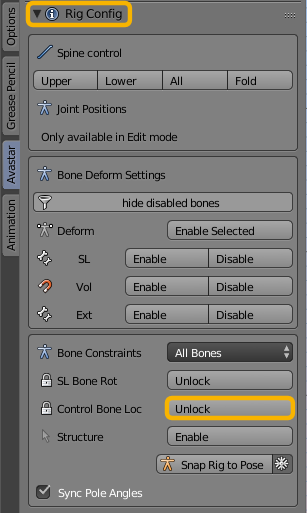
- Open the Tool Shelf – Rig Control Panel
- Unlock the Control Bone Locking (see image)
- Take care that you only(!) edit the green control bones.
The good news is that you also can use all pose tools, even IK and auto IK. Until here you actually just pose your character. There is nothing really special about this. But remind … green control bones ONLY!
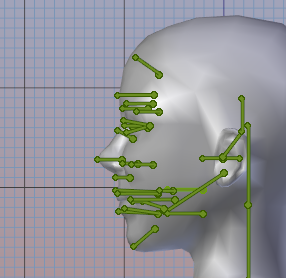
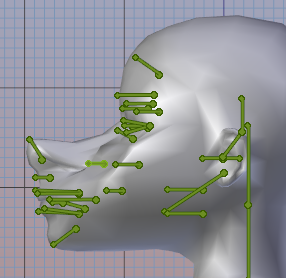
Now you can go ahead and pose your character as you like. Below is an example sequence for modifying the default SL face into a snout:

Convert the pose to Restpose
Once you are happy with the new pose, you want to conserve your settings as a new Restpose. Pure blender provides a function for this (Apply pose as new Restpose). But this does not work nicely together with the Avastar slider system. For this we have added our own Pose bake tool which also calculates the joint offsets and allows to use the sliders afterwards:
- Select the Armature in Pose mode
- Open the Tool Shelf – Rig Config Panel
- Then call the Snap Rig to Pose button
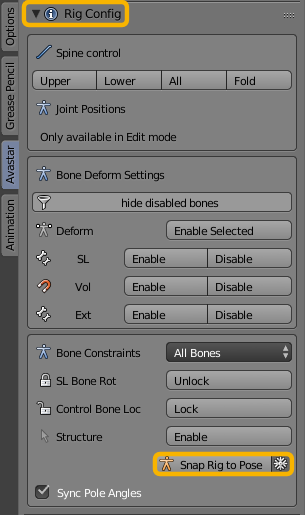
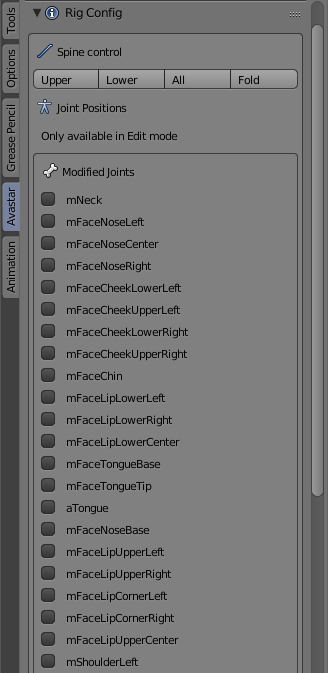
Now the new skeleton is calculated based on your Pose. And once this function is finished, you find a list of all bones with joint offsets in the Config Panel (see image) and now you can test your character with the slider system.
Editing in Edit mode
While editing your character in Pose mode may be of benefit for some workflows, you still may want to have full control over the bone editing. Or maybe you just like the Bone editor more than the Pose editor.
So of course we also support editing your character in Edit mode:
- Be sure you have set the appearance sliders to SL Restpose (see above)
- Select the Armature in Edit Mode
- Take care that you only(!) edit the green control bones.
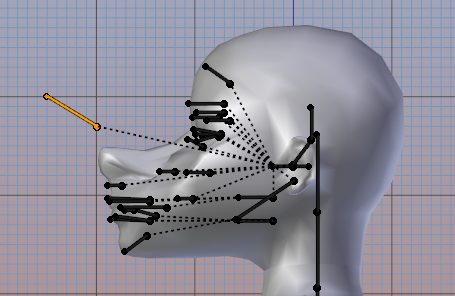
Just for demo i moved the nose bone a bit
The problem is that you can not tell from the editor if you work on the control bones or not… We have no good idea how to improve that, but we try.
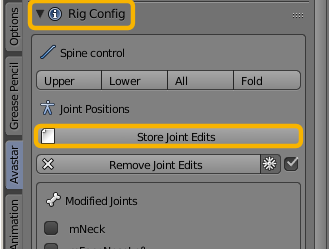
Apply the Bone edits to the Sliders
Once you are finished with your bone editing in the Blender armature editor, you again have to tell the slider system about your edits.
- I expect you are still in edit mode (of course)
- Open the Tool Shelf – Rig Config Panel
- Then call the Store Joint Edits Button
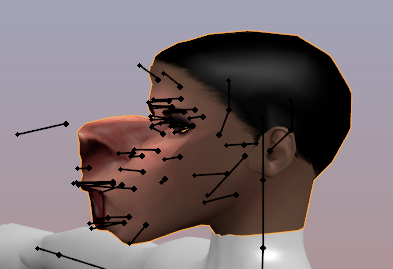
Testing the sliders
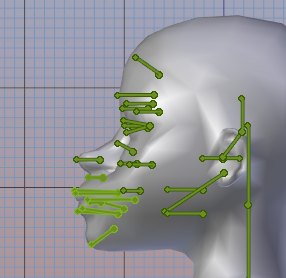
Here is the modified Skeleton head with some of the face sliders edited and the jaw bone posed (to open the mouth):
Now you may be eager to export your head to Second Life. You do this as usual. Just open the Collada exporter and export your meshes with the default Collada settings.
