In this episode we will use the Avamesh body to create a top for the Belleza character.
Prepare the Rigs
- Create a Belleza Rig on one layer and an Avamesh Rig on another Layer.
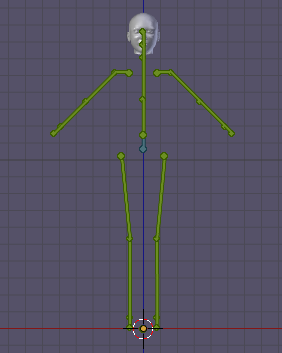
Belleza Rig
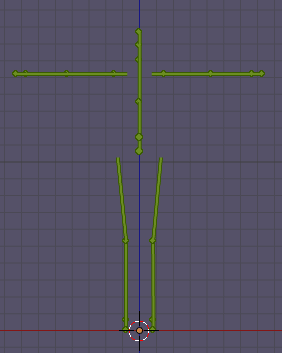
Avamesh Rig
- Make both layers visible
- Select the Avamesh Armature (in Pose mode)
Rotate the arms of the avamesh to match the Belleza arms. You may notice that the rigs differ slightly.
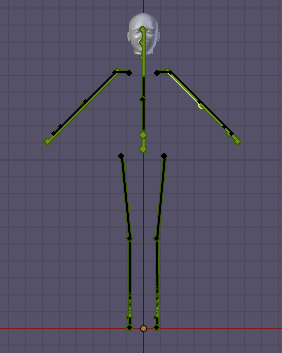
The reason for the difference is: Belleza uses the SL Rest shape while Avamesh uses the SL Default Shape. Fix this as follows:
- Make sure the Avamesh is selected
- Open the Appearance panel
- Click the white stickman to switch avamesh to the SL Rest shape
Now the Avamesh Rig and the Belleza Rig match perfect.

Freeze Avamesh
- Make only the layer with the Avamesh visible
- Select the Avamesh in Object mode
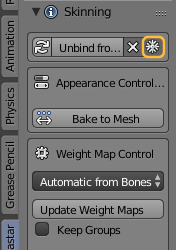
- Open the Avastar Skinning Panel
- Ensure the white snowflake icon is Selected
- Unbind from Armature
Now you have an Avamesh in A Pose but not rigged. You can delete the Avamesh Armature and all its children. We only work on the frozen Avamesh…
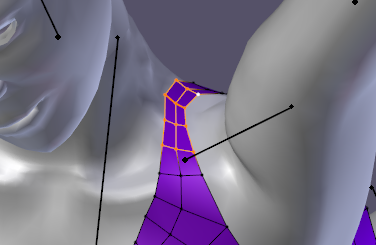
Cut out the Top
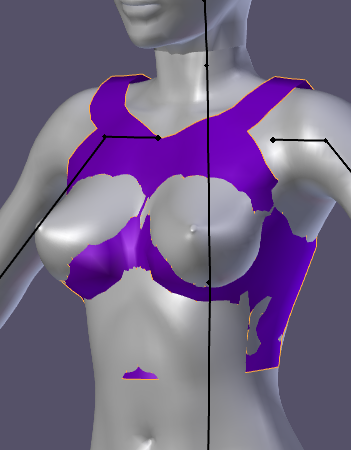
remove all faces from Avamesh that will not belong to the Top. In the image i have selected all to be deleted faces:

Remove more faces from the shoulder part to create thinner straps. I also assigned a new Material to the top and set the base color. At the end we will have something like in the image.
Before we bind the top to the Belleza Armature, let us first use a Shrinkwrap modifier to adjust the shape.

Adjust the Mesh
- Go to Object Mode
- Make the Belleza Layer visible
- Add a shrinkwrap modifier
Set values similar to the image:
- Target: VenusNatural
- Offset: 0.003
- for the rest see image

Top without shrinkwrap

Top with shrinkwrap
Now adjust the top to your likes while the shrinkwrap modifier is enabled. This procedure may take a while depending on your modelling skills it can take from a few minutes up to a couple of hours. I also added some edge loops and removed others during my adjustments. Here is the result:
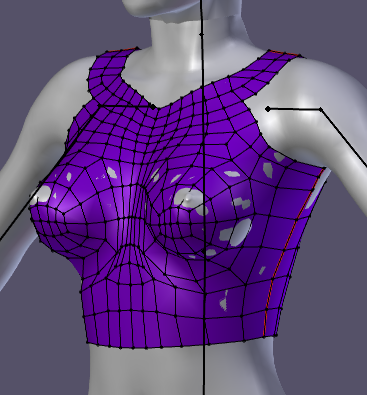
The original Avamesh cut out
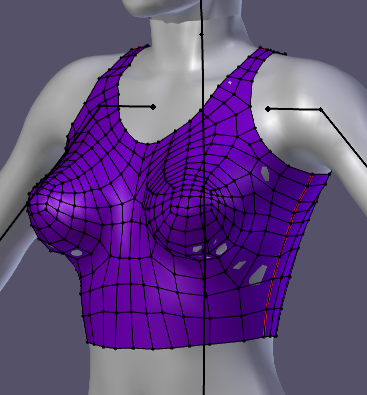
After editing the mesh
Cleanup the Mesh
As a final polishing i also smoothed the mesh vertices and then i applied the shrinkwrap modifier. I also inspected the topology again and fixed a few oddities around the armpits and now i am almost happy with the result. It might still have too many faces, … we will look at this later.

Clean the Weightmaps
We do not want to mix weightmap information between Avamesh and Belleza. So we remove all weightmaps from the Top.
With Avastar:
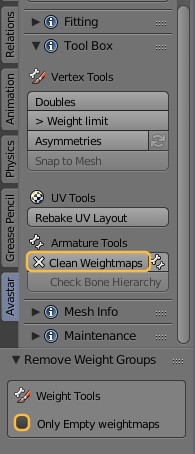
- Open the Avastar Tool Box
- Clean Weightmaps (see image)
- In the redo panel disable the option ‘Only Empty Weightmaps’ (see image)
Pure Blender:
- Open the Vertex groups widget
- Click the Arrow down Icon
- Select Delete All Groups
Binding
- Select the Top in Object mode
- And the armature
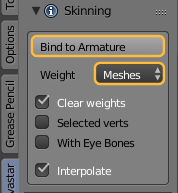
- Open the Avastar Skinning panel
- Get weights from Meshes (image)
- Bind to Armature
inspect the weights
- Select the top
- Open the Avastar Settings Panel
- Select the Skin&Weight workflow
- Pose the armature into some extreme
but still reasonable position - Keyframe the extreme pose on frame 80
- Reset to restpose and keyframe the restpose to frame 1
Now you can use the timeline for inspecting the weights also in Mesh Edit mode.

Fix issues
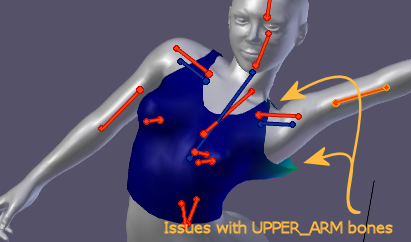
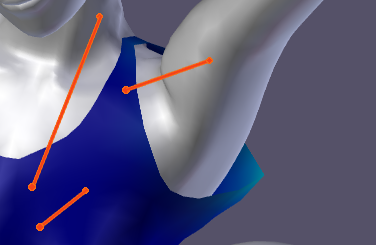
When you play a bit with the poses you will eventually find one big issue on the shoulders and on the armpits (Image)
In our case the reason is too much weight on the UPPER_ARM Bones. WE use Blender’s Levels tool to fix this.
- Make sure the armature is in pose mode
- Make sure the mesh is selected in weight paint mode
- Make sure the X Mirror option is enabled in the Options Panel
- Put the mesh into a pose where you can see the distortions
- Open Blender’s vertical Tools Tab
- Open the Weight Tools panel
- Select the UPPER_ARM Bone (Left or Light)
Now call the Levels tool and Use the Gain in the Operator redo panel to adjust the overall weight strength of the UPPER_ARM until the straps touch the shoulder but do not sink in.
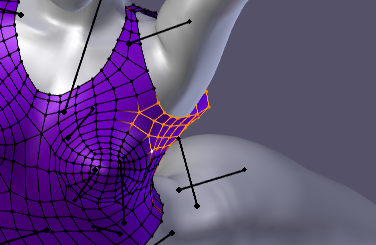
- Switch to edit mode
- Select the vertices around the armpit.

- Call the Levels tool again and adjust the gain value until the selected verts are fixed for your purposes.
- You can do a similar trick on the upper part of the shoulder straps.
Tip: Since we have the X Mirror option enabled the Weights are automatically mirrored to the other side. So you only need to work on one side of the mesh
On the straps part you may need to adjust also the NECK and the CLAVICLE Bones a bit. However using the Collision volume bones for adjusting the shape has a downside. That is:
The collision volume bones are also used from the Appearance sliders. This means when you adjust your mesh for a specific Appearance sliders combination, then you can not be sure that your adjustments are still good when you change the shape.
But this is a general problem with the Concept of using bones for shaping a mesh…
To be completed…
Maybe see if we can get a better solution when using appearance sliders…
export and wear …