Is it as simple as that? Well… no!This document is all about how to work with Avastar for creating Mesh attachments without losing control over your shapes.
You want to know this, I promise!
From where we want to start
Lets say you have created an Avatar body or any other rigged attachment for a body (wings, heads, etc…) or a complete Animesh character for example. Lets also say you have already exported your character with either of:
- Avastar’s Orange Stickman shape (SL Default Shape)
- Avastar’s White Stickman shape (SL Neutral Shape)
- Your personal Shape (As set in the shape editor)
And last but not least you have already uploaded your character or mesh attachment or Animesh… to SL.
From now on you will sooner or later need to perform some of the following activities:
- Create attachments for your work
- Make animations for your work
- Modify your custom mesh(es) for improvement
Note: This document also applies when you want to create attachments for a ready made mesh body that was provided by others (that is: when you use a Developerkit).

Of course Avastar and Blender allow you to do all kinds of changes to your work, but you have to keep in mind that you already have uploaded your item to SL, so unless you plan to fully replace your item, you have to make sure that whatever you upload from now on will match to your items in world.
And we are here to show you how you can do this and where you have to take care. However, things keep rather easy as long as you follow a few very basic rules. But if you just go ahead and do not care (or do not know) then bad things will happen almost for sure.
Where we want to go
Our goal is to explain why you sometimes find that your meshes “somehow do not match perfectly”. All we want to do here is to show you where things work different from what you might think, how this might lead to unexpected mismatches of your clothing and why this is so.
And I promise: Once you have understood what really happens you will be ready to take full advantage of your findings and be able to benefit much more from Avastar.
The working example (just an example!)
I have been thinking about what working example would be the best to use and I finally have chosen one of the popular Developer kits, namely Slink.
The reason for this choice
The slink body uses a custom shape and not the neutral shape (White Stickman) which is provided by most other Developer kits. And this is ideal for demonstrating some pitfalls, as you will see further down.

Preparations (Slink related)
I made only 3 basic preparations:
- The Developer kit that I use is made for Blender 2.79 and Avastar 2.79-4. But I want to work with the newest Blender, so I need to Migrate the Rig.
- I removed all items from the scene which I do not need for this document. Especially I removed all hidden meshes from the Armature.
- I made sure that all rigged meshes are parented to the Armature.

Original – click to zoom

After Migrate and Cleanup
Our example Attachment – Simple T-Shirt
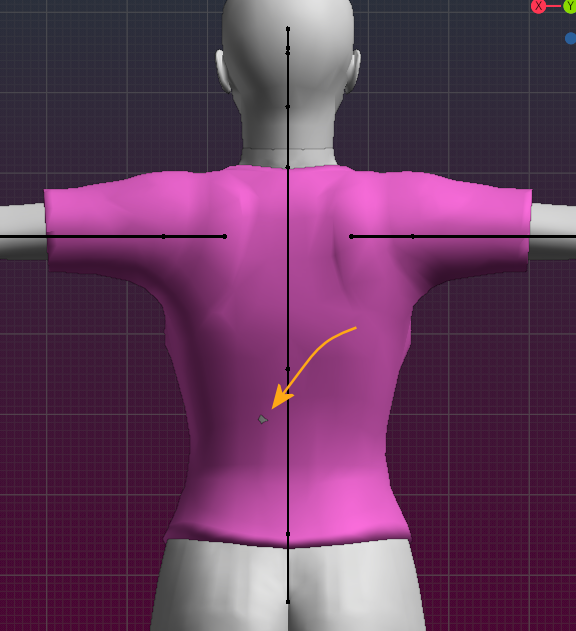
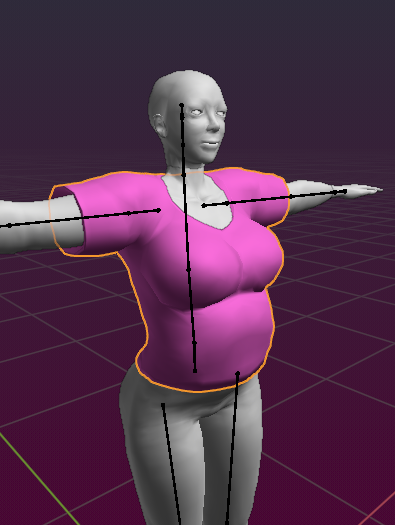
I have chosen a simple Custom mesh T-shirt which I edited slightly so that it matches the Slink default Body shape.
Actually I made 2 copies of the T-Shirt, one colored in green, the other colored in pink. In the image you see that Blender shows only the pink t-shirt. However both shirt meshes are are placed at the same location. But for some reason Blender has decided to only show the pink t-shirt.
We will see in a moment why I have added 2 T-shirts.
Click to Zoom
Proof of Avastar Collada Export
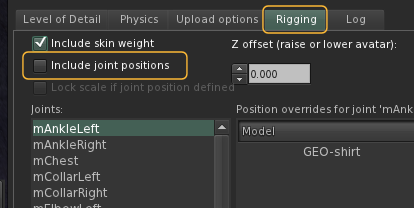
It is always good to check for every possible pitfall. So lets see if this t-shirt matches also after it is uploaded to SL. I export the mesh with the default export options, and I import the mesh again with the default options.
Important: We must keep the option “include joint position” disabled, because the joints are already defined in the Slink mesh body! )
Well this looks promising, but oops… Oh my god, there is an error on the Back side! See below what I mean…
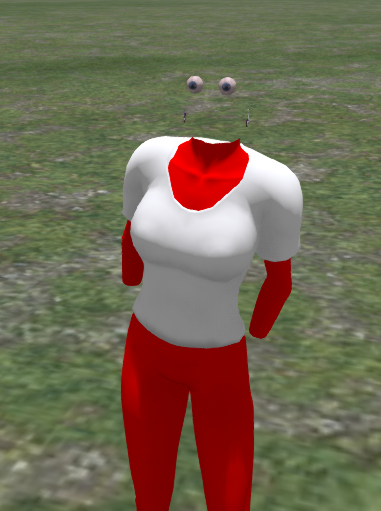
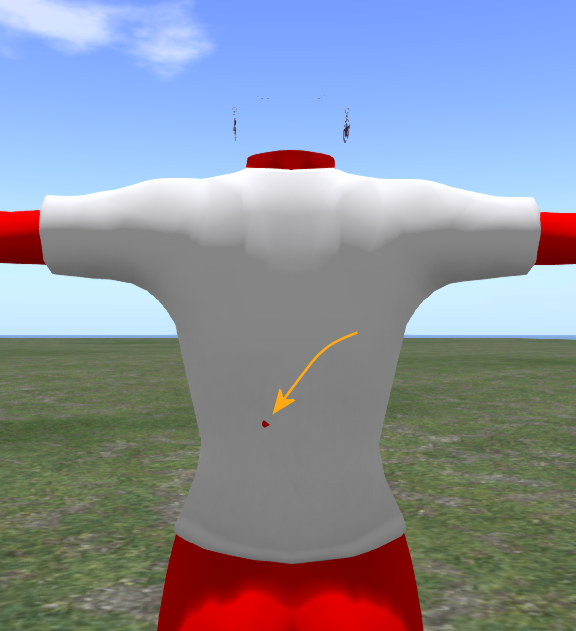
Bad Spot … Our T-Shirt has a hole ? Moths ?
A quick check in Blender shows. This is an error in the model!
Actually this is great news. Why? Because we have proved that what you see (in Blender) is what you get (in SL). So, all we need to do is to fix the backside and all is good. However, lets keep this hole for now, this small issue is not at all important for this document.
So lets now get a little bit deeper into the pitfall zone.
Slide and go
Lets say my favorite shape is a bit different from the fashion model shape. So lets do some more little preparations first.
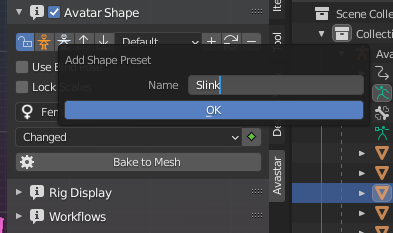
as a preparation store the Slink default shape as a preset for later reuse. I named the preset Slink
This is very practical when we later want to return to the Slink Shape.
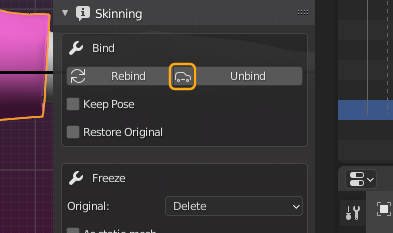
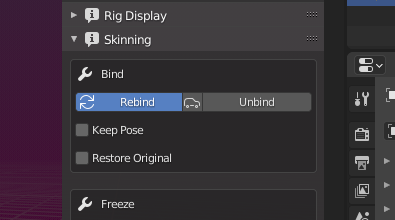
I open the Skinning Panel and make sure that the Auto rebind option is disabled. This step is actually not necessary, but we want to be careful and make sure that no automatic procedure will spoil our experiment.
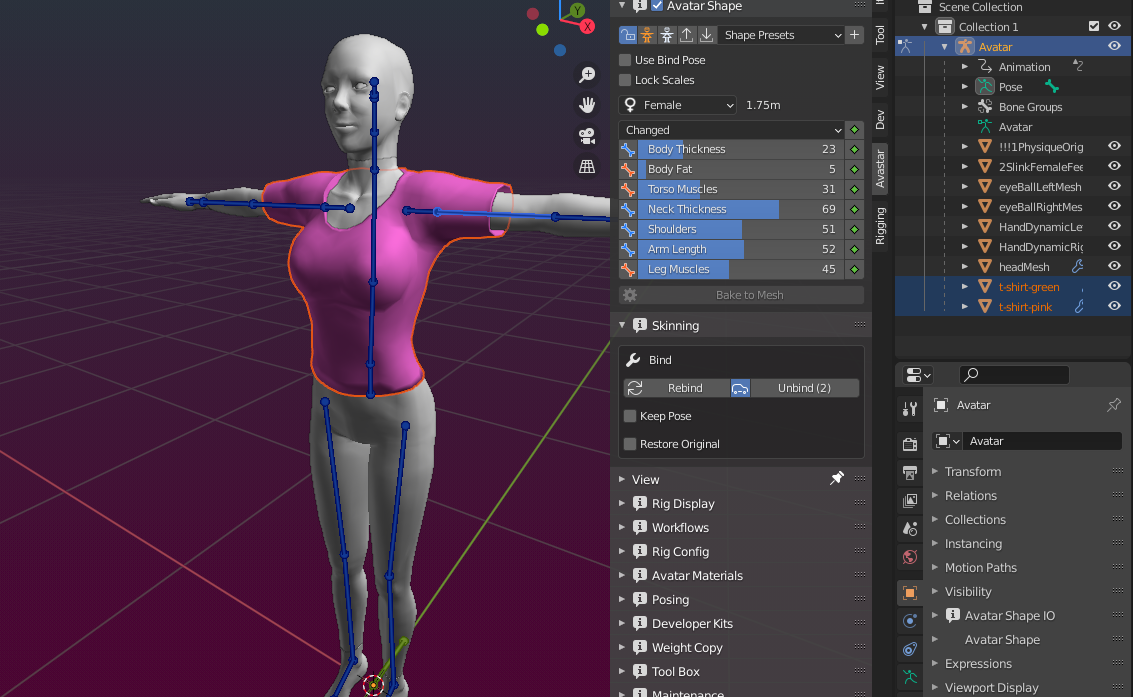
I use following slider values for my demo shape:
- Body Thickness: 50
- Body Fat: 50
- Breast size: 70
- Arm Length: 100
- Belly Size: 30
The resulting T-Shirt shape is good for me to go. Note that the green shirt and the pink shirt still have exactly the same shape (of course). For practical reasons I store this new Shape also as Shape preset. So I later can switch between my shape and the Slink default shape with one mouse click.
Now we select the Pink T-Shirt and rebind it from within the skinning panel. Still everything looks great, both meshes still look the same as before. However a very important (but not visible) thing has changed:
- The pink T-Shirt has changed its reference shape to the current slider setting.
- While the green t-shirt still uses the original Slink shape as its reference shape.
In other words: Your mesh is no longer the same as it was before, it just LOOKS the same in the current slider configuration. This is super important, see further down…
To be super precise: The mesh of the Pink T-shirt and the Mesh of the green T-Shirt are Different now! They only happen to look the same in the current shape!
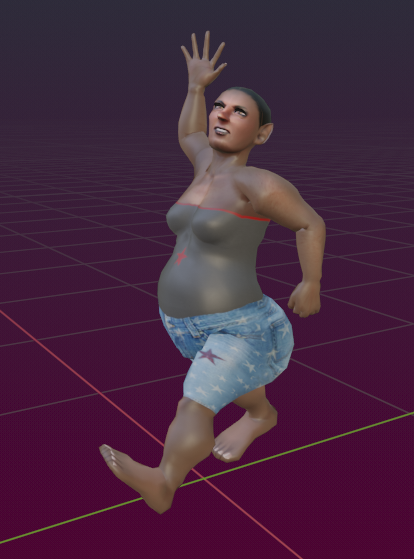
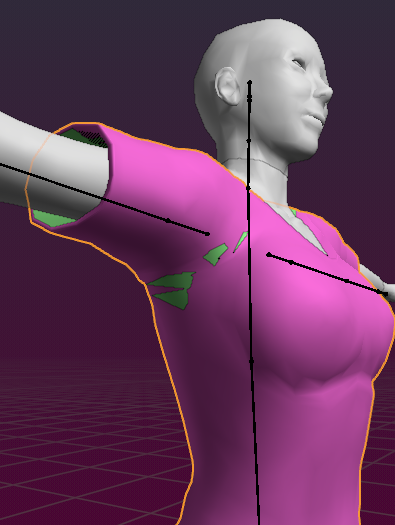
Lets see what happens when we revert to the Slink default shape:
You now see that in the Slink default shape the meshes look differently, especially the arm pits seem to react very sensitive on changes in the reference shape. You can see the issue a bit better when you enable wireframe mode.
One might be tempted to say this is a precision issue, or maybe even a bug. But actually it is expected behavior.
Explanation (don't read)...
To be honest: The following might not help a lot and you actually can skip over this text. All you need to know is summarized in the next chapter anyways. But you are curious? Then go ahead.
This behavior is related to a massive change in the bind shape matrix that is used to define how your mesh is attached (bound) to your armature.The issue is not very apparent as long as you only use the SL default bones (mBones) in your mesh.
But especially for Fitted Mesh we face an additional hiccup which is related to an inherent bone scale that is defined for Fitted Mesh bones (Volume Bones) in the SL Armature Restpose. And it is exactly this scaling in Restpose which makes the changes in the matrix transformations irreversible when a rebind has taken place.
If you want to understand in more detail what is going on, then please refer to the mathematical fundament on which skeletal animation is built. Otherwise it is sufficient to remember that rebinding a mesh to another shape will always change the mesh!
So what you really must know is …
Actually this is not bad, you even might want this to happen as it guarantees that your mesh matches your avatar exactly if you also wear this exact Shape in world.
But you must also know: Your mesh will not necessarily match perfectly to the shape that you used when you initially bound your mesh to the armature. So it is crucial to know:
If you must retain the original shape and the original mesh, for example because your mesh is already uploaded to SL and you can not change the mesh shape any longer) then you also must edit your mesh only(!) when it is in the original shape.
Special note to Developerkit Creators
When you edit your reference body, then make sure that all edits happen in exactly the same shape that you used when you uploaded the Mesh for the first time to SL. If you make any edits while you use a different shape, then your entire mesh becomes incompatible with the mesh that you have uploaded earlier to SL and you will see small deviations compared to the original.
I wish we could figure out a way to make the mesh editing independent from the Shape. But so far we could not get it to work for fitted mesh bones.
Special note to Attachment Makers for Developerkit Bodies
You are initially free to edit your attachments in which ever pose you like and upload your attachment to SL in whichever Shape you like. But if you later plan to modify you attachments (by adding vertices for example) then you must remember that editing in a different Shape will change your entire mesh. You may want this to happen on purpose, because your new mesh is meant to be precisely matching for the new shape.
But note: When you create an attachment in a shape that differs from the Original shape used by the Creator’s Developerkit, then your attachment might not match to the creator’s default shape. This is expected. So if your goal is to provide attachments which fit best in the Developerkit default shape, then edit your meshes only in the Developerkit default shape!