In this document we give a short introduction into how you can easily add physics to your Avatar using the Fitting Sliders.
This is an extreme demo of what you can make with the physics. The demo was made by SeraphLinden a couple of years ago
Intro
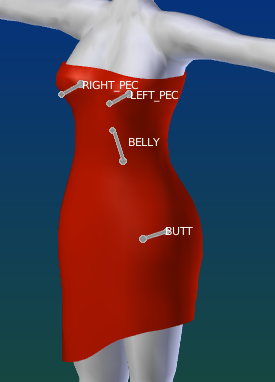
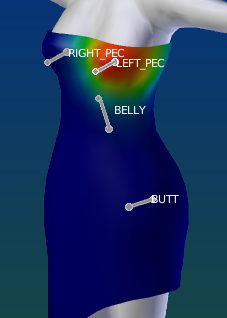
Avatar physic is directly attached to Collision Volume Bones in Secondlife. The bones of interest are:
- RIGHT_PEC
- LEFT_PEC
- BELLY
- BUTT
These bones are automatically animated when the Avatar jumps around (see video above) And all you need to do for getting this to work is adding weight for those bones to your meshes and then wear a physics item in SL
Some of the Collision Volumes have been added to simulate gravity (physics). This is implemented for Pecs, Belly and Butt. Furthermore LindenLabs have added some more extra bones for Fitted Mesh: UPPER_BACK, LOWER_BACK, LEFT_HANDLE and RIGHT_HANDLE. Avastar does not automatically create Weight maps for these bones (Except for the BELLY). But we have added a weight generator for those bones.
This weight generator has unfortunately been named physics generator, although strictly spoken the Handles and the Back bones are no SL physic bones.
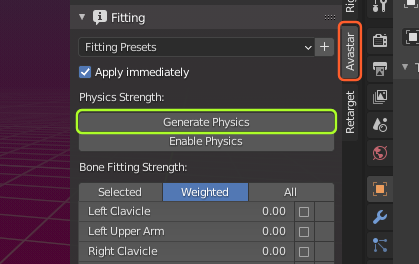
The weight generator gets into action when you click the Generate physics button.
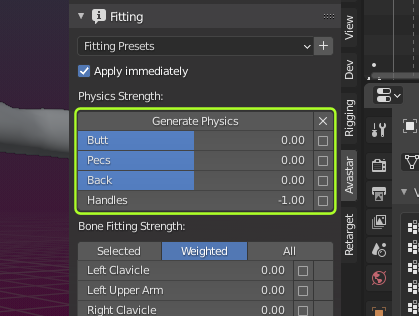
After the physics weights have been generated, you get 4 new Fitting Sliders for Butt, Pecs, Back and Handles. You use those sliders to adjust the weights for the specific regions.
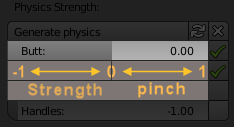
Hint: The sliders are split into 2 regions:
- Left – Center: Increase strength of weights
- Center – Right: Pinch the weighted area
By default the Handles get no Weight (set to -1, see image) (as recommended by LindenLab )
Important: Remember that only the PEC Bones, the Belly and the BUTT are influenced by Secondlife physics. All other bones are not affected.
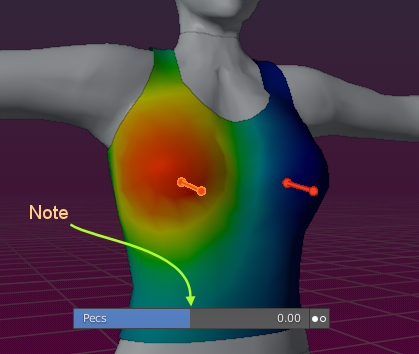
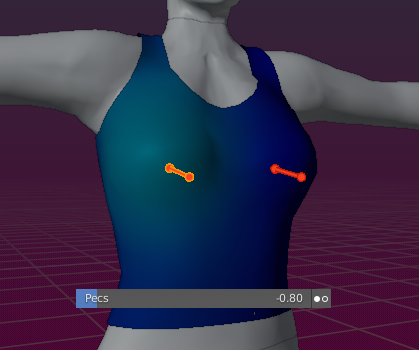
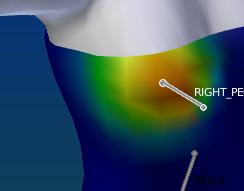
Lets take a look at the Pecs weights by selecting the select box right to the Pecs slider. As soon as the box is selected you see an icon with 2 white dots indicating to which side of the mesh the displayed Weight map belongs.

Now lets look at the model. You see the Pec is fully weighted although the Slider is just placed in the middle of its range. Now move the slider to the left side. You see that the weight becomes less and less the more you move the slider to the left….
until the weight vanishes. You see the slider value is at = -0.8 in the image. The weight is completely gone when the slider is on the left side and has a value of -1.0
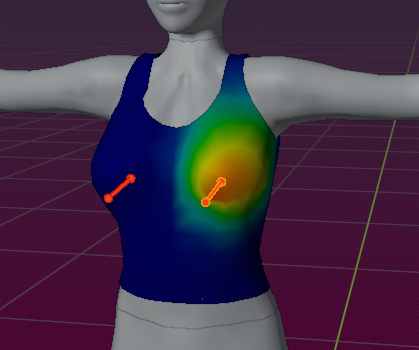
Now lets see what happens when we move the slider to the other side. Here the weight distribution gets modified. The more we move the slider to the right the more concentrated the weight gets, until the slider value is 1.0.
Note: If this is still not concentrated enough, you can manually enter a number above 1.0 to change the slider range.

The weight on the Opposite Pec is adjusted in symmetry. You can select the opposite Pec either by selecting the other Pec Bone (CTRL LMB) or by clicking on the double circle in the Pec Fitted mesh slider.
Note: As soon as you change the value on the slider, the Right PEC will be auto selected again. this is a known issue.
Of course what i wrote about the Pecs is also true for the Handles. The Back and the Butt bones work in a similar way. However you might need to feed in some initial weight by using a paint brush. Please make your experiments from here on. The Fitted mesh is somewhat special and you may encounter a few surprises. But in general you can get rather good results if you keep patient and try out the system.
After all the fitting Panel is just a tool that can be used along with other tools. there is no strict do it this way and follow those rules. It depends all on what you try to do and how your mesh model supports fitted mesh by design.
Example: Weighting the Breasts
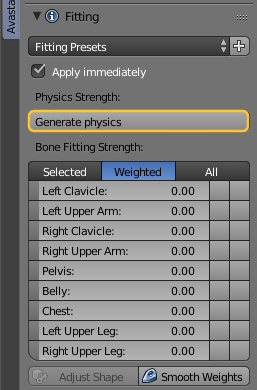
I assume we begin with a mesh that has no weights on the collision Volume bones. When you select the mesh and open the Fitting Panel, then you should see the Button Generate Weights like in the image.
When you click on the button, then the initial weights are generated and the button is replaced by a list of bone sliders…
Initial generated weights for the LEFT_PECK bone
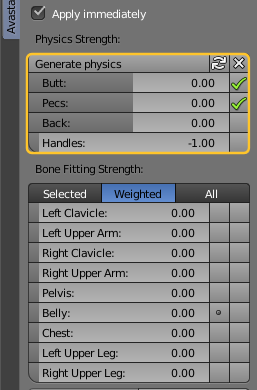
Physics box after Generating physics
The physics bone sliders explained
The sliders behave a bit in an unusual way:
- From far left to midpoint the slider increases the amount of weight for the assigned Bone
- From midpoint to far right the weight distribution gets pinched
Below i have added 3 images to explain visually what happens on the LEFT_PECK

Slider on far left (no weights)

Slider at midpojnt (max weights)
Slider at far right (Pinched)