Avastar-2 now has full support for arbitrary rest poses. So you no longer have to work strictly in T-Pose. You can model your characters and attachments with a better suited Rest pose (like an A pose for example) to bind your meshes and tweak the weights.
Some words of warning
About the origin of the demo file
The blend file used in this document is based on an older tutorial from blender guru about rigging a complete character. The original of this file was downloaded from blendswap.com but it seems to no longer exist there.
We provide the shaolin blend as is and only for demo purposes. If you intend to reuse parts of this blend file for any other purpose than learning for yourself, then please ensure that you have the appropriate permissions to do so.
Preparations
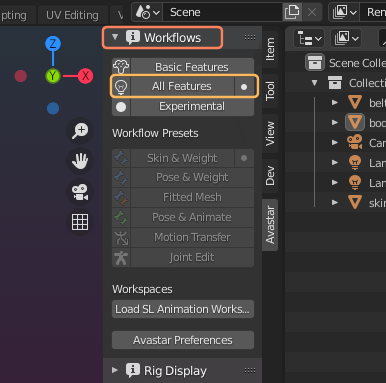
Some of the tools that we need in this document will only be available in Expert mode. So please open the settings panel and make sure that Expert mode is enabled.
Now lets create a new Avastar character using:
Add -> Avastar -> Complete

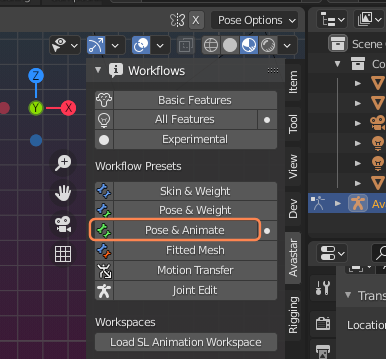
In the Workflows panel select Pose & Animate to see only the green animation bones
From the newly created Avastar Rig we only need the Armature and the eyes:
- Open the Rig Display Panel and
- Make sure the Armature is selected
- Open the N-Panel (right side)
- Locate the Armature Tools
- Delete Avastar Meshes
This will initially delete all Meshes. However, immediately after you clicked the Delete Avastar Meshes button, an Operator Redo Panel shows up in the tool shelf (see below)…

- At the bottom left side of the 3D Viewport you see a box
named Manage Avastar Meshes - If the box is closed, then open it now
- Enable the Eyes

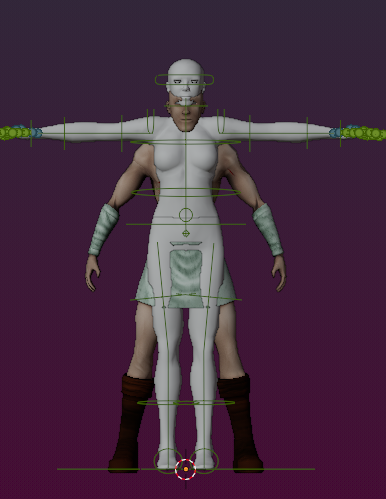
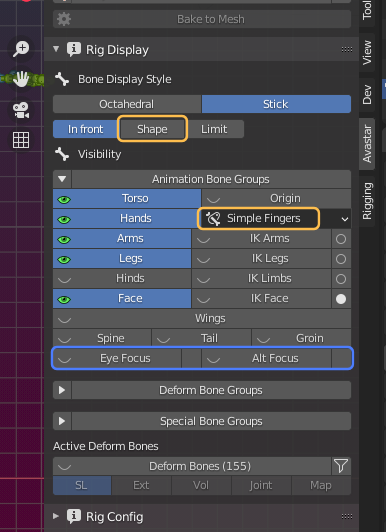
When adjusting a rig to a mesh it is easier to work in Stick display mode. And for adjusting the eyes to the mesh it is good to see the eye bones as well:
- Open the Rig Display panel in the Tool Shelf
- Disable the Shape Display
- Enable the Face and Hands
- Set the finger IK to Simple Fingers
- Disable the Eye focus bones
- Open the Appearance sliders panel
- Set the gender to male
Now we are almost prepared to adjust the Rig to the mesh.
As a final tweak we will hide all face bones except the eyes:
- Select all face bones except the eyes
- Press ‘h’ on the keybord to hide the bones
Tip: You can later unhide the hidden bones by typing ALT h
Now we can begin with the real work..
The eyes
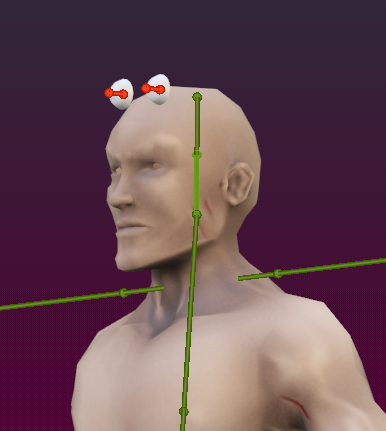
I adjust the eye height by reducing the Avatar height in the Body slider section. However, it is not possible to adjust the eyes exactly to the character’s face with the eye depth slider, because initially the Avastar eyes are located well in front of the character mesh. So i used a little trick here:
- Gender: Male
- Body height: 18
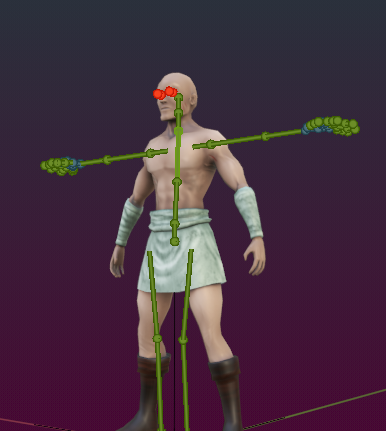
- I rotate the chest back by ~2.5°
- Then i compensate the rotation by rotating the Neck forward by ~2.5°
- Finally i set the eye depth slider to 23
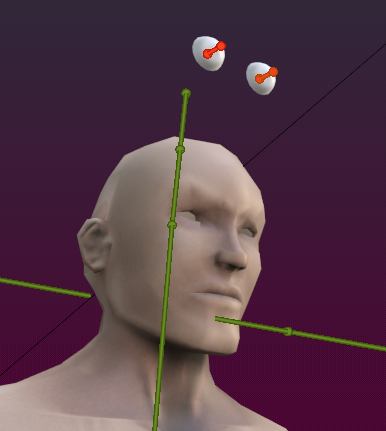
Initial (female default shape)
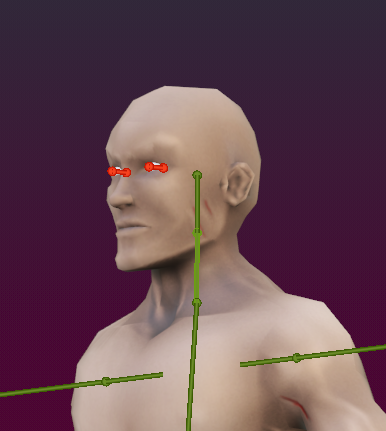
final: with all changes set
If you get different results, then check that you have set the gender to Male in the Appearance sliders!
Fine adjustments
Thew eyes balls poke through the mesh. We have 2 ways to fix this:
- Make the eye balls smaller (Eye size slider)
- Edit the character mesh a bit
I have chosen to edit the mesh:
Note: Make sure that X Mirror is enabled. Of course this only makes sense when the Model also has X Mirror symmetry. otherwise the X Mirror option can not be used and you are forced to model both eyes manually.
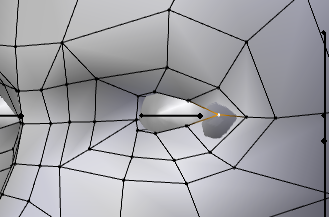
Before editing
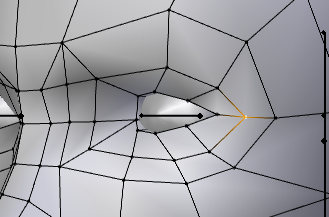
After editing
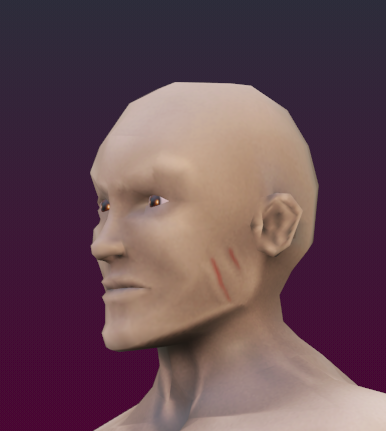
Hint: You can use the eye textures from the female Avastar materials. Make sure you have the Armature selected, and the Viewport Shading is set to Material preview. Then you find the Avatar Materials panel in the N-Panel
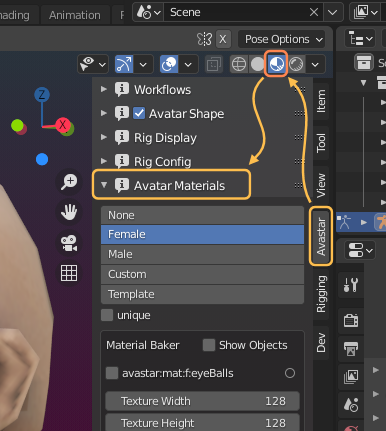
The eyes show up immediately on the eye balls
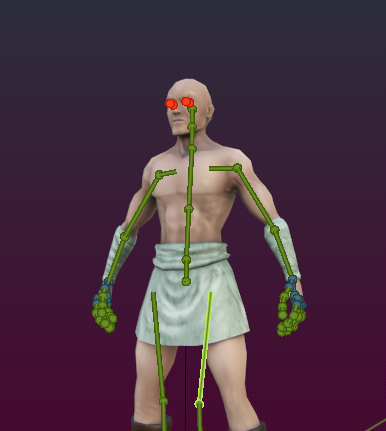
The arms
Now we proceed with the arms. I used the arm appearance slider to adjust the arm length to 45. Furthermore i posed the arms just by rotating the bones in pose mode. However, i spent most time with adjusting the fingers.
Note: I only pose one side of the armature and enabled x-Mirror (in the Tools tab in the N-Panel)
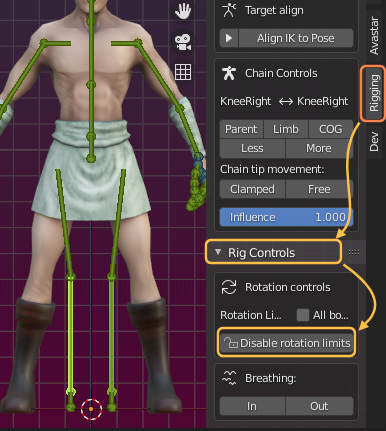
The legs
For the legs we have to disable the rotation limits.
- Open the Rigging Tab in the “N” Panel
- Locate the Rig Control panel
- Select the knee bones
- Disable rotation limits
Now you can pose the knee bones as necessary (see images below).
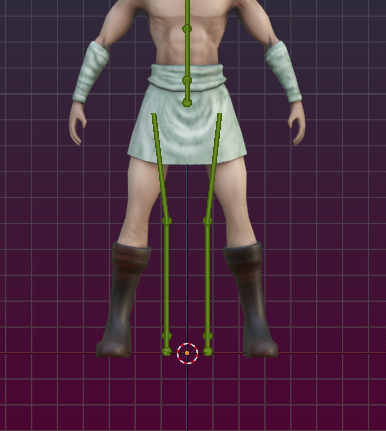
Initial
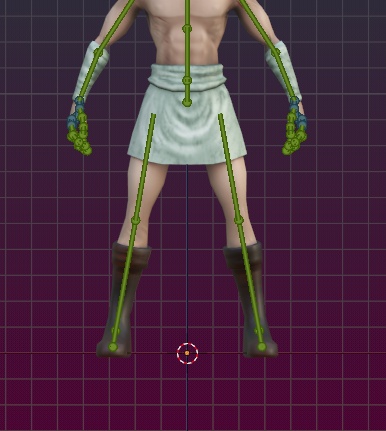
Final
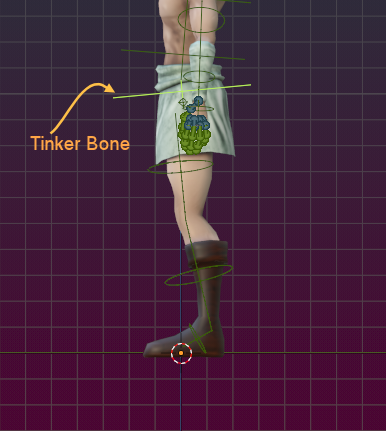
Note: I also rotated the Tinker bone a bit for a better positioning of the leg bones.
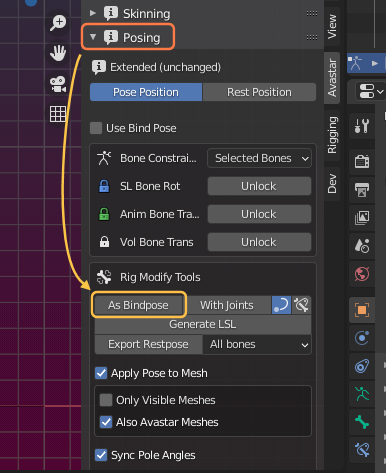
Create Bind Pose
- Make sure the rig is selected
- Open the Posing Panel
- Locate the Rig Modify Tools
- Make sure that Apply Pose to Mesh and Also Avastar Meshes are both enabled
- Apply As Bindpose
Now we are almost ready to go.
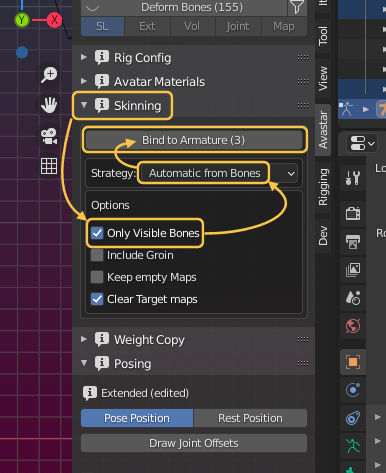
Binding
Make sure that all animation bones are visible (also all the face bones and the hands)

- Select the Mesh parts (body, skirt and belt)
- Open the N-Panel
- locate the Skinning Panel
- Strategy: Automatic from Bones
- Options: Only Visible Bones
- Bind to Armature (3)

Important: When you import your meshes then please disable the option with joint offsets!