Sometimes we have to face reality. We can not always make fitted mesh only by adjusting the mesh weitghts. In such cases there is no other way than creating multiple versions of your attachment for different sizes.
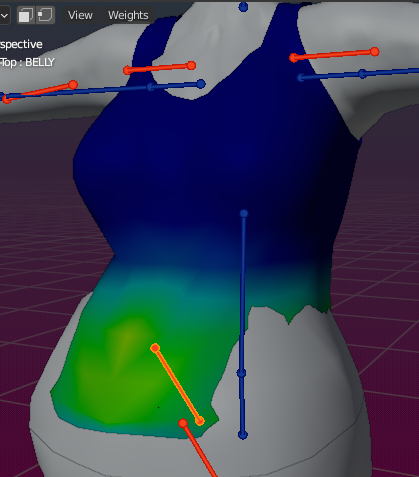
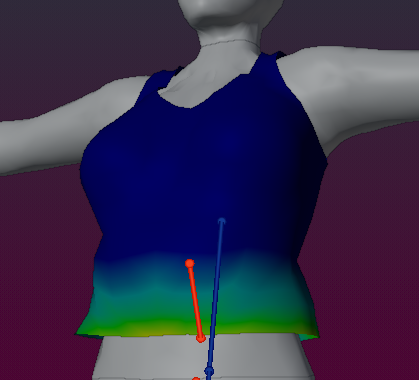
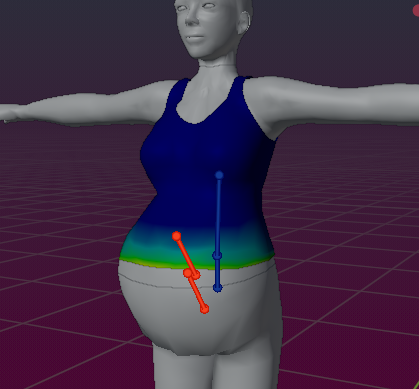
The Tank-Top in the image has serious issues on the sides. It really does not match the Avatar body in this case. In previous chapters we have shown how to adjust the front with adjusting weight maps. Now it is time to get into editing the mesh.
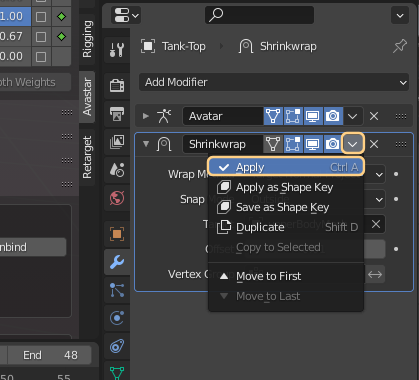
Since the goal is to make the T-Shirt fit the body tightly we can make use of Blender’s Shrinkwrap modifier. Here is how it goes:
- Open the Modifier panel
- Add a Shrinkwrap Modifier
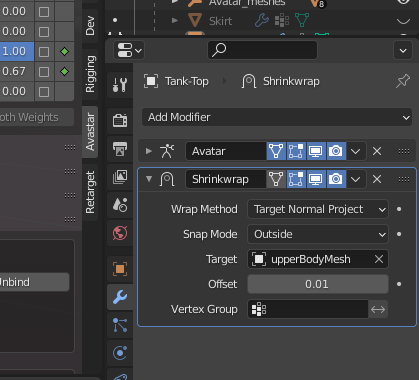
- Wrap method: Target Normal project
- Snap mode : Outside
- Target : The Avatar upper body
- Offset : 0.01
those are just propositions. You should play with the settings to find your best matching result.
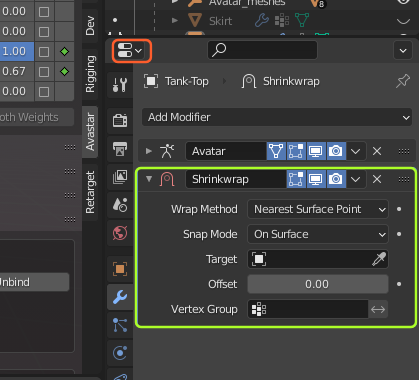
Here is how the Modifier panel looks after adding the values above:
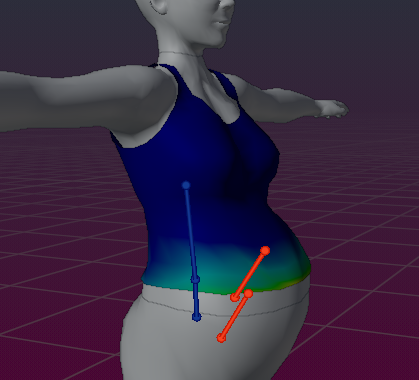
And this is how the Mesh looks now in weight Paint mode
Now we apply the Shrinkwrap modifier to the Tank-Top
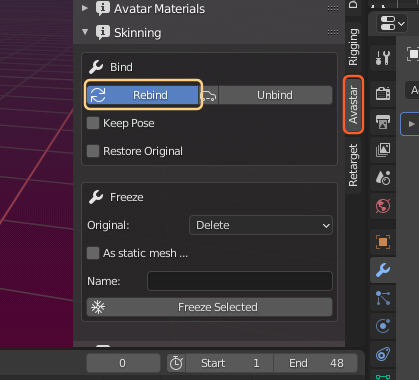
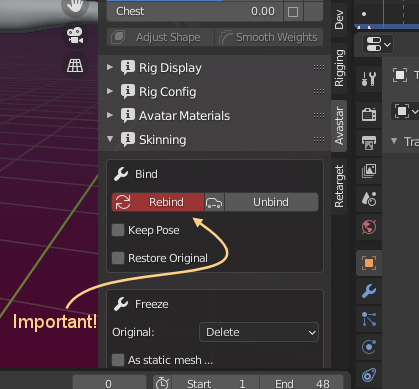
Finally we have to tell Avastar that we have edited the mesh (Avastar currently does not recognize when a modifier gets applied). But this is super easy to do:
- Open the Skinning Panel
- Rebind
Now your bind shape has changed to the current shape.
You now can export your mesh to SL. It will fit perfect when your worn Shape in SL has the belly slider set to 100 (maximum).
But of course you now can also move the belly slider back to 0 to see how the mesh has really changed. Of course it no longer matches the slim body now. But what do you expect? Think of real life… its not so much different, right?
So we can now take the original Tank-Top for slim bodies and the new tank-top for huge bellies. Of course we can do more sizes and use other Shape slider combinations as we like. Blender offers other ways to handle your meshes and their variations, for example by using shape keys. But those methods are Blender related and we consider them as more advanced techniques.
Lets get adventurous
what if we really want to do all our work in mesh edit mode and just move the vertices around? What if we wanted to correct this T-Shirt that way?
lets try!
i have selected only the lower part of the mesh. Now we just use scale along X to adjust the vertices (there are other options, but let’s keep it super simple)
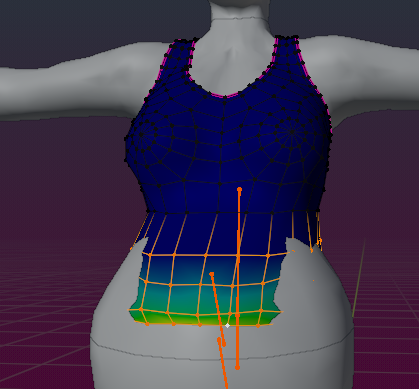
After a bit of scaling, reselecting, scaling, adjusting even single vertices, doing all sorts of editing magic, using all sorts of Blender tools (smooth, etc.) – you name it…
Switch back to weight paint mode and see …
Important: Only move the mesh, but never(!) add or remove vertices, edges or faces when you adjust your mesh by editing the weights!
Attention, caveat ahead!!!
All of this fancy Mesh editing comes with a price again. we have to make those changes permanent. That is now (other than explained in the previous chapter above) As soon as you leave Edit mode, now Avastar detects that your mesh has changed and it marks the Rebind button in red.
You must be aware what that means!
When you now move sliders (fitted mesh sliders or appearance sliders) then you will lose all your edits! This is because Avastar still believes your mesh is based on the original mesh that you bound in first place. And it does all recalculations based on that initial mesh. what we need to do now is telling Avastar to replace the original mesh by the one we just edited. So this becomes your new base mesh!
You must be aware that your original mesh will get lost in that case. But this is not as bad as it might seem in first place, you still can use the sliders (after you rebound the mesh) to move them back to orange stickman for example, or to your original Bindshape. The mesh will follow the sliders as before. The only difference is that your bindshape has changed and this means, the mesh in the original bindshape looks slightly different now.
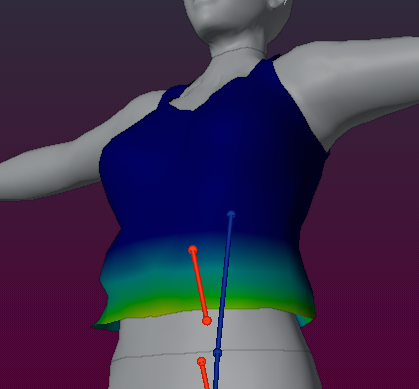
The mesh rebound and then shape sliders moved back to original bind shape.
As described in the chapter above you now can use this mesh as your “big belly sized” model while you can take the Original tank-top for the slim bodies, and of course again you can create multiple sizes of your garment for different body styles. The trick is that each variant of your attachment works best when worn with the shape in which it was edited (adjusted). And there is a good chance that the appearance sliders work in a small range around the ideal shape.
Now lets move on to Physics…