Some creators of full mesh bodies provide Mesh Development Kits. These kits typically contain Reference Meshes and reference weight maps for the developing of body attachments (clothes).
This document explains how you can use the Avastar Rig Converter to get a development kit imported into Avastar.
Disclaimer
If you are a developer kit user
Whenever you run into an issue with a developer kit integration, we must strictly recommend you to ask the kit creator for help. It is important that the creator has kept their distributed working files up-to-date for use with Avastar. You may wish to suggest to the creator that they can contact us for help if they are not able to help you.
If you are a developer kit creator
We provide help with getting your kit to work with Avastar if – and only if – you provide your kit with one or more Colladafiles (We do not accept blend files). Also you need to send us a copy of your developer kit for inspection. Otherwise we won’t be able to help you or your customers with any issue resulting from the usage of your developer kit.
Ok, so lets get started
Lets assume you got the Development kit in some readable form, such as .obj (Wavefront) or .dae (Collada) file or even as ready made blend file. The models may already be rigged. But we also can work with simple unrigged mesh models. In general you will proceed as follows:
Try first with the Developerkit Manager
Really! The developerkit Manager should make the import of a Developerkit a snap when
- The developerkit comes with Collada (.dae) files
- Each Collada file contains one rig and a set of related meshes
If this is true for your developerkit, then the developerkit manager is by far better suited than the manual way described below.
Prepare Blender
Open the blend file that contains the development kit meshes or import the development kit meshes to a fresh new Blend file (By using File -> import …). Then depending on the properties of the development kit..
If the development kit is rigged to another Rig (most common case), then open the first toggle bar below.
If Your development kit comes with meshes only (rare) then open the secnd toggle bar below.
When Your development kit comes with its own Armature...
Migrate from foreign Rig
If your mesh development kit is rigged to another (non Avastar Rig) then your best option is to get the rig converted with the Avastar Rig convert tool.
in short…
- Open the blend file with the mesh development kit
- Select the armature of the development kit in Object mode
- in the tool shelf, Avastar Tab, Rig Conversion Panel:
- Set the properties as necessary for your rig
- Click Convert to Avastar Rig
Most important settings:
- Target Rig: Basic for old avatar, Extended for Bento Avatar
- Source Rig: SL (good for almost all devkits), Bastioni, Avastar
Also check the Transfer Presets. Maybe your devkit is already included there.

If the automatic transfer does not work, then you also can try to unbind the meshes from the armature, then proceed with the next toggle tab (When Your development kit comes with meshes only…)
When Your development kit comes with meshes only...
The following sections describe how to handle a Development kit that only provides Meshes but no Rig. This situations is not very common. However if you ever step into issues with converting rigged development kits to Avastar, then you always can try to unbind the meshes from the devkit rig, and treat them as Devkit without Armature.
Rig a plain T-posed model without armature...
Applies to: not rigged Mesh that was made for the SL Restpose rig
This is the simplest situation where you need to do almost nothing to get the mesh development kit to work with Avastar.
- Create a new Avastar
If your development kit contains a full character, then you probably want to create only the Rig.
But you are free to create the Avastar meshes along with the Armature. - In the Appearance panel locate the Shape presets. There you see 2 stickman icons, one orange, one white. Select the white icon.
- Check that the Avastar armature matches to the mesh.
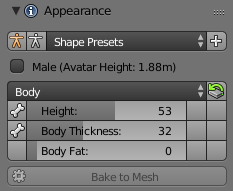
The white Stickman icon puts the Armature into SL Restpose. This is what most Foreign Development kits support.
If the Mesh now matches to the armature, then
- Bind your mesh to the avastar rig with Keep weights
- And that’s all you need, your mesh character is now
ready to use with Avastar.
If the Mesh does not match to the armature, then proceed below
Your Content
Adjust the rig to a given Appearance Shape...
Applies to: not rigged Mesh that was made for a specific SL appearance Shape
Sometimes the Mesh development kit has been made with a slightly modified rig that does not match exactly to the SL Original rig but has been made for a specific Appearance Shape. In that case you need to adjust the Avastar Rig accordingly as follows:
Select the Avastar Armature in Pose mode. If you know for which appearance Shape the mesh was made, then you can import this shape to Avastar. If you not have the Shape available then you still can use the appearance sliders to adjust the bone length until the rig matches to the Mesh.
Add a new Preset by click on the white + sign right to the Shape preset popup
If the Mesh now matches to the armature, then
- Optional add a new Appearance Shape preset
- Bind your mesh to the avastar rig with Keep weights
- And that’s all you need, your mesh character is now
ready to use with Avastar.
If the Mesh does not match to the armature, then proceed below
Adjust the rig to another Pose (bind pose)...
Applies to: not rigged Mesh that was made for a rig that used Bind Pose
Some Mesh Development kits do not use the SL Rig restpose (the T-Pose) but they use a bind pose. The good news is: Avastar-2 supports bind poses with only very little extra work on your side. But…
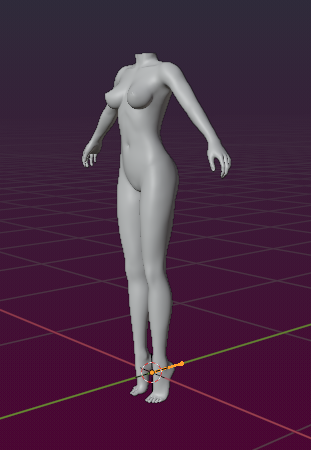
It is very popular to use A-Pose rigs, that is where the arms are bended downwards into an A-Pose. And sometimes also the legs are bended a bit outwards (see image).
for technicians: Blender does not support Bind poses. Therefore we must convert the original Bind pose (that was used by the mesh creator) into the new Avastar Restpose. And when we export the rig we must revert the conversion of the rig back into a T-Pose Rig. Avastar is ready to support all of this for you in the background.
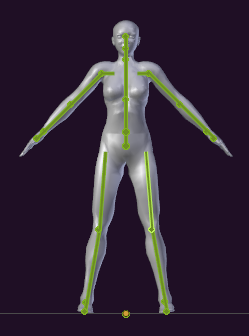
A typical A-Posed Rig
- Select the Avastar Armature in Pose mode.
- Then adjust the Avastar pose to the development kit mesh until the rig matches the Mesh as needed.
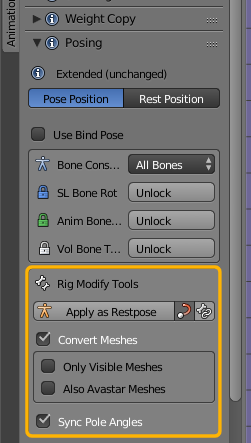
- Finally open the Pose panel and in the Rig Modify Tools use Apply as Restpose
Since Avastar-2.3: The Convert Meshes option has previously been a white snowflake icon on the right side of the Apply as Restpose button (formerly named Convert to Bindpose). We have extended the functionality of the operator and moved the snowflake for better clarity into the next line and named it “Convert Meshes”.
If the Mesh now matches to the armature, then
- Bind your mesh to the avastar rig with Keep weights
- And that’s all you need, your mesh character is now
ready to use with Avastar.
If the Mesh still does not match to the armature, then proceed below
Edit the Rig in Edit mode...
Applies to: Not rigged Mesh that was prepared to be used on a modified rig
Sometimes the Mesh development kit uses a modified Rig with edited joints. This is almost always true with development kits for non human characters. But also some human character development kits come with edited joints. When in doubt then please ask the development kit creator if they have edited the joints and if they can add the modified rig to their development kit.
However, if all you have is the mesh itself, then you still can adjust the Avastar rig by editing the rig itself. In this case you need to do a bit of extra preparation to get Avastar to work properly
- Make sure the Avastar appearane sliders are set to the white stickman icon
- Select the Rig in object mode
- In the Settings panel select the “Bone Edit” Preset
- Now adjust the rig as you want
- When done with your editing, then open the Panel presets again and click the pose&animation button
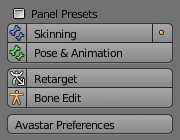
See the Panel presets section in the Avastar Settings Panel
When the Mesh matches to the armature, then
- Bind your mesh to the avastar rig with Keep weights
- And that’s all you need, your mesh character is now
ready to use with Avastar.
Edit the Rig in Pose mode...
Applies to: Not rigged Mesh that was prepared to be used on a modified rig
Besides the direct editing of the rig – as described in the previous chapter – you also can use pose mode as an alternative way to edit your rig. Using Pose mode for adjusting the rig has the benefit that the attachment bones and the Collision Volume bones are automatically kept in the correct positions. Here is the brief workflow:
- Make sure the Avastar appearane sliders
are set to the white stickman icon - Select the Rig in object mode
- In the Settings panel select the “Pose&animation” Preset
- In the Rig Control panel Unlock the green animation bones
- Adjust the green animation bones in pose mode
by using rotation and translation. - Finally convert to bind pose as shown in the previous chapter
- Disable the “Use bind pose” option.This will modify the rig a bit
- Possibly go to edit mode and do a bit of
cleanup and fine adjustments
When the Mesh matches to the armature, then
- Bind your mesh to the avastar rig with Keep weights
- And that’s all you need, your mesh character is now
ready to use with Avastar.
An example for importing a Foreign Development Kit into Avastar
There is nothing special about the Belleza Devkit. It just happens to be an ideal candidate for showing how to do a Migration in practice.
Step 1: Import the Devkit
- Open the Collada Importer by using:
File -> Import -> Collada
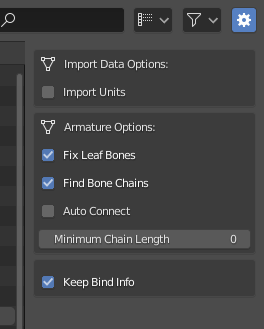
- Locate the Operator Redo Panel near to the top right corner of the File selection Window (See image). Please make sure that the following options are enabled (check marked):
Fix Leaf Bones
Find Bone
Keep Bind Info (importing Fitted Mesh Bones, see below)
Note: the Auto Connect option can be disabled in most cases. Please test what works best for your case!
- Import the Model
Important: The keep bind info feature is especially needed for development kits that are made for restposes other than the SL T-Pose. If you intend to import those development kits to Blender/Avastar, then please make sure that the Keep Bind Info option is enabled.
Note: If you ignore this Tip, then be prepared that your meshes will not look right in SL. Avastar can not export your meshes correctly in that case. Also you can not fix this later. So better get it right here and now.
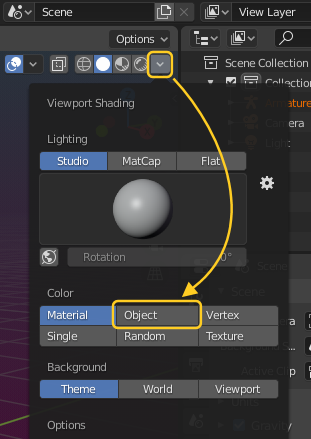
Step 2: fix the Material settings (specific to Belleza)
Belleza has set up their models with a transparent material. So it is very likely that you see only the Outline of the Belleza Body.
The reason for this is that the Blender 2.8 Viewport has been improved a lot and it now can display advanced material options.
The good news: You can configure that…

- Open the Shading Options panel (upper right corner of the 3D Viewport)
- in the Color subsection select Object
- Now the Belleza Body appears again as usual
Now the mesh appears as usual
Step 2: Set the Migration options
- Select your Armature in Object mode (or Pose mode)
- Open the N-Panel and locate the vertical Avastar Tab
- Within the N-panel scroll down to the Rig Inspector
- Within the Rig Inspector locate the Transfer tool
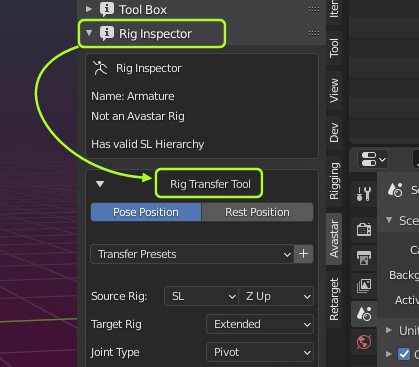
- The Source Rig is SL with the Up Axis: Z
- The Target Rig can be Basic or Bento depending on what you want to do next. When in Doubt then select Basic.
- The Joint Type is Pos as far as we know.
- You probably do not want to have the Avastar meshes, so Dummies:Delete
- Belleza comes with an A Posed rig, you want to use Bind Pose and With Joints
- Since we are importing a female model, we keep Male Sliders and Male Skeleton unchecked
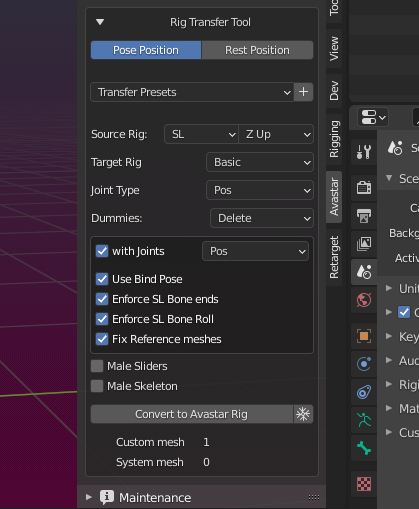
Important: For the male Belleza Mesh please enable Male Sliders but disable Male Skeleton
Now you are ready to click the Button Convert to Avastar Rig.
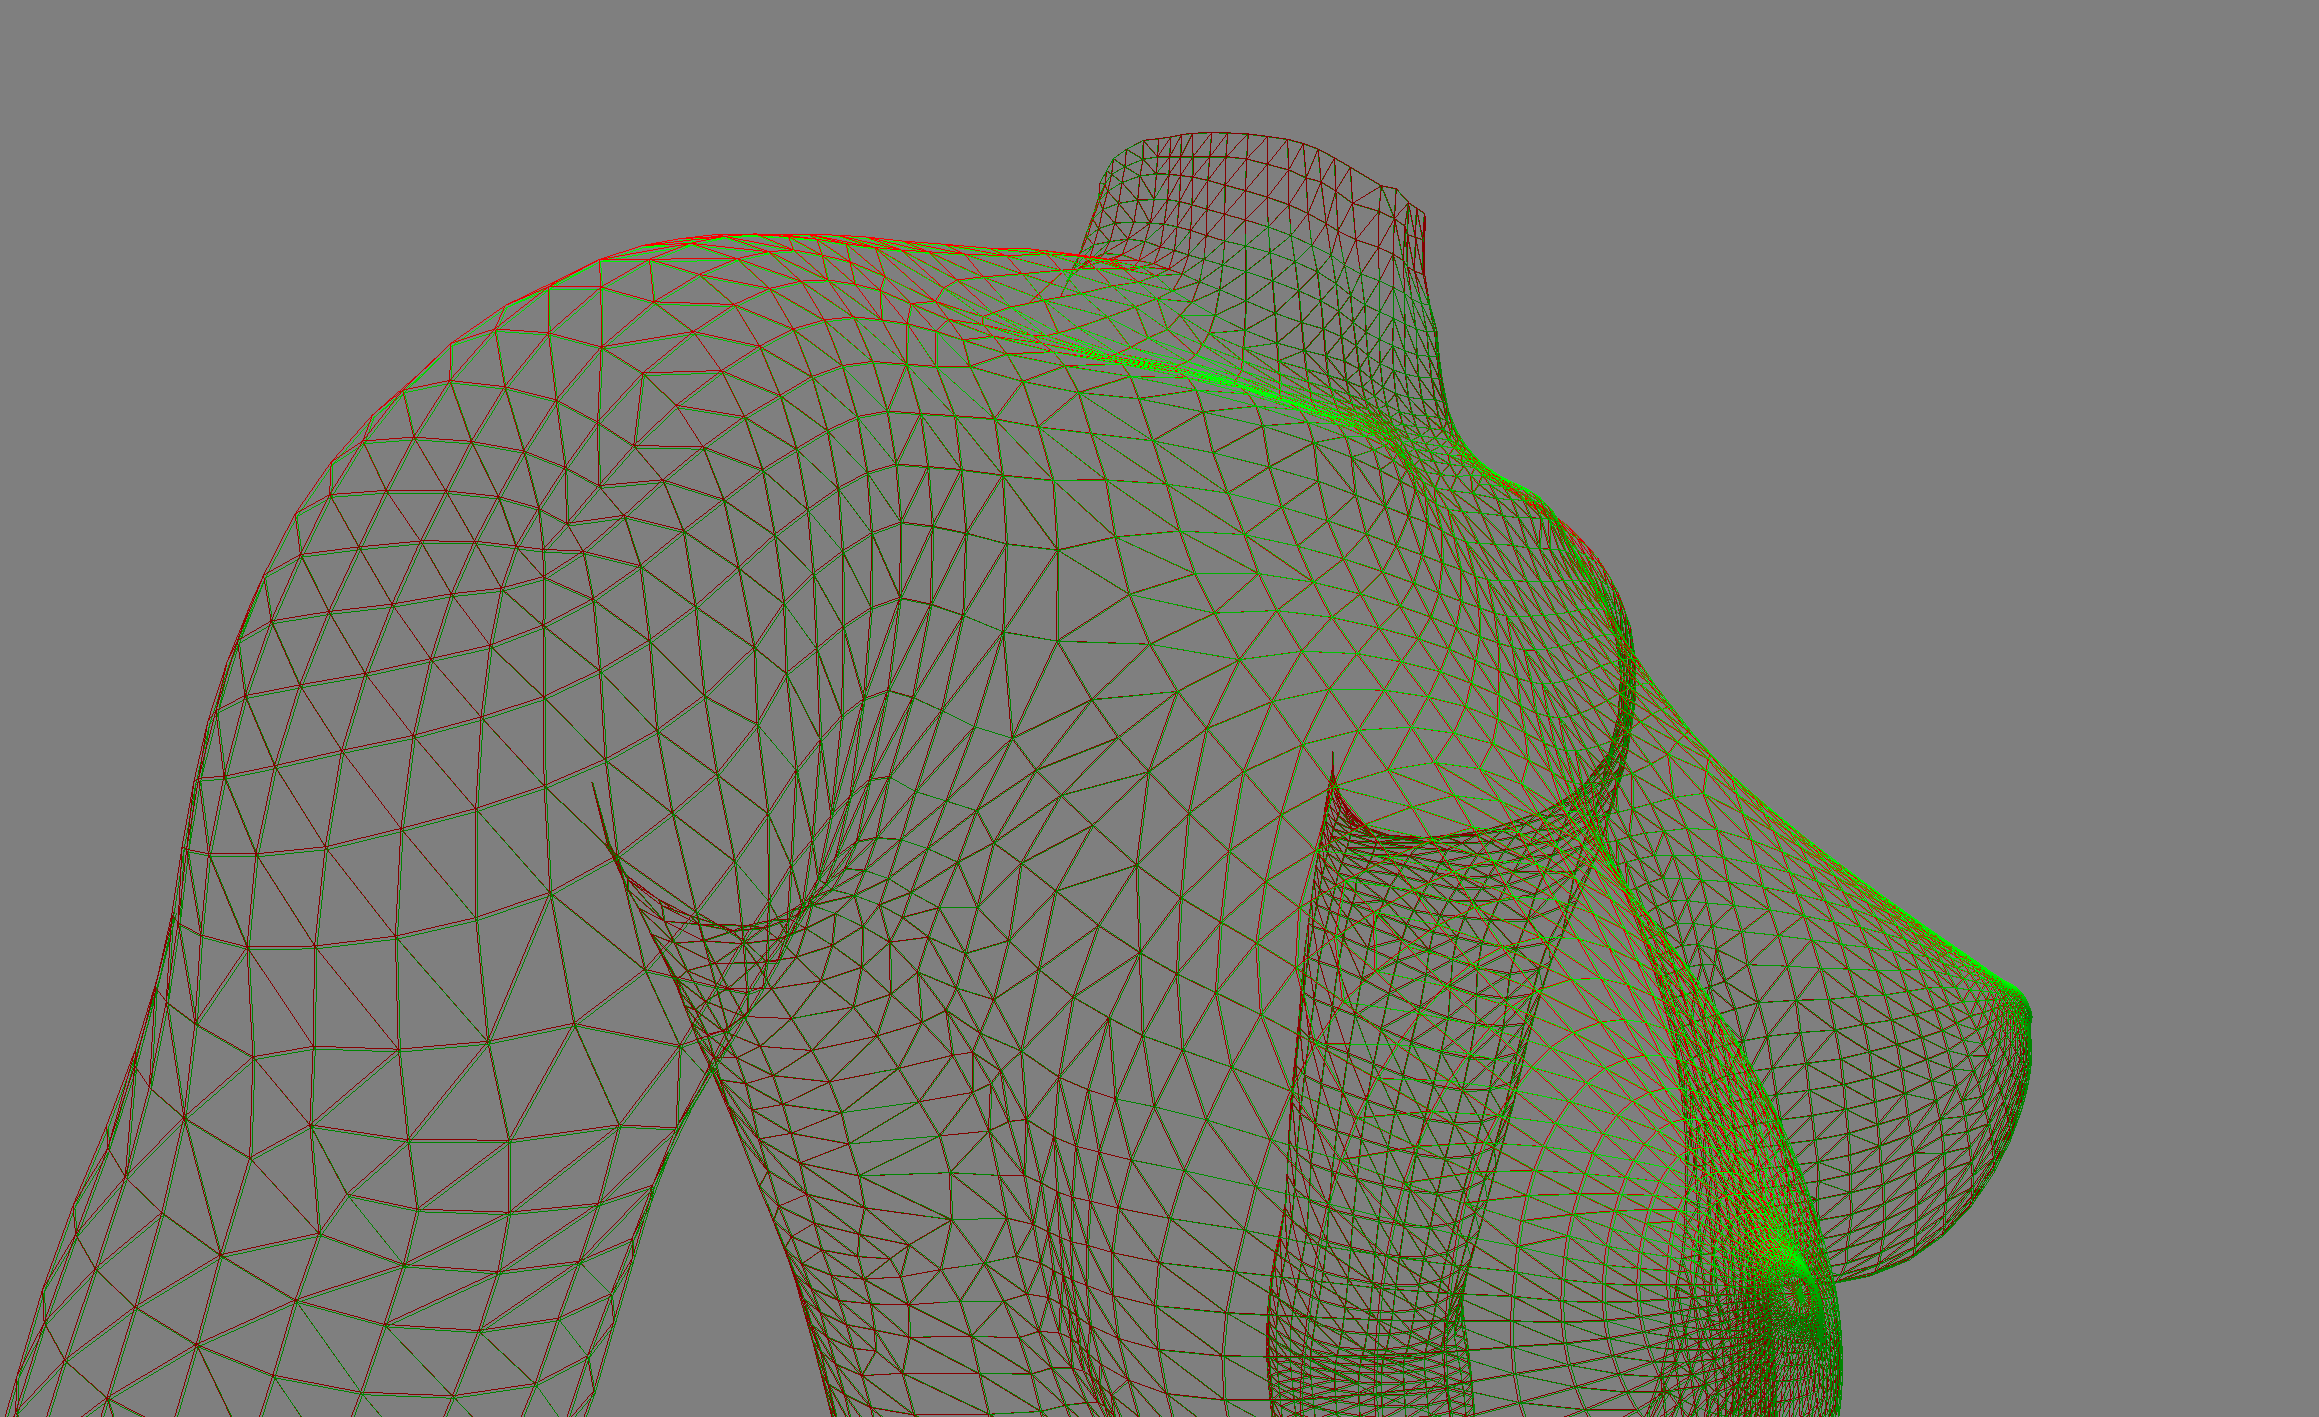
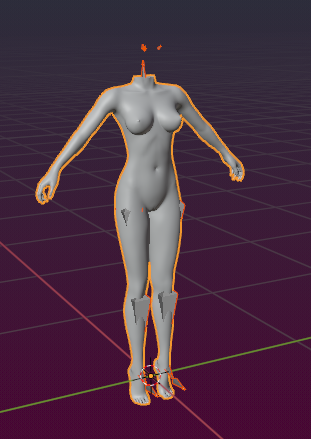
Belleza Mesh right after Import (Collada)
Belleza Mesh after conversion to Avastar. The 90 degree rotation is on purpose.
We propose to use the Developer kit Manager instead of using the conversion as described here.
Note to Developer kit Creators: