Walk Cycle Generator

The Walk Cycle Generator is a simplified version of the Sparkles Timeline Copy Tool, optimized for creating Walk cycles.
Cheat Sheet
- Create a Contact Point (at first frame)
- Create a Passing Point (at 1/4 of animation size)
- Click Generate Walkcycle
If you need more detail, please see the guide below

Short guide for creating a minimalist Walk cycle
Define the cycle range
- Create an action with a reasonable length.
- Make sure the action length is divisible by 4.
- The action starts at frame 0 and ends on frame 48.
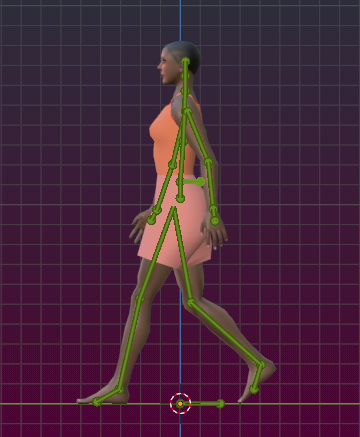
Create a contact Point on frame 0: This around the moment where both feet are touching ground at the same time.
Make sure you key all posed bones.
Tip: Use the Smart key Tool for a one click keying of your pose. The tool figures out on its own which keys it needs to keyframe

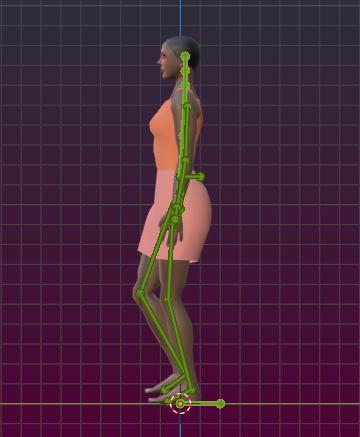
Create a passing Point on frame 12 (first quarter of the animation): This is the moment where one foot stays flat on the ground while the other foot passes by (see image)
Make sure you key all posed bones (with the smart key tool).
Note: Using 48 frames for the action is just a reasonable choice. You can actually make the animation as long as you like.
Finally click on Generate Walkcycle
Then play your animation to see if it works as you want it.
From here on you can either adjust the contact point and the passing point, then click Generate walkcycle again until the walk works as you want.
Or you can now fine adjust the entire animation to your likes. But then please remember to no longer use the generator, because it will take only the first quarter of your animation into account.

Creating a complete walk Cycle by hand
Below i explain briefly how you make a walkcycle entirely by hand. However, if you do not yet have made any animations with Blender, then please first checkout how to work with the Dope Sheet and with the Graph Editor. You also can take a look into the Avastar documents:
So, now lets go ahead and get something done:
Defining the seed poses
You need two simple poses for the beginning.
- The Contact Point, that is the moment where both feet are at their maximum distance.
- The Passing Point, that is where both feet are closest to each other.
Contact Point
Passing Point
Place the Contact Point on Frame 0 on the Timeline and place the Passing Point at the first quarter point of the walk cycle. A complete walk cycle with Blender’s default settings takes about 48 time frames, so the first quarter point is in time frame 12.

Mirror and copy the keyframes
The trick is to mirror copy the 2 key frames to the second half of the walk cycle, that is: copy/mirror paste frame 1 to frame 25 and copy / mirror paste frame 12 to frame 36. Then add the initial frame again to the end of the timeline.
In detail:
- Move the cursor in the timeline to the frame that you want to mirror.
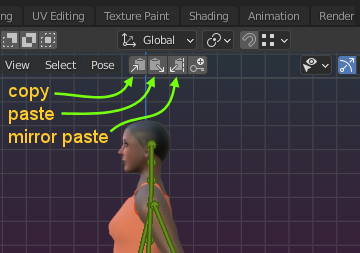
- Copy the keyframe (use the copy tool as indicated in the image above)
- Move the cursor in the tieline to the frame where you want to place the copy
- Mirror paste the keyframe (see image)
Copy Paste Operators
Here is where you can copy and mirror paste a single keyframe
Note: This is a feature brought to you with Avastar. Blender has hidden those functions deep in the menu system.