This is a short introduction mainly aimed at Kit Users who are not familiar with Blender and Avastar but want to use the tools for making attachments for ready made Developer kits. We assume that the Developerkits are ready made for Avastar. If this is not the case, then you might need to first read the Introduction for Developerkit Creators.
Before you begin
The developer kit creator needs to provide some technical information about the Developerkit that you want to add to the Developerkit manager. If the creator does not provide this information, you need to figure out the values by experimenting or by asking around, maybe some other user of the same Developerkit has already figured out the values:
- Developerkit brand (“Maitreya”, “Belleza”, “Signature”)
- Developerkit name (“Jake”, “Venus”, “Lara”)
- Gender (probably female, even for male models)
- Scale (probably 0.01, 1 or 100)
- Rig type (“SL” or “AVASTAR”)
- Joint type (“POS” or “PIVOT”)
- Restpose type (“t-pose” or “other-pose”)
- Use bindpose (true or false)
- Is edited (set to true if the rig has edited joints)
Note: If you are curious you may also want to take a look at a more detailed document about how to create your own developer kit.
Purpose of the Developer kit Manager
The following chapter describes the Developer kit Manager from the point of view of an Attachment maker. If you are a Developer kit creator then you still should read through this chapter so you can better understand what your users (attachment makers) are dealing with.
The problem
Developer kits basically are reference models of already existing Avatar creations. A Developer kit is typically used for creating additional content (attachments) for those Avatar creations. Hence a Developer kit must ensure that whatever attachment is created with it can also later be attached easily to the same Avatar in SL (or OpenSim).
Developer kits are often distributed as Collada files, less often they are provided as Blend files and sometimes they are even provided with an Avastar Rig. However in all cases the attachment makers always must take care to import the correct Collada file into Blender using the correct import options, or they need to load the Developer kit blend file with the correct version of Avastar and possibly a specific version of Blender and take care to never overwrite the Developer kit itself. This is a very error prone approach. The Developer kit manager comes to the rescue…
The Developer kit Manager
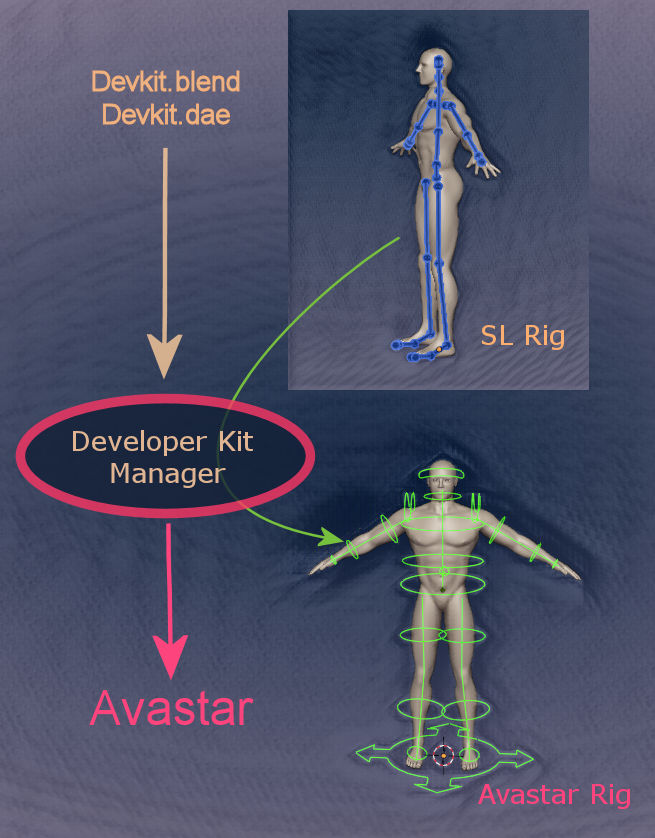
The Developer kit Manager takes as input an original Developer kit file (Collada or Blend) as it was distributed by the Developer kit Creator, then it converts the Developer kit into an Avastar Rig, which finally can be used with Avastar…
Provided the Developer kit creator has taken care to obey some pretty straight forward rules:
- The Collada file(s) must be correctly importable into SL
- Blend files must contain SL compatible Rigs
- The Developer kit creator must provide information about some basic properties to allow an attachment maker to create best matching attachments (see the chapter What the Developer kit creator needs to provide further down)
Configuring the Developer kit Manager
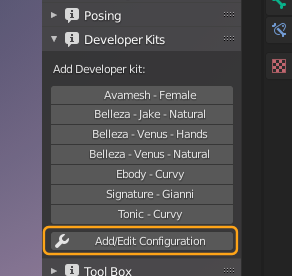
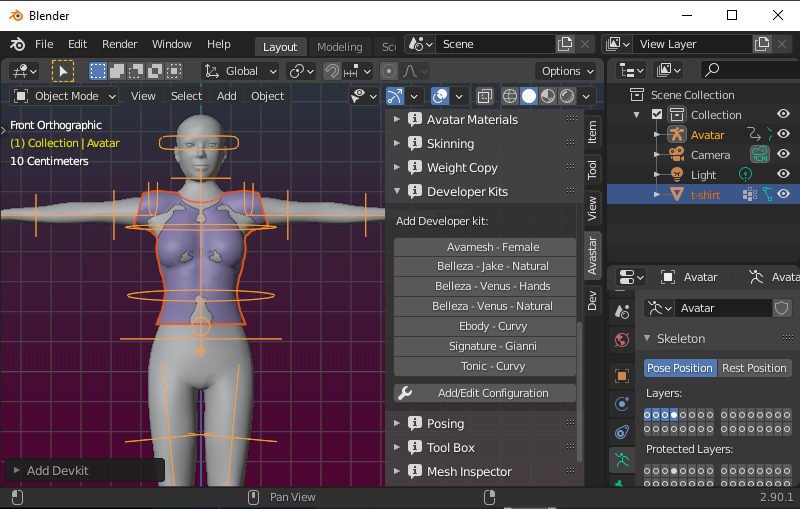
Avastar provides an area in the user Interface where attachment makers can add Developer kits for quick access.
When clicking on one of the listed items, a new character plus its Armature are created from the related Developer kit, ready made for direct usage with Avastar.
Furthermore the attachment maker can integrate more Developer kits at any time as necessary (see the button Add/edit configuration in the image). However adding an entry to the Developer kit Manager needs some basic information which must be provided by the developer kit Creator (see below).
Adding an entry to the Developer kit Manager
- The attachment maker must get the Developer kit from the developer kit creator. The developer kit either comes as a blend file or as a Collada (dae) file with a model and Rig ready made for Secondlife.
- The attachment maker also needs to get a couple of customization parameters of the developer kit from the Developer kit creator.
- The attachment maker opens the Developer kit Configuration panel in Avastar, specifies the file location and the custom parameters.
- Finally the attachment maker creates a new Developer kit Prefix. The new Prefix will show up in the Developer kit listing, which i have shown on the previous image.
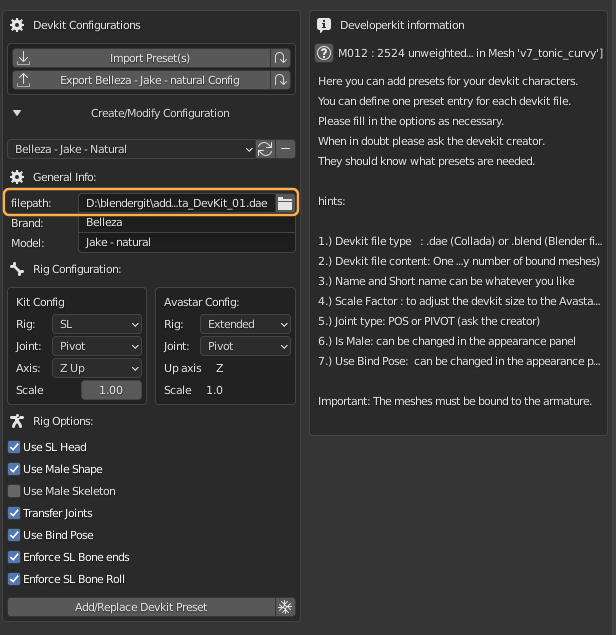
Click to Zoom In
Typical Workflow with Developer kits
When the attachment maker clicks on a Developer kit button as described above, then the related kit is added to the current scene. Whatever was in the scene before will remain at its place. What exactly the attachment maker will get added to the scene is fully controlled by the developer kit creator. Here is an example:
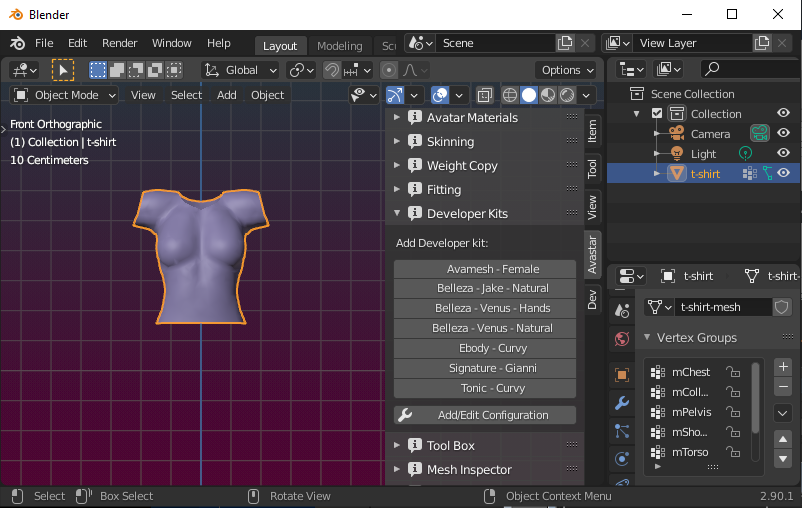
The Attachment without Rig
The Developer kit is added to the scene without removing anything
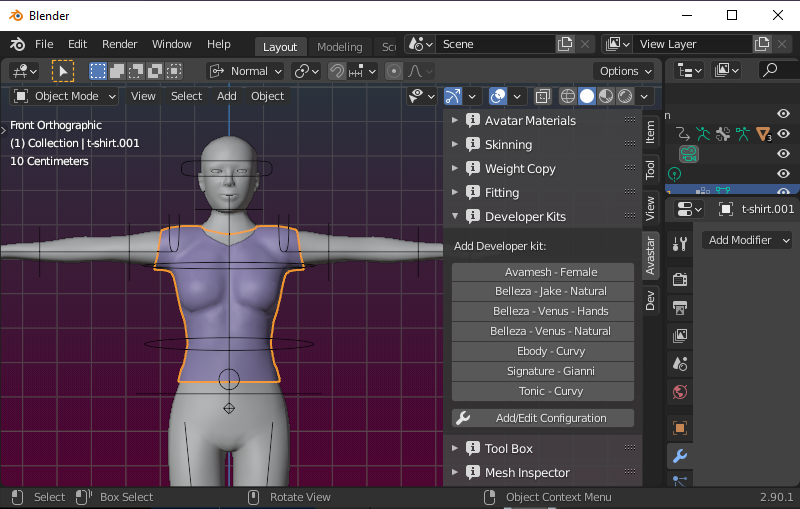
Step 1: The Basic adjustment
The very first thing the attachment maker will do is creating an adjustment and adjusting the attachment to the Developer kit model. This is mostly a matter of using appropriate modelling techniques to get the attachment to match with the Developer kit.
I will not get into detail here. The image just shows how it might look after doing the basic adjustments.
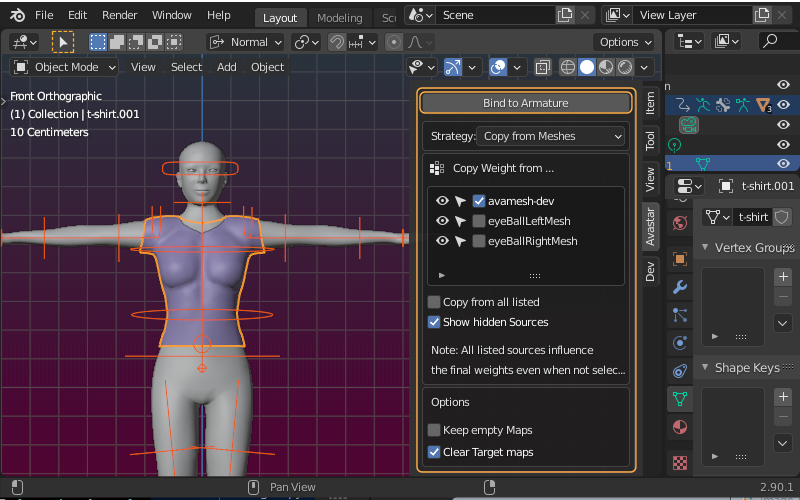
Step 2: The Binding
In the next step the attachment maker will Bind the Attachment to the Developer kit Rig. With Avastar this is a matter of a few clicks, where the attachment maker decides from where the attachment shall get its weights (from ‘Meshes’ means the weights are copied from the developer kit) and then call the Bind to Armature Operation.
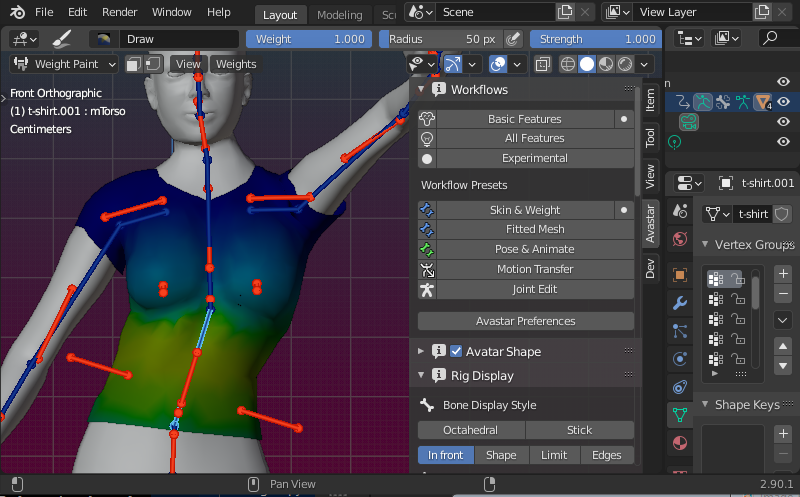
Step 3: The weighting Workflow
Once the model is adjusted and bound to the Armature, the attachment maker will proceed with checking the weighting and adjusting the weights where necessary to match the Developer kit as good as possible.
We have provided a Workflow panel from where the attachment maker can select the Skin&Weight Workflow. This workflow prepares the Blender scene such that the attachment maker can select the bones, add/remove weights as necessary, and rotate the Bones to test if the weighting is good.
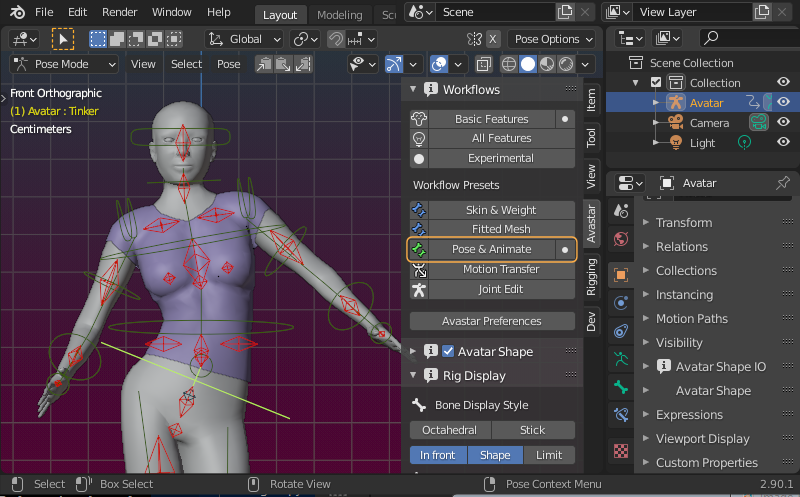
Step 4: Posing and Animation
Once the weights have been set up and tested, the attachment maker might also want to go into posing and animation.
In this case the attachment maker will switch to the Pose&Animation workflow where he/she can use all animation features from Blender to create still poses or animations as they like.
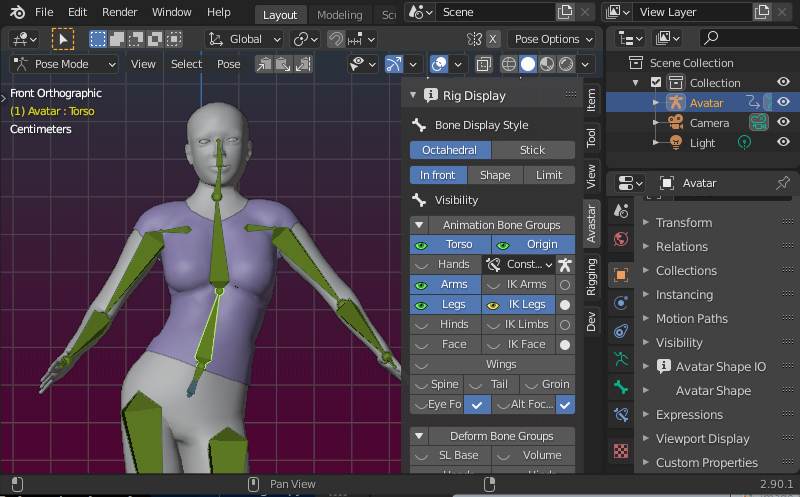
Avastar provides a decent panel for controlling which part of the Rig shall be displayed. The Rig Display panel is probably one of the most used panels we have.
Here the attachment maker can also change the display style from Shape to Octahedral or Stick.
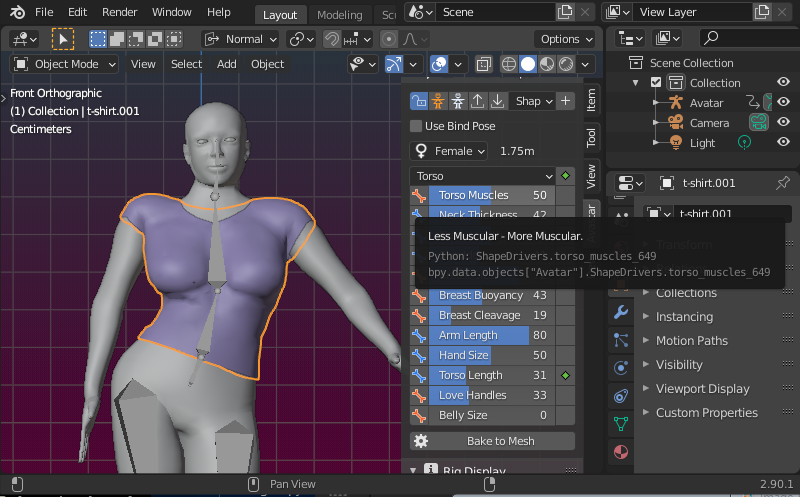
Step 5: Shape Sliders
Avastar provides a full emulation of the Secondlife Avatar Shape Slider system. The Shape sliders are all located in the Avatar Shape Panel and can be used at any time during a user session for checking if the variations of the Shape sliders work well with the user attachment.
Step 6: Export to SL
- Select the mesh attachment(s) for export.
- Call the Avastar Collada exporter as usual.
- When importing the attachment to SL(using the SL Importer) then you want to:
- enable with weights
- enable or disable with joint offsets depending on the bones you use, see below:
How to set the with joint offsets option
- If you create an attachment that only uses bones from the Developerkit, then you must disable with joint offsets.
- If you create an attachment that uses only bones which are not already used by the Developer kit, then you need to enable with joint offsets.
Note: As mentioned before, please avoid to create attachments which use bones from the Developerkit and in addition other bones. Otherwise the resulting meshes might suffer from distortions when worn in SL.