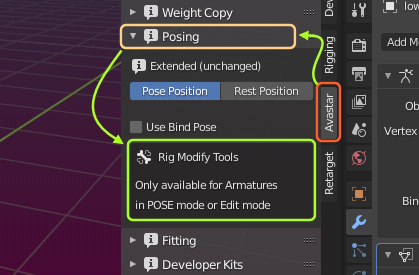
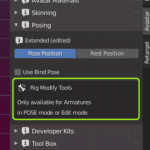
This panel provides a set of functions suitable for posing and animating the Avastar rig. Most parts of this panel are only available for Armatures in Pose mode. However, there is one more workflow that actually combines Armature pose mode and Armature edit mode for creating bind poses. We made this panel also available in Armature Edit mode to support this workflow.
This page describes the common options in the panel. Further down you find the links to the more specific documents for the various possibilities how the Posing Panel is used.
Basic Information
- Click the (i) icon to open a popup window with more detailed information about the panel sections.
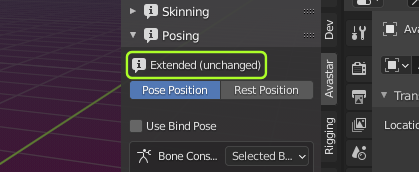
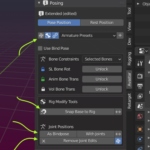
- The Rigtype can be Basic or Extended (Bento).
In the image an Extended rig is used.
- (edited): The rig has Joint edits (custom rig).
- (unchanged): This is a default SL T-Pose rig .
In the image the rig is marked unchanged (no edited joints).
Position Control
Select Rest Position to disable all pose information and display the rig in its neutral Restpose.
Select Pose Position to enable all pose bones and show the current pose.
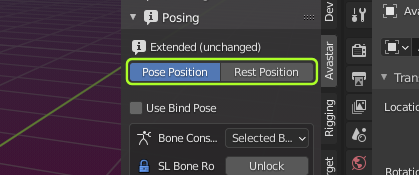
Note: This is the same operator that you also can find in the Bone Data Properties Window (Right side of your Blender Screen). We added it here because it is a nice shortcut for quick tests of your Rig.
Use Bind Pose (option)
When this option is enabled, then Avastar calculates the difference between the Restpose of your custom Rig and the Restpose of the standard SL Rig. This difference is also called The Bind Pose
This means in simple terms: Your rig is still an SL Default rig (in SL T-Pose) but with an additional extra pose (The Bind Pose) added to the Rig before the meshes are bound. However, in Blender you see the Rig has joint offsets. For details see

Note: When you enable this option while you are not using the White Stickman shape (in the Shape Editor ) then you probably see some bones shifting to slightly different locations. This is not a bug. This is because custom Rigs are handled slightly different in Secondlife. Those joint shifts are expected.
Why use Bind Pose?
The benefit to use Bind Pose over just exporting the custom Rig with joints is: You import the Rig into Secondlife without joint positions while still maintaining your custom rig with all edited joints. Hence the restrictions on Sliders for custom rigs do not apply. But beware: The bind pose only works reliably when you work with human meshes.
Pose Panel Modes
Pose Mode
Edit Mode
Object Mode
Minimalistic workflow for making Custom Rigs
Lets assume you want to work with a custom pose instead of the default SL T-Pose. This is a very common usage scenario and it is briefly done as follows (nothing special here):
- Add a new Avastar
- Pose Avastar to your mesh (such as A-Pose)
- Apply As Bindpose
- Do the weighting of your meshes
Now you can work in your custom Restpose and there is nothing wrong with that. Avastar will automatically export your work compliant to SL. So there is not much to worry about here. But please keep in mind: This works best for human rigs which have been edited only by rotating bones. As soon as you encounter Bone Translations, there are additional steps to take, see (TODO: Point to the document about corrective Pose to fix SL Shape)
The downside of this
The only downside of using custom rest poses is that you no longer can use the Avastar meshes as reference for your work! This is because the Avastar meshes are frozen during the rest pose conversion (see the Freeze Shape tool ) Hence they are no longer compatible with the default SL Avatar but behave exactly like custom Mesh does.
Especially when you are doing fitted Mesh for the system character then you will almost certainly want to compare your work to the SL Avatar to make sure your meshes behave nicely in the SL world. This can only be done when you work with the default T-Pose.
Final Remarks
You think all of this is just “utterly complex stuff for easy things”? well, yes, admitted. it’s not a one button click solution. But honestly, once you understand how things work together it boils down to a few clicks and almost no thinking. You need to train a bit and then you will like this a lot, i am sure !
And note: All of the above is only needed when you want (or need) to compare your creations to the default SL Avatar (mostly when you work with fitted mesh). If you do not use the system character at all, then you can use the fitting panel with any skeleton arrangement.