
The Avastar Animation exporter exports skeletal animations of the Avastar Armature. We support 2 export Modes (anim and BVH).
Note: The Exporter is only available when you have selected an Avastar Armature as the active Object.
.anim Export
Basic Settings
The Anim export creates data files in the same animation format that is also used by SL, OpenSim etc. One advantage of this export type is that it supports the animation of the Eye Bones. The panel is divided into sections:
Action Export options
- fps: (Frames Per Sec).
- Start Frame: First frame to export.
- End Frame: Last frame to be export.
- Synchronize: keep the options here permanently synchronized with the same options in the Timeline.
Clicking the little auto icon between Start frame and End frame does pretty much the same on demand (when clicking) as what you get with the Synchronize option automatically.

Anim Export Options
- Ease in: Time in seconds until the character will be reposed from the character’s current pose to the first pose in the Start Frame.
- Ease Out: Time in secs until the character will be reposed from the End Frame to the character’s previous pose.
- Priority: [-1, 0 … 6] Animation priorities (1)
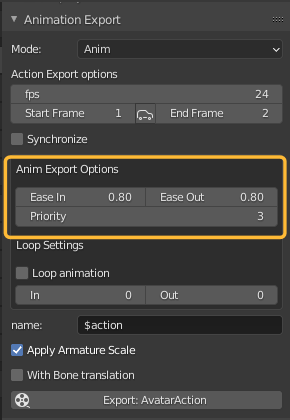
(1): Priorities from 0 to 5 correspond to SL’s priority system. Priority 6 is like a master priority that “rules them all”. But it is not officially supported. Priority -1 probably means “ignore this joint”, but we could not find a description of what it really does.
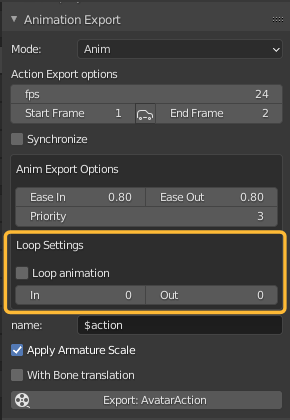
Loop Settings
- Loop Animation (checkmark): if checked, the animation will later run in an infinite loop. If unchecked, the animation terminates after running once.
- In: First frame of loop (can be anywhere in the animation)
- Out: Last frame of loop (needs to be right from the In location)
Note: Last Frame and First frame can be the same for a pose (static animation).
Export Settings
- name: name of the animation. This is actually a name template. It contains a string plus optional variables, see below. Default value is $action (the exported file will be named like the action name.
- Apply Armature Scale: You need this option when you are working with scaled models in Blender. In that case normal animations might not work as expected on your scaled model when they are later played in SL. This option actually scales the animation together with the model.
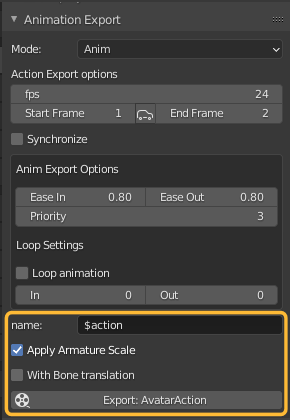
- With Bone translation: While rotation animation is always exported, the export of translation is optional. You will need to check this if you have enabled the option anim bone trans or vol bone trans in the Posing panel. You will keep this unchecked when you want to ensure that your animation does not contain any translation.
- Export Animation: Clicking this button will open a file selection box and after you have specified the name of the export file (pre-filled with the template from the name field), the data is exported to disk.
Allowed variable names in the action name string:
- $action Name of current action (String)
- $avatar name of the Armature (String)
- $fps Frames per Second (number)
- $start Start frame (number)
- $end End frame (number)
- $prio Animation priority
- $easein Ease In (Seconds)
- $easeout Ease out (Seconds)
- $loopin Start of Loop (frame number)
- $loopout End of Loop (frame number)
Important: If you move the bones (not just rotate the bones, but also unlock the bones and add translation) then it’s easy to later break your avatar in SL in such a way that it could require to ‘Reset Skeleton & Animations’ in the SL Viewer. If nothing helps then you might need to logging out from SL and Relogin to fix such issues.
Trouble shooting
- If you have no keyframes defined, then the export button becomes red (see image) and exporting is disabled.
- If your animation contains keyframes for the Origin bone, then also the export is disabled because the Origin bone animation can not be transferred to Secondlife and the final animation would become distorted. You can fix that by deleting or muting the Origin bone animations.
- If your animation contains very subtle animations for the face parts for example, then the animation exporter sometimes smoothed out your animations and you see nothing when uploading to SL. You can inform the exporter to keep animations unchanged as follows:
- open the timeline
- for each keyframe that you want to preserve add a timeline marker
- Name all preserving markers “fix”
- All so marked keyframes will be exported unchanged.
.bvh Export:
The BVH export is compliant to standard BVH, but it takes care about some conventions which are needed by the SL animation Importer. What these conventions are needs to be documented still.
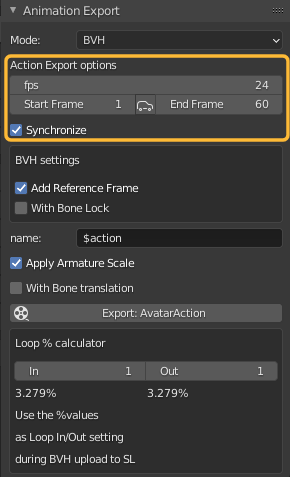
Action Export Options
- fps: (Frames Per Sec).
- Start Frame: First frame to export.
- End Frame: Last frame to be export.
- Synchronize: keep the options here permanently synchronized with the same options in the Timeline.
Clicking the little auto icon between Start frame and End frame does pretty much the same on demand (when clicking) as what you get with the Synchronize option automatically.
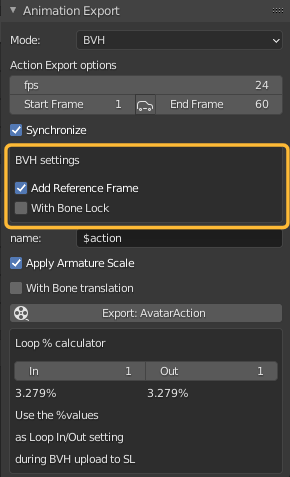
BVH Export Options
- Add reference Frame(1): Add the Reference Frame as initial frame
- With Bone Lock: Keep bones in animation even when not animated
(1): Prepend reference: Automatically add the Reference Frame as initial frame (the reference frame is needed by the animation system of SL, OpenSim and other compatible worlds)
Export Settings
- name: name of the animation. This is actually a name template. It contains a string plus optional variables, see below. Default value is $action (the exported file will be named like the action name.
- Apply Armature Scale: You need this option when you are working with scaled models in Blender. In that case normal animations might not work as expected on your scaled model when they are later played in SL. This option actually scales the animation together with the model.

- With Bone translation: While rotation animation is always exported, the export of translation is optional. You must check this if you have enabled the option anim bone trans or vol bone trans in the Posing panel. You keep this unchecked when you want to ensure that your animation does not contain any translation.
- Export Animation Button: Clicking this button will open a file selection box and after you have specified the name of the export file, the data is exported to disk. If the button is marked red, then something prevents Avastar from exporting. In that case a short explanation appears on the Button.
Allowed variable names in the action name string:
- $action Name of current action (String)
- $avatar name of the Armature (String)
- $fps Frames per Second (number)
- $start Start frame (number)
- $end End frame (number)
- $prio Animation priority
- $easein Ease In (Seconds)
- $easeout Ease out (Seconds)
- $loopin Start of Loop (frame number)
- $loopout End of Loop (frame number)
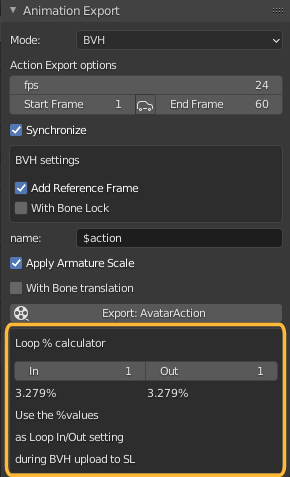
Advanced feature: Loop Calculator (available for .bvh)
During upload of a bvh file to your online world you can specify animation loops. The in and Out locations need to be specified in %.
We have added a loop % calculator. Just enter the in frame and the Out frame. Avastar will calculate the percentage values as you need them later for the SL animation importer.
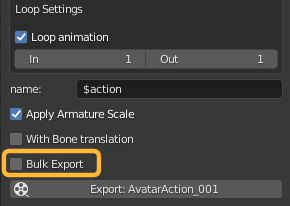
Advanced feature: Bulk Export (available for .anim and .bvh)
Bulk Export: Export multiple Actions into separate animation files. Bulk export is only available when you have more than one action defined.
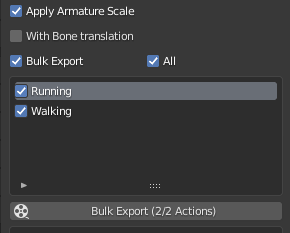
When you enable Bulk Export, then you get an additional list of available actions. You can select All actions or you can select exactly which actions you want to export from the set.
In any case each exported action wil be exported into its own animation file.
Advanced feature: Priority per bone (available for .anim and .bvh)
You can set the priority for each bone separately. You find the setting in the Pose Bone properties editor:
Bone Section -> Custom properties -> Priority
By default this is set to -2 for each bone (see image)

You can change the priority value for each bone to:
- -2 : use the priority specified in the export panel (only valid for .anim exports)
- -1 : ignore the joint in the SL animation (not sure if this is actually true, may be a rumor)
- 0-5: Bone priority used in BVH animations
- 0-6: Bone priority used in .anim animations