Purpose
Attach a Mesh Model to Avastar.
Main Workflow
Migrate T-Posed Model to Avastar
- Load your model into the scene (blender supports a number of input formats).
- Create a fresh Avastar.
- Put your Avastar into Pose mode
- Ensure that your Avastar keeps in rest Pose !
- Only use Avastar’s shape sliders to get a best fit of both models.
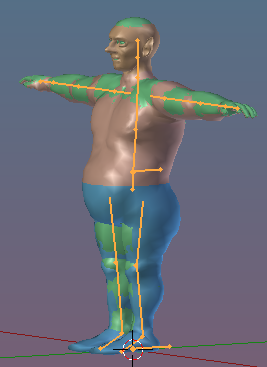
Avastar meshes (green) and custom shape after adjusting Avastar with Shape Sliders
- Select the Avastar Armature and SHIFT RMB select your Model as well.
- Open the Tool shelf and there open the Avastar Tab.
- Locate the Skinning panel.
- Set the weight option to Meshes.
- Enable Clear Weights.
- Keep Selected verts disabled.
- Keep With Eye Bones disabled.
- Keep Alter to Rest Pose disabled.
- Click Bind to Armature.

- Select the Avastar meshes and hide them (type “h” to hide selected)
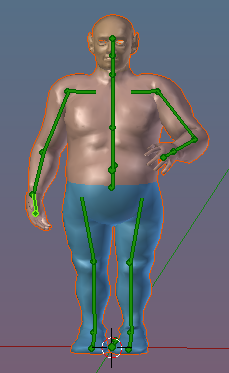
- Select the Avastar Armature
- Set the armature to Pose mode
- verify that your Model is correctly weighted
- If necessary start fixing the weighting now
Non T-Posed Characters
Migrate arbitrary Posed Model to Avastar
Preparations
- Load your model into the scene (blender supports a number of input formats).
- Create a fresh Avastar.
- Put your Avastar into Pose mode. In the next steps you only want to pose the green control bones!
TBD: Add links for importing models to Blender

Use the Pose preset in the Rigging Panel to set your armature to Pose mode. This ensures your settings are all right.
Adjust Pose
- Repose your Avastar to match the pose of your Model.
- Also use Avastar shape sliders to get a best fit of the armature and your Custom Mesh.
You can modify (Edit) the Mesh directly. Or you can adjust the Armature by using the sliders and posing the bones.
TBD: Add links to corresponding tutorials
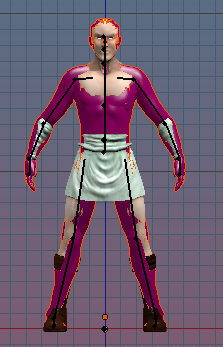
Avastar model posed and shaped to match roughly your character.
Bind the Mesh
- Select the Avastar Armature and SHIFT RMB to select your Model as well.
- Open the Tool shelf and there open the Avastar Tab.
- Locate the Skinning panel.
- Set the weight option as needed: Use
Keep if your mesh has weights
Meshes to get Weights from meshes
Bones to get automatic weights - Enable Clear Weights.
- Keep Selected verts disabled.
- Enable Alter to Rest Pose.
TBD: Add basic information about which weighting method to use when

- Click Bind to Armature.
The Bind function creates an Armature modifier for your Mesh and binds the mesh to the armature according to the settings in the skinning panel.
Final cleanup
Now your mesh is bound and ready for usage. Here is a final cleanup to get your custom mesh into SL T-Pose:
- Select the Avastar meshes and hide them (type “h” to hide selected)
- Select the Avastar Armature
- Set the armature to Pose mode
- Select all green control bones
- Pose -> Clear Transform -> All (reset the pose)
TBD: When things go wrong…