This part of the documentation contains the context sensitive Help pages of the Avastar Addon.
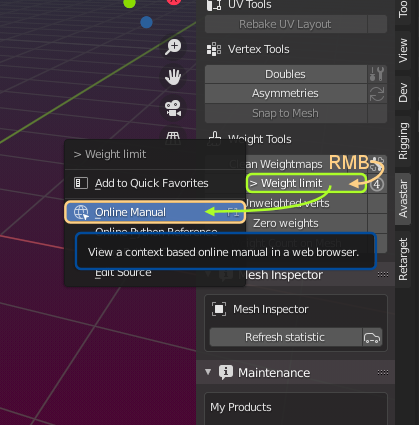
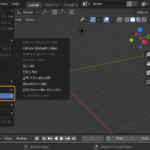
You can open the help page for any Avastar button (option or operator) directly in Blender by by clicking RMB (right mouse button) diorectly on the Button, then select Online Manual or use ALT F1 for a more direct access.
Your browser opens the corresponding help page from the related document website (if the help page exists).
The Reference Guide Sections
Intro
Adjust
N-Panel
Properties
Import/Export
Where is what?
Avastar has grown a lot over the years. If you are a new user then you sometimes may get stuck with searching where exactly a panel is located. Here we try to give you some basic information about how we name things, what they do and where they can be found. This section will be completed as needed. Please tell us when something is missing here!
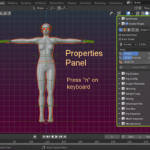
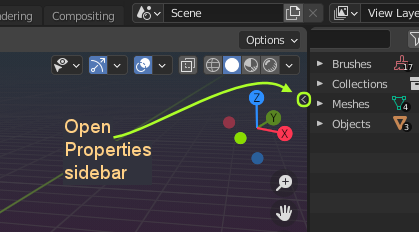
Properties Sidebar (N-Panel)
- Location: typically on the right side of any Blender window.
- Open: Click the little ‘<‘ sign (see image)
- Close: Drag vertical N-Panel border to the window border until the ‘<‘ sign appears.
- Keybord Shortcut: N

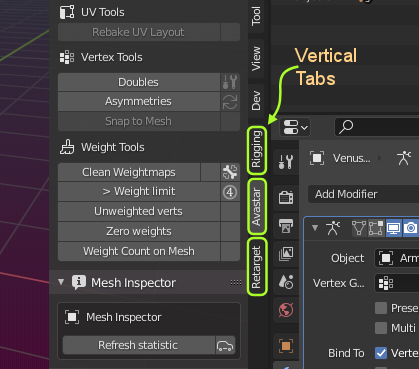
Vertical Tab
The Properties Sidebar is organized in vertical Tabs. Avastar has got three vertical Tabs of its own. The active Tab is colored with a light grey background (Blender default theme)
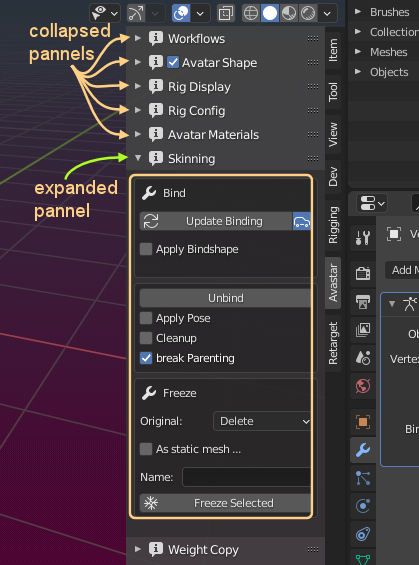
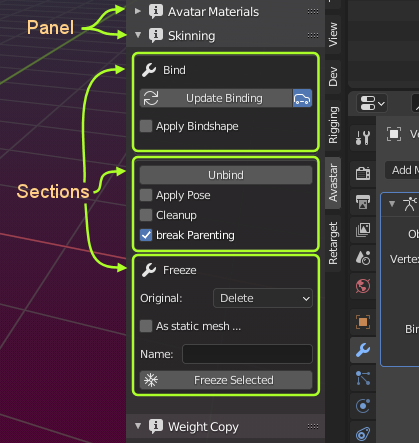
Panels
Each Tool Shelf section is organized in a set of Panels.
Each Panel can be expanded or collapsed
Use of Colors in the Avastar documentation
Often you find colorized boxes on the documentation images. The colors are extra indicators for you:
- Dark orange : Marks the current Context in the User interface, here the context is the vertical Avastar Tab
- Light green : something you need to locate, here the Bind section
- Sand : Click to start an action, here you call an operator …
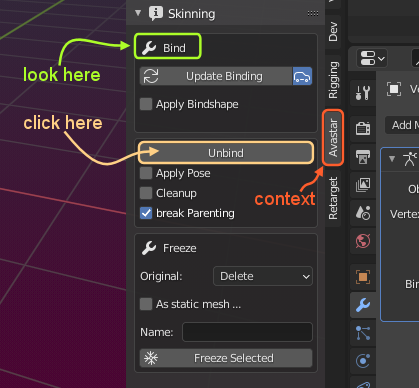
The above image might be accompanied with a documentation snippet:
- Open Properties Panel (Vertical Avastar Tab) (dark orange, the context)
- In the Skinning Panel
- Locate the Bind Section (green, find your path to the action)
- Click on the Unbind operator (sand, click to all the action)
Panel Section
Each panel can be organized into one or more sections.
And a section normally contains
- in most cases one (in some cases two or more) Operators (buttons to click for action)
- and options related to the operator.
User Interface Elements
Operator
You can think of an Operator as a call to a dedicated function. Normally Operators are labelled with a short name indicating what they do, like for example Unbind from Armature or Bake to 2 Meshes
Note: Options can be set before an operator is invoked (button is pushed) and sometimes also after the operator has been processed! See Operator redo panel below.

Options

Selections
A selection is actually also an Option which happens to have 2 or more predefined values. Selections are typically shown as Popup boxes.

Operator Redo Panel
After an Operator has processed, it possibly opens up the Operator Redo Panel. where you can change the options of the operator. This gives you some form of interaction where you can test the operator with different option settings.

However, not every operator has a redo panel and there is no way to see in advance if an Operator actually has one or not. If there is one, then the redo panel is always located at the lower left corner of the 3D Viewport. The Redo Panel title is the same as the name of the called Operator.
The redo panel allows you to change Operator options. In many cases changing an option will cause the operator to revert its work to the state just before it was called, and then redo the operation again with the modified option value.
Tip: The Operator redo panel is interactive: You can use it for test option values on the fly.
Note: Some operators take a whole lot of time to run. So each change in the redo panel can possibly cause Blender to freeze for a while until the Operator has processed again.