Once you have exported your Mesh character, you only need to import it to your target System (like SL or a compatible online world). Although this is easy in principle, there are a few pitfalls in your way. So let us take a deeper look into the Mesh Importer.
The Video explains:
- How to import a rigged Mesh to SL, OpenSim or similar online worlds.
- How to use an Alpha mask for hiding the default character
- How to use image textures to texturise your character.
- Potential problems with your meshes (visible seams, wrong shape, missing face animations)
This video has been made in SL. But it applies also OpenSim or any other OpenSim based world as well. Also the video does not depend on Blender, but it is a general purpose tutorial for the SL Importer. Below you find the import procedure explained in pictures.
Hint: Did you know that Linden Lab provides another world very similar to Second Life, where you can upload your meshes for free? The Beta Grid is a perfect way to test your mesh creations before you finally upload them to Second Life.
The Upload Panels in detail
Upload the model (import the Collada file to SL) - Read more...
 You can start an upload directly from the main menu bar as shown in the image above.You also can start an upload from within the repository view.
The LOD Panel (The entry page) - Read more...
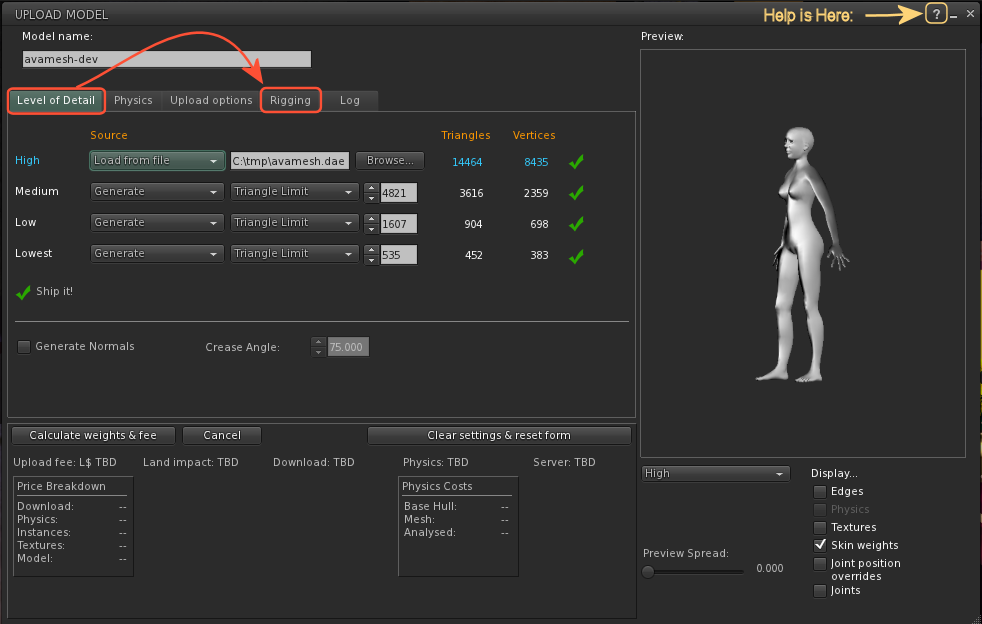
The model uploader starts in the LOD panel. Here you can define all your levels of detail or let them calculate automatically. We currently have no LOD files, so we keep this panel as it is.
Note: You always can get detailed help from the help button in the upper right corner. For now you can proceed by switching to the Upload options tab.
The Rigging Panel (Here you check if Skin Weights are included) - Read more...
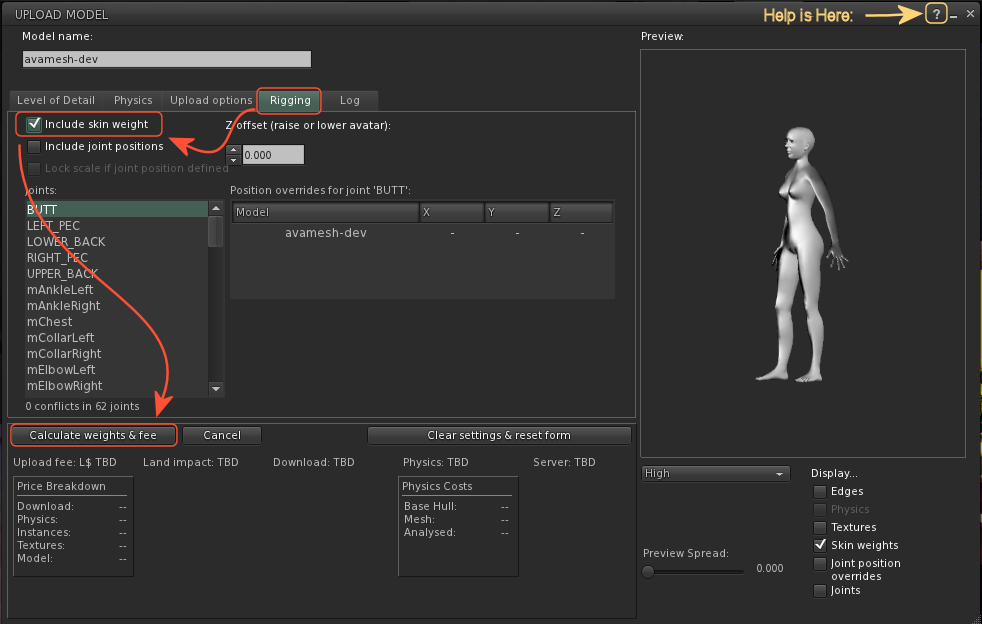
Normally the uploader will only upload the mesh, but no animation data. If you want to also import the rig data (the mesh weights), then you have to include “skin weights”. Please keep the button “Include joint positions” unchecked unless you know exactly what you do. we will get to this advanced feature later.
Also note that you can checkmark the “skin weights” below the Preview window to see if your mesh is properly weighted. But checking the skin weights here has no influence on the upload! This is so common mistake! If you ever are “sure that your mesh is weighted” but remains stiff when worn, then there is a good chance that you forgot to enable “Include skin weights” on the left side!
Now we are done with our first Mesh creation. You can simply wear the mesh and see how it moves with the default animations..