When the update fails
When you update an Add-on in Blender, then normally the following steps are performed:
- The installer disables the current version of the Add-on.
- The disabled Add-on is removed from the system (deleted from disk).
- The new Add-on version is installed.
- You now can enable the new version manually
However sometimes you can not enable the addon after a new version is installed. this can happen because the first step (disabling the Add-on) does not disable all of the software. So it may happen that the old Add-on leaves some traces in the running Blender, which may result in subsequent errors when you try to enable the new Addon Version.
When the above situation happens to you, then please go ahead as follows:
Step 1: Remove traces
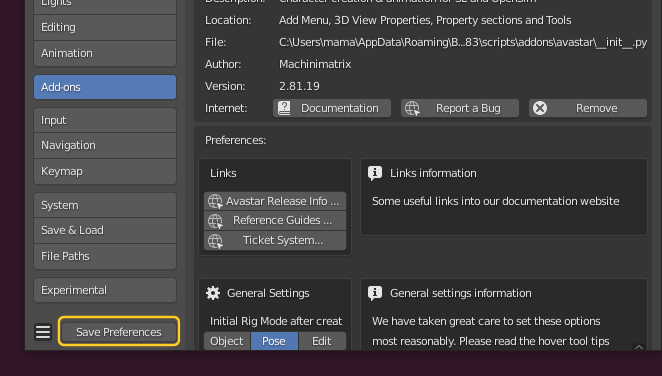
- Save Preferences at the bottom of the User Preferences Panel
- Then close Blender
Note: It is important that you really close blender.
Just opening a new scene is not enough! - Open Blender and open the User preferences again
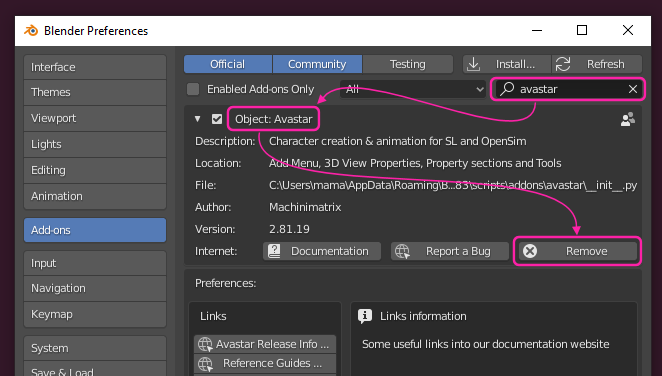
- Type “Avastar” into the Add-on search field to locate your Add-on
- Then Enable the Add-on
In most cases this is all that you need to do. The Add-on will enable without errors.
If the above procedure does not work for you, then you need to put blender into a clean state as follows:
Step 2: Remove Avastar
You find the Remove Button in the expanded Avastar Add-on Panel:
Step 3: Save User Settings
You find the Save User settings Button at the bottom of the User Preferences Window.
Step 4: Restart Blender and Install the new Avastar Add-on
Go ahead and install your Addon