Glossary: Skinning
Skinning is the process of creating an association between a Mesh (the Skin) and a Rig. More specifically in the Skinning process we define associations for each bone of the Rig’s Skeleton to each vertex of a mesh. In practice, for a polygonal mesh character, each bone is associated only with a subset of the character’s vertices.
Portions of the character’s skin can be influenced by 2 or more bones, where each vertex of the affected area gets an influence factor to each associated Bone. This factor is also called Vertex Weight. Thus the influence of each bone on a specific Vertex is defined by its Vertex Weight.
The process of Skinning includes:
- Binding the Character to the rig in a specific Pose (basically establishing an association between the Rig and the Mesh)
- Weighting the Mesh to the Armature bones (create the Vertex Weights)
Note: When binding a Mesh, then typically some form of automatic Skinning is applied as well to populate the mesh weight maps with initial data. Those initial weight maps are then optimized and tuned manually.
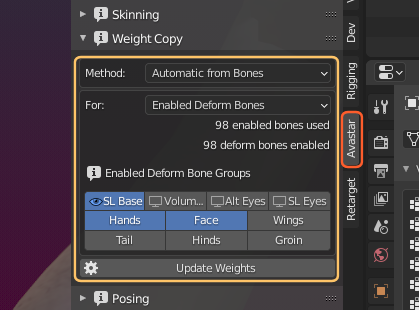
The Weight Copy panel is only available for Custom meshes which are already bound to an Avastar Armature. This panel is used to create or replace weights for your meshes.
The weight Copy panel is admittedly complex. However, once you understand the elements in the panel and how they interact, weight copy should no longer be a mystery for you.
Note: We offer more specific Weight Tools in the Armature Tool Box Panel. Also Blender provides a set of basic weight related functions.
A Gentle reminder
Especially when you try to copy weights from other meshes you have to refine the weights manually in almost every case. All that you can achieve is to get a starting point for your work. This may work nicely, or not.
If you are trying out the Fitted Mesh Weighting, then we recommend to avoid using the default Avatar weights. Please consider to use Automatic Weight from Bones instead. That gives better results in many cases. Blindly using the weights from the default Avatar never works!
The example below shows 3 identical meshes: The left mesh is weighted to the classic mBones, the right mesh is weighted to the Collision Volumes (cBones) using the same weight values.
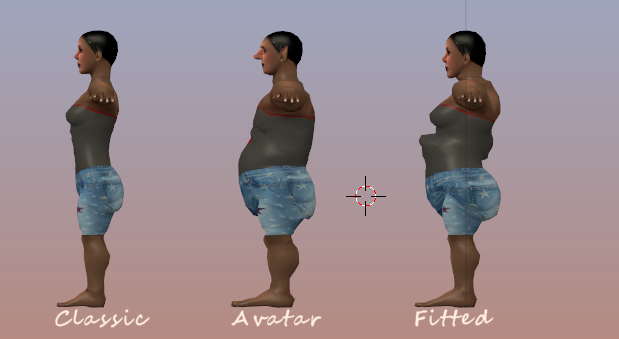
The character in the center gets the full treatment of mBone weights plus mesh deforms (shape keys). This character is equivalent to the default Avatar in SL using the same Gnome shape.
For Fitted Mesh (Collision Volume Bone weighting) you can get much better results when you hand optimize the weights.
Operator Panel Properties
Depending on the chosen Strategy the operator Redo panel is setup with different extra options. Remind: The operator panel is always displayed after you have called the “Update Weights” function. The operator Redo panel pops up at the bottom of the Tool Shelf:
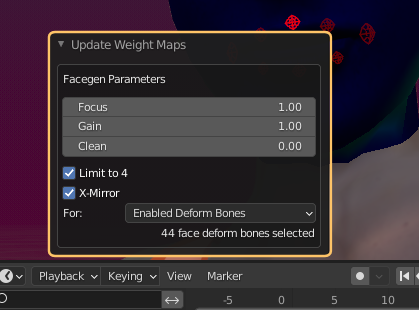
Facemap Generator:
This is a very special setup for an interactive face weight generation. This is only for creating weights for the Bento face bones!
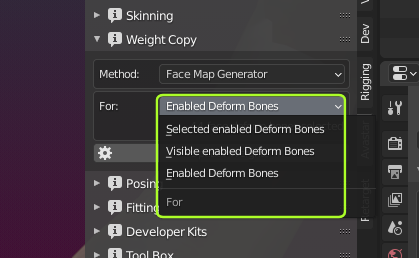
Operator Redo Panel:
Right after you clicked the Update Weights button, an Operator Redo Window opens up (in the Tool Shelf lower left corner) where you can specify parameters to optimize the weights for the selected bone collection. Please play with the settings to get an idea how the generator works
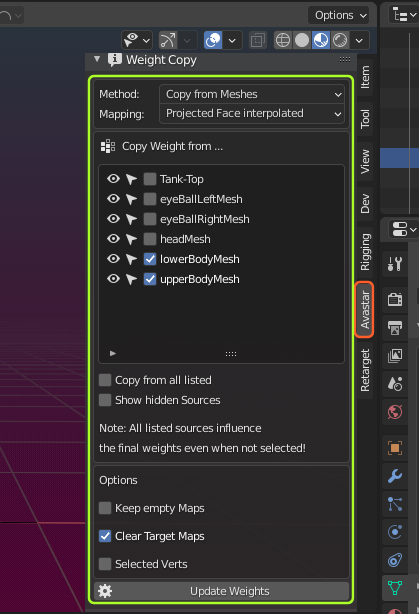
Copy From Meshes:
This feature comes with the most complex panel. The Mapping allows to choose from several options hoe the weights from the sources are copied to the destination mesh, while the Following list of available Sources (meshes) allows to choose from which meshes the weights shall be transferred.
There is no Operator Redo panel associated with this operator.
Automatic From Bones:
Use Blender’s internal Weight generator by calculating the weights from the Bone configuration. This works remarkably well in most cases. However you often need some minor adjustments especially where the Custom Mesh shall behave similar to the underlying SL Avatar mesh (for tight clothes).
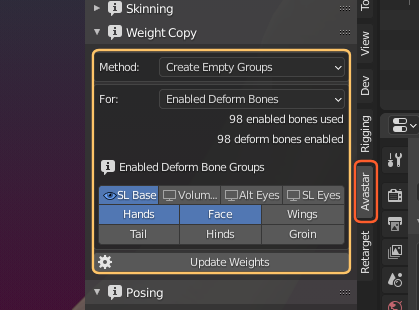
Create Empty Groups:
Checks all deform Bones for existing Weight Groups. Adds all missing Weight Groups as empty Groups.
It is possible to specify exactly for which bones empty meshes have to be created. the basic boneset is either all selected bones, all visible bones or all enabled bones.z
Furthermore the set can be filtered by bone groups. By default only bones from the SL Basis rig, the Hand Rig and the Face Rig are taken into account. the panel allows to change that.