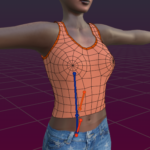
The original SL Rig contains a set of special bones (Collision Volumes, also named Fitted Mesh Bones) which add more flexibility to shaping Mesh attachments with the Shape Sliders. The rig is organized in pairs of bones which we will name fitting pairs from now on. Each fitting pair consisting of a regular deform Bone (blue) and a corresponding Collision Volume Bone (orange).
In the image you see for example 3 fitting pairs for the right arm:
- mWristRight – R_HAND
- mElbowRight – R_LOWER_ARM
- mShoulderRight – R_UPPER_ARM
In the fitting panel (see below) you find the corresponding tools for modifying the fitting pairs seen in the image.

The Basic concept of the Fitting Panel ...
So, this is theory and it is a bit tedious to understand, true. But i ensure you, it is not overly complicated. So please take a chance and read on, it will help you!
The two bones of a fitting pair generally serve for very different purposes:
- The mBone is mainly used for rotation and translation of the skeleton.
- The Volume Bone is mainly used to blow up or shrink the mesh (to give it more or less volume).
However, the Volume Bone is always tightly clamped to the mBone, so that when the mBone is rotated or moved, then the volume bone rotates and moves along with it in perfect synchronization. In other words we can see both bones as one more complex bone-entity that is good for rotation, moving and volume.
The trick is that the volume is controlled only by the volume bone, so the more weight the volume bone gets the more volume is generated on the mesh. But the rotation and the translation actually depend only on the sum of the weights found on the volume bone and the mBone. Thus the skeletal animation is not changed when we take are to only move weight between the bones but not add or remove weight from them.
So we came up with the main idea of the fitting panel: provide sliders for taking the given weight of an mBone and move parts of it to the Volume bone, the more is put on the volume bone the more volume the mesh gets at the end. But because we only shift weights, there is no change in the way how the bone pair rotates and moves the mesh. So we can be sure that our animations do not deform the mesh when we have given it some volume.
The Fitting Sliders
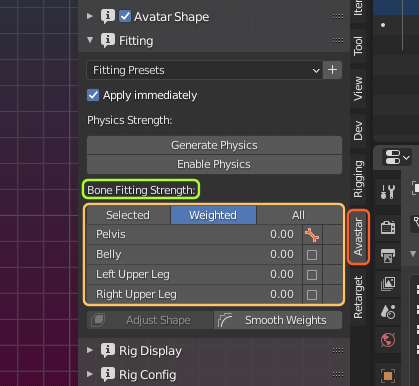
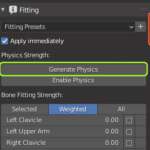
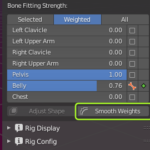
OK, back to practice. You find the list of available fitting pairs in the Bone Fitting Strength section at the bottom of the panel
The Bone fitting strength sliders shift the weight between the blue mBone (slider value = 0.0, means all weight is in the mBone) and the orange Collision Volume Bone (slider value = 1.0, means all weight is in the Collision volume Bone).
Remind: We do not create additional weight! We only shift the weight that already exists on the bone pair, so in simple terms: the less weight you have on the mBone the more weight you get on the collision volume bone!
Caveat: If a bone pair has no weights, then the corresponding fitting slider is useless. Also if a vertex has no weights in a bone pair then the slider won’t generate weights, it just shifts nothing between the mBone and the Collision Volume. A Simple method to avoid this issue (and also avoid odd deformations) is:
- Use only the classic bones (mBones) to optimize the weights for your default shape
- Then switch over to the Fitting panel and add the weight for the volume bones
General usage
The easiest way to use the fitting sliders is by setting the Bone Fitting Strength section to Weighted(see image above). Then you see only sliders where at least one of the corresponding bones of the fitting pair has weight values. However Avastar assumes by default that the mesh has been weighted for classic bones only. Because of that all sliders are set to 0 initially.
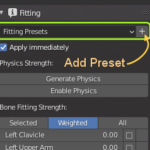
Anyways as soon as you begin to move the sliders you will move more and more weight from the deform bone over to the collision volume. This happens right out of the box. There is no initialization of any form needed. However you can optionally use the Fitting presets to begin your work.
Tip: The Fitting Panel is best used together with the Avatar Shape panel. You should have both panels open and visible in the Tool Shelf.
Advanced usage
The fitting sliders also work together with the Vertex Select Mask. In that case they apply to the selected vertices. However this mode is a bit tricky because there is only one single slider setting for all vertices. But you actually can use the sliders on different selections and adjust the weight distributions to your likes.
Tip:Before you enter Edit mode create a temporary preset of your slider settings. Then after you have finished your edit sessions, switch back to object mode or pose mode, then apply your temporary preset to restore the slider settings as they were before the editing. Now you can safely delete your temporary preset.
Section sub pages
Sliders
Edit Mode
Edit Fitted Mesh

Physics
Fitting Tools (Smooth Weights)
Fitting Presets