Creating a fitted Mesh has become a bit easier with our new Fitting tool. This document contains a brief usage workflow. For the full documentation please read the Fitting Panel Help page.
The workflow
Add an Avastar and Import your Mesh
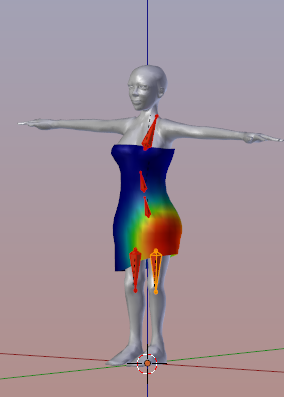
We assume that you know how to create a new Avastar Dummy and how to append or link your Mesh into the scene. In our working example we use a dress made for a small avatar. The image shows the scene after the initial setup.
Initial Setup: Tiny Dress and Default Avastar
Adjust your Avastar to your Mesh
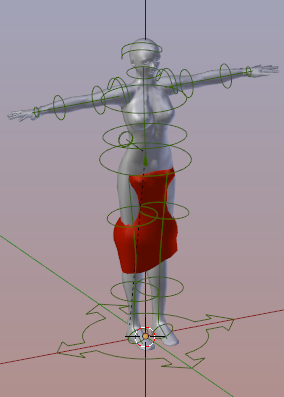
Now use the Avastar Appearance sliders to adjust the Avastar to the Dress. When you have adjusted your mesh you may optionally want to create a new Shape preset:

Note: Adding a Shape preset makes it very simple to reuse the Shape for other projects.

After adjusting the mesh to the rig
Bind your Mesh to the Armature
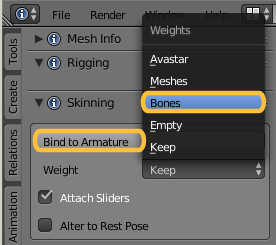
You can choose if you want to keep the weights on the Mesh, or copy the weights from the Avastar meshes, or generate the Weights automatic from Bones.
Its your choice and your decision. If you are in doubt, select weights from Bones (See image). You may want to Attach sliders now as well.
Finally Bind to Armature
Setup the Fitting Panel
Select the Mesh object (the Dress). Then open the Fitting Panel and there select either the Half way preset or the Fully Fitted Preset.

Tweak your fitting with the fitting panel
Now you can tweak the fitting with the fitting sliders. But note that just tweaking may not be enough to get good results. You can combine the tweaking with other methods:
- Enter Edit mode and tweak vertices either by moving them to better places or by tweaking the weight values (ALT-Q updates the display after you modified the vertex weights)
- Add more Weight with Weight Paint brushes in weight paint mode (not recommended)
- Generate Physics (to be documented)
- Use the Smooth Weights function (at bottom of tweaking sliders, see image)

Tweaking in Edit mode
<to be done>
Generate Physics
<to be done>