Abstract
In this document we describe a practical approach to create a Developer kit for a Male Mesh. We will begin with the Mesh model, and make it fit for usage as developer kit.
The Scenario
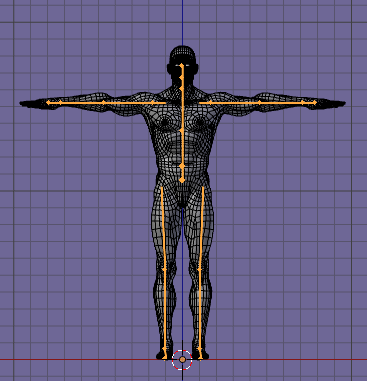
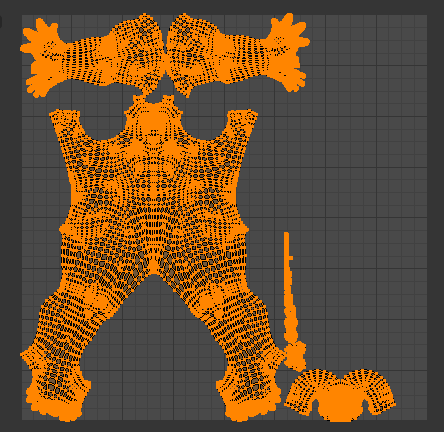
Lets assume you have been working on your model for some time and you have tried out many things until now. Finally you are satisfied with your model. Then you have tried to rig your model and prepare it to work with Avastar. But you encountered a few issues and finally ended up in a messy situation.
Click to Zoom in
I will show you now how you can rescue your model and get it to work. But note that i assume none of the rigging and skinning activities have been made properly and we can just redo this part of the work. So actually we want to start with a clean model.
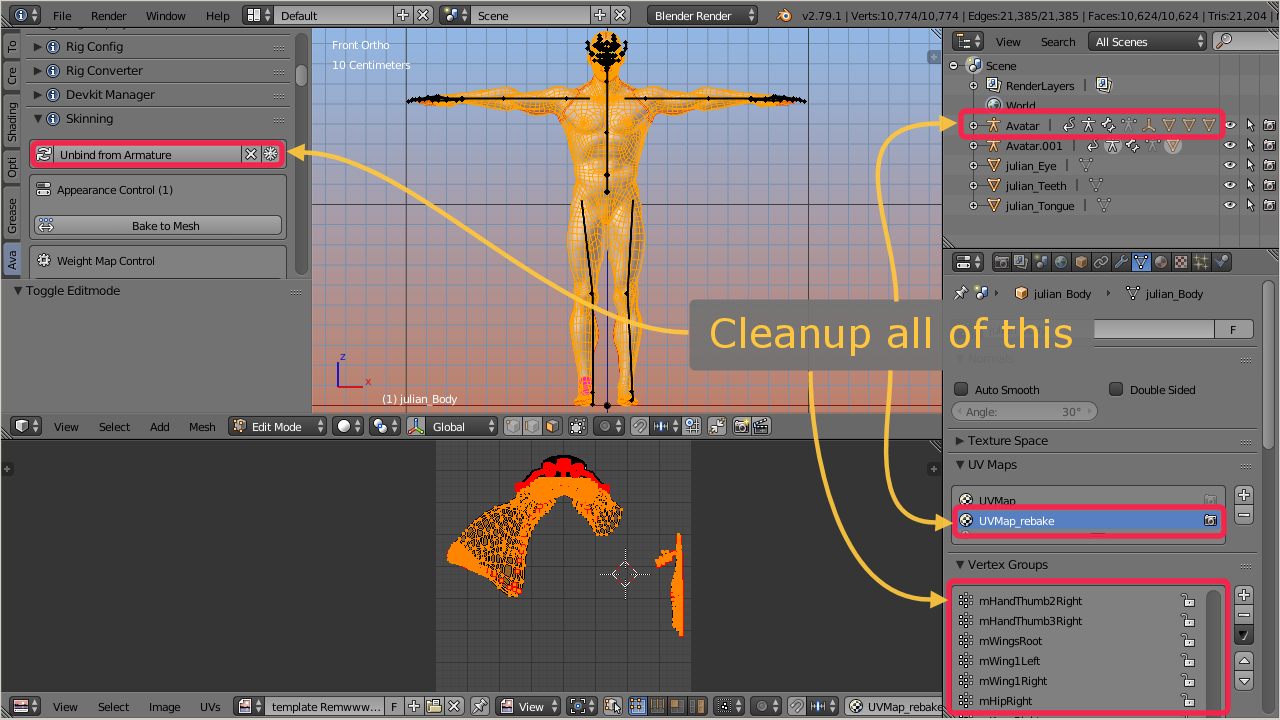
So in the very first step we will cleanup the entire scene and cleanup our desk…
Clean the project file
Remove unneeded Objects
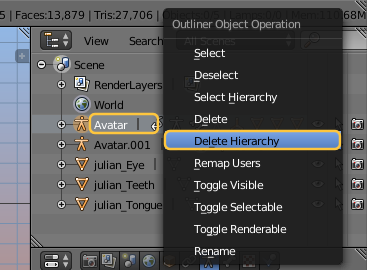
- Open the Outliner
- Select an unneeded Element
- RMB – Delete Hierarchy
- Do this for all elements which are unrelated to your model
Take care: If your mesh model is part of an Armature, do not delete the armature yet. See further down.
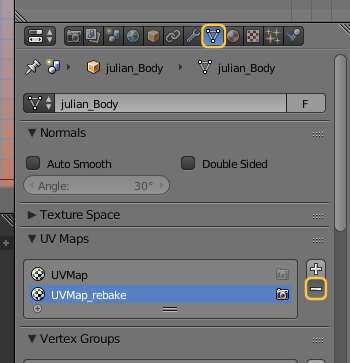
Remove not needed UV Maps
- Open the Properties window
- Lookup the UV Map panel
- Remove all UV Maps that you no longer need
Note: In this particular model the vertex group rebake tool created bad results. The rebaked UV map is useless, so we can remove it. If your models uses multiple UV Maps on purpose, then there is no need to remove or replace them. Just ignore this step in that case.
Remove vertex groups (if necessary)
- Open the Properties window
- Lookup the Vertex groups panel
- From the function drop down select Delete all Groups
Note: In this particular case the vertex groups are broken. If your model has properly working vertex groups then keep them. Just ignore this step in that case.

Unbind the model from an Avastar rig
If your model is bound to an Avastar Rig
- Select the Mesh model in Object mode
- Open the Tool Shelf
- Locate the Avastar – Skinning Tools panel
- Enable the X icon (cleanup Avastar properties)
- Unbind from Armature

Unbind the model from a Blender rig
If your model is rigged to another armature (not an Avastar) then:
- Select the Mesh model in Object mode
- Press ALT P
- In the popup Menu click Clear and Keep Transformation
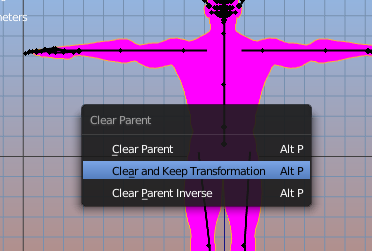
- Now you can safely remove the armature hierarchy (as explained further up)
- You now may want to save the cleaned scene into a new blend file.
Inspect and fix the model
To check:
- Topology
- Symmetry of Mesh
- UV Mapping
Please also do some preparations:
- Take care that only the Mesh is selected in Object mode.
- Make sure the mesh is not yet bound to any armature
- Remove any unnecessary elements from the Blend file.
- Always keep a clean desk!
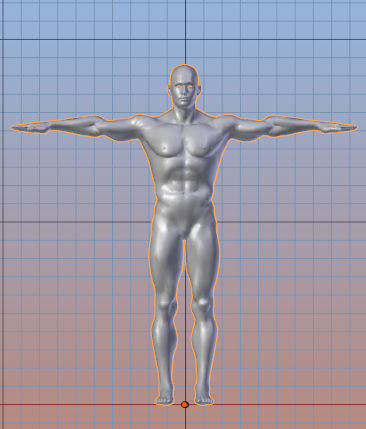
The Body of the new Developer kit
Topology
We aim for a smooth shape with as few polygons as possible.
- Go to Edit mode
- Open the Avastar – Mesh Info Panel
- Check the vertex count and the Face Count
Compare to the SL System character:
Triangles
Faces
SL Mesh
3618 Verts
7186 Tris
7186 Polys
Our Mesh
10774 Verts
21204 Tris
10624 Polys
The numbers sound OK. The Mesh could be optimized still, but overall the model seems to be well suited for SL.
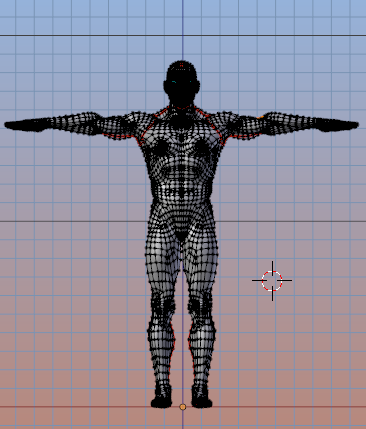
The Mesh (Edit Mode)
Symmetry
Note: This video is newer than the text below and it may use a more elegant method for fixing asymmetries.
Although there is no strict rule about symmetry, it makes a lot of sense to make sure that your model is symmetric. This will later save you and your customers a lot of work.
- Make sure the mesh is in vertex select mode
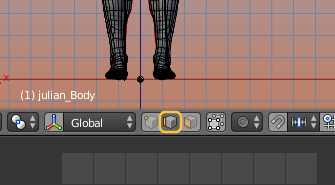
- Make a visual check if the Mesh is symmetric to the Origin.
ok, in our case a Quick inspection shows that the mesh looks symmetric but it is slightly shifted. We need to fix that by shifting the entire mesh to the right in Edit mode.
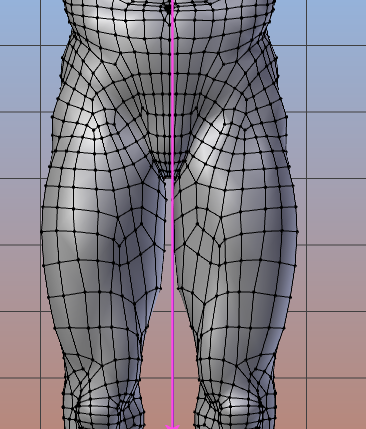
Close inspection: Mesh is shifted sideways
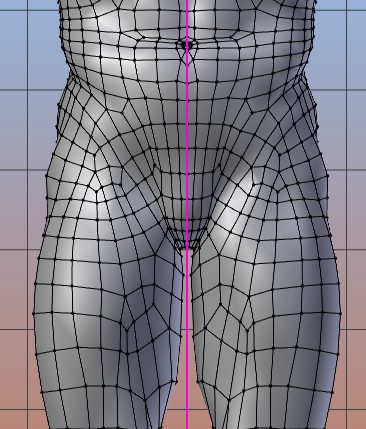
Looking good after manual shift
By visual inspection the mesh is now symmetric. But lets check this with Avastar
- Make Sure the mesh is in edit mode
- Open the Tool Shelf
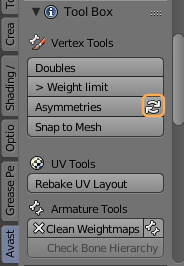
- Open the Avastar Tool Box
- Click the Find Asymmetries Operator

However, now almost all vertices are selected. This is because our visual fix was not precise enough.
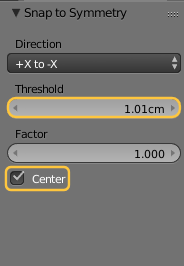
However we can force symmetry by clicking to the Apply Operator (left image below), and then in the Operator Redo panel (right image below) enable the Center Option, and take care to reduce the Threshold to something below 1 mm to avoid getting distortions from the symmetrization.
Then Click again on the Asymmetries operator (left image below). Now no more vertices should be selected. If this is so, then the Mesh is fully symmetric regarding its vertices.
After applying Symmetry the mesh is clean
If the Asymmetries operator still finds asymmetric vertices, then you need to manually make them symmetric. This may take some time. Tip: You always can delete half of the mesh and then use a mirror modifier…
Lets proceed by checking if the edges are symmetric as well.
- Make sure the mesh is in edge select mode
- Open the Avastar Tool Box
- Click the Find Asymmetries Operator
Now all edges are selected which are not symmetric. In our mesh we can find a few of such edges. We need to fix them manually. This takes some time, but its worth the effort. However, as i mentioned before you always can delete half of the mesh and then use a mirror modifier…
We need to do this procedure once more for checking the symmetry of the faces or use a mirror modifier…
When the mesh is reported to be symmetric regarding vertices, edges AND faces, then we are done and the mesh is ready for the next step. Save it now!
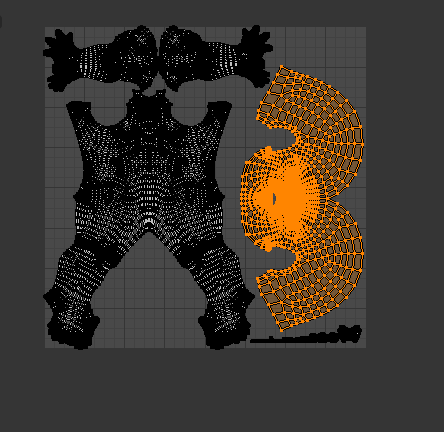
UV Mapping
We really want a good and useful UV Map. Lets see how it looks.
- Select all verts of the Mesh
- Open the UV Editor
In the original model something seems to have gone wrong with the UV Map. WE will have to fix that.
- in the UV Map editor select all vertices (press ‘A’ twice)
- Now unpin all pinned verts (press ALT P)
By now all verts with red markers should now show up as normal (unmarked)
- Open the 3D View
- Make sure all verts are selected
- Press U to open the Unwrap tool
- Select Unwrap from the selection list
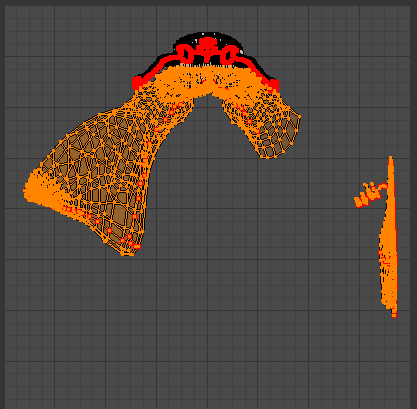
Now this looks better. However the head part (lower right corner) is unwrapped only to a small part of the map. We can select that part (‘L’) , rotate it (‘R’) and move it (‘G’) to the large empty space at the left side of the map ans scale it up (‘S’)
We can do this also with the toes and finger nails (left above the head, see image)
The final UV Map could look like in the image.
- i moved the toes and nails down to the bottom of the map
- I moved and scaled the Face map as indicated above.
Right now the Face map is still selected so you can see how i moved and scaled it.
Prepare the Rig
Now we have our model in a good shape. We can proceed by preparing the Rig. We will have to:
- Adjust the torso bones
- Adjust the hand bones
- Adjust the Face bones
We will Create a new Bento rig. We adjust the rig completely in Pose mode. Then we create a new Bind pose and use that for the final binding of the mesh to the rig.
Create the Rig
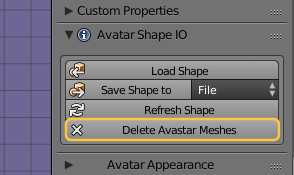
We want to create a Bento rig. Actually we onlu need the Skeleton and the eyes:
- Add – Avastar Extended
- opewn the Object properties
- Locate the Avatar Shape IO Panel
- Delete Avastar Meshes
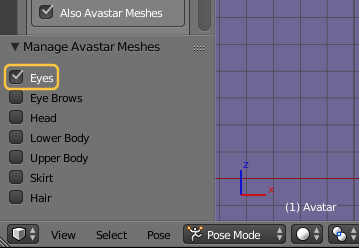
- Open the Tool Shelf
- Scroll down to the Bottom of the Tool Shelf
- Select the Eyes
Now lets see what we have so far. Avastar can be used to bind male and female characters. There is a gender switch in the appearance sliders panel.
However it looks like this particular mesh was made for the Female Skeleton, because the Skeleton already matches so nicely without any modifications.
So we will keep the gender flag at female and only make some minor changes (see below).
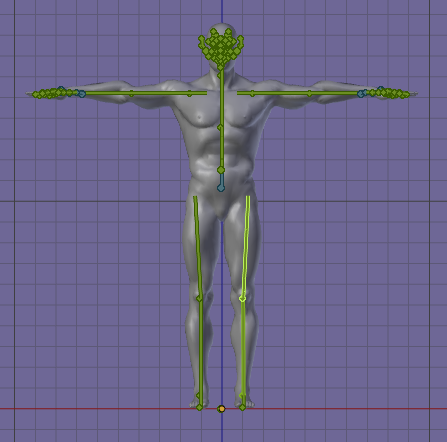
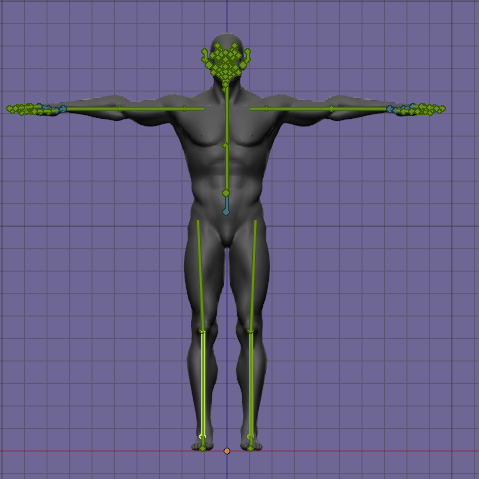
All following activities happen in pose mode. We will only use the green animation bones.
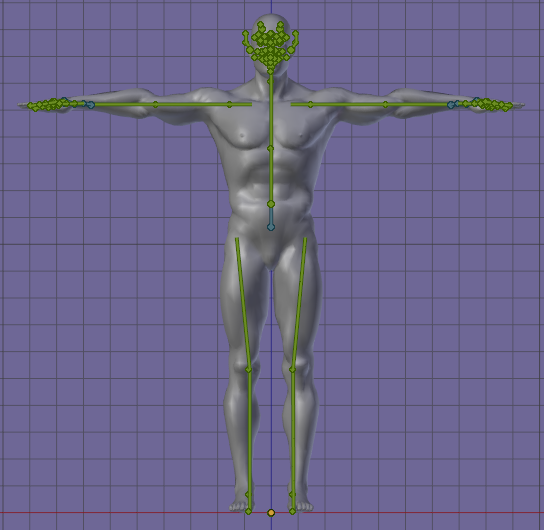
The torso bones
- We bend the hip bones by 3°.
- And we bend the Knee bones back by the same amount.
- That should be good enough for our purpose.
Tip: If the Knee bones can not be rotated you have to disable the rotation limits for those bones.
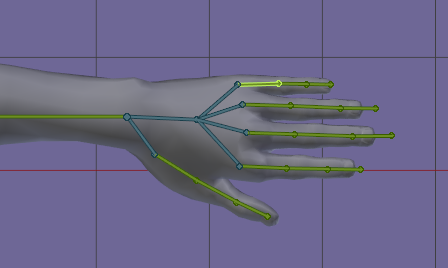
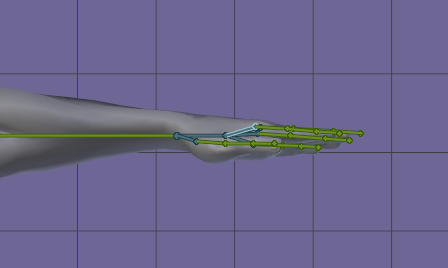
Arms and hands
- Open the appearance sliders
- Select the Torso section
- Adjust the arms length
- Adjust the shoulder width
- rotate the collars by about 6°
- compensate rotation on shouldersab
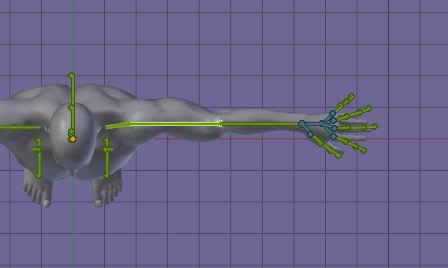
- pose the hand bones
- also make the hands a bit bigger to change the distance of the knuckles
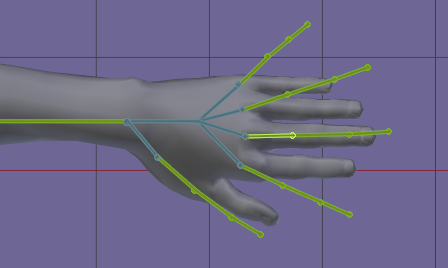
This is how the hands look after posing:
Tip: pose only one side of the character, then select all posed bones, and mirror copy the pose to the other side.
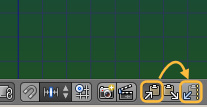
Left: Copy Pose Bones
Right: Paste to other side
The Face bones
I prefer to work in GLS mode:
- Open the Properties area (N)
- Open the Shading Panel
- Select GLSL mode

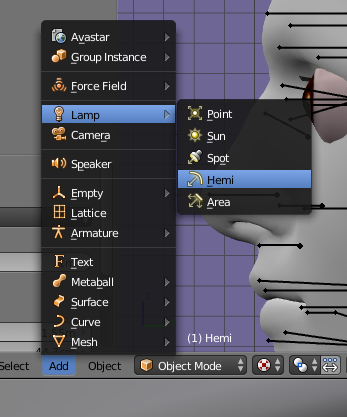
- Add a Hemi Lamp
- Select the Rig
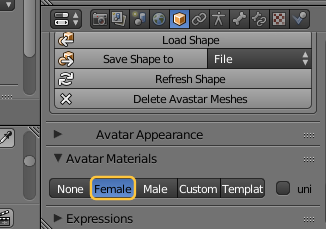
- Open the Object properties
- open the Avatar Materials panel
- Select Female
This will add the eye texture to the Avastar eyes.
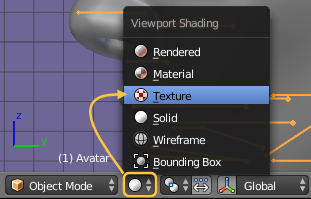
- Enable texture Display mode
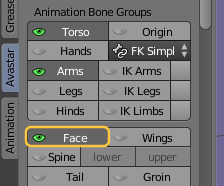
- Open the Rig display panel
- Enable the Face bones
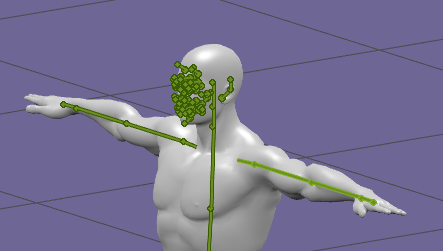
- go to side view
- Open the Appearance Sliders
- Select the Torso
- Use neck length to adjust eyes
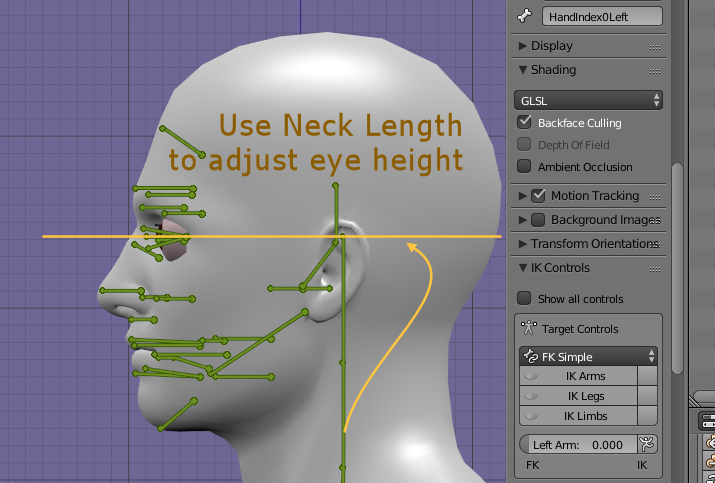
- Select the Eyes Section
- Adjust eye width, size and depth

After the eyes are adjusted, you can proceed with the mouth bones. You do this best in side view…
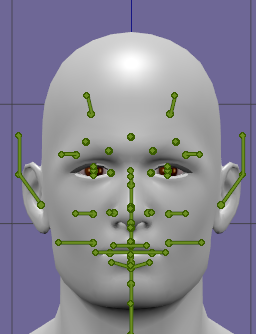
- Select the Mouth Section
- adjust Mouth Position
- Select chin
- Adjust the Jaw jut

Adjust the various face sliders
- Open the Rig Display
- Switch Bone display to Octahedral
- Disable X Ray
- Adjust the sliders so that the bone tips are sitting close to the skin
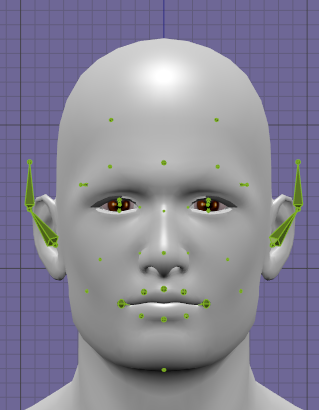
Bone tails adjusted slightly above Skin
Sidenote: the bones are not very visible on a bright skin. But we can use Matcaps for making them better visible:
- Set Texture Mode Solid
- Open the Properties sidebar (N)
- Open the Shading panel
- Enable Matcap and select a dark texture
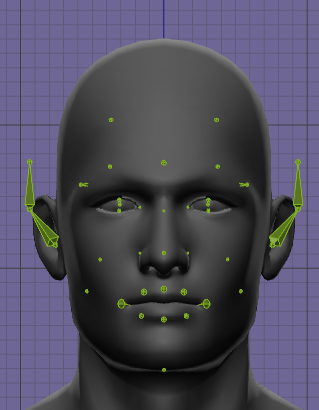
Same as previous image but using Matcap
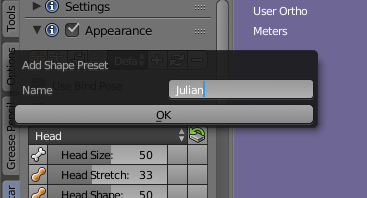
- Open the appearance sliders
- And create a new Shape Preset
Create the bind Pose
- Open the Posing Panel
- Convert to Bind Pose
Now your rig is adjusted to the mesh and it is time for the final step, that is…
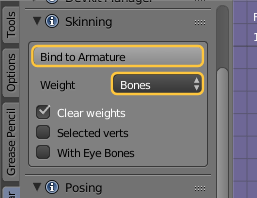
Bind the Mesh
- Select the Mesh
- SHIFT RMB the armature
- Open the Skinning Panel
- Enable Weight from Bones
- Bind to Armature
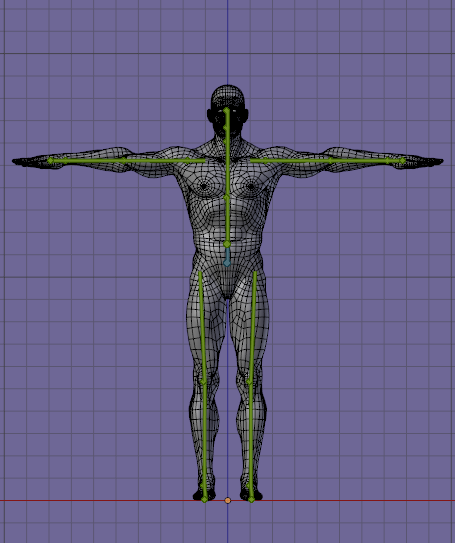
Now check the weights of your mesh by posing the armature and see if the skin behaves correct. You also can check if the apperance sliders now work nicely with your mesh. It looks pretty well now:
 If you look close to the head then you see that even the face appearance sliders are working, as the nose size has been changed using the Node – Size slider. The sliders work also in SL of course!
Make the Developer kit
- Make sure only one armature is in the scene.
- Make sure the Mesh is bound.
- Put mesh into Object mode.
- Put armature into pose mode.
- Put armature into restpose.
- Take care that you apply the previously stored character shape preset to your armature.
- Store this as a new blend file.
Keep this blendfile with you as your reference file. Please do NOT distribute this blendfile to your customers, see below…
Create the Distribution
- Export the model from your blend file to dae and check if the model works in SL
- if the dae file imports correct into SL, then distribute the .dae file to your customers (that is the developerkit)
Kits as .blend compared to kits as .dae
Avastar is capable to use either your dae file or your blendfile as input. here are the pros and cons:
Blend file
+ users can start right out of the box
– Users are forced to use one particular version of Avastar
Dae File
+ works across all versions of Avastar
– User must setup the developerkit manager to get most benefit
Conclusion:
We strongly discourage to distribute blendfiles to your customers.Please consider to only distribute dae files. This will help your customers a lot. Please note the next section where we describe hopw your users will add your developerkit to their developerkit manager:
Configure (what your users do)
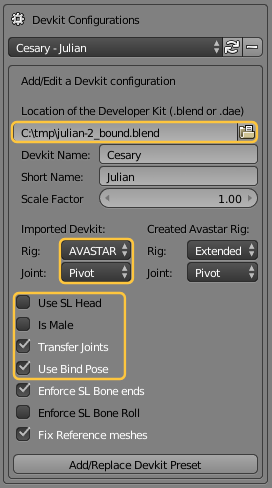
The next step must be performed by your users. You only need to deliver the just created Blend file to your customers. And you must tell them the customization parameters:
- Developer kit Name (Cesary)
- Model Name (Julian)
- Scale factor (1.0)
- Imported Rigtype (AVASTAR)
- Imported Joint Type (Pivot)
- Use SL Head (no)
- Is Male (no, because we used the female gender for binding)
- Transfer Joints (yes)
- Use Bind Pose (yes)
- Enforce SL Bone Ends (yes)
- Enforce SL Bone Roll (does not matter its already correct)
- Fix Reference Meshes (does not matter, is already correct)
- Exported Rig (Extended or Basic, user decision)
- Exported Joint type (Pivot)
And here is what your users will actually need to do:
Configure
- Open the Addon properties
- Locate the Developer kit Manager
- Setup the Developer kit parameters
- Store as new preset
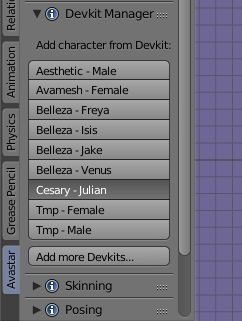
Use
- Open Avastar – Developer kit Manager
- Select Julian
Get Creative
Now go and make attachments…
I hope this document helps you to setup a fresh character and use it as your personal developer kit, or prepare it for distribution to your customers, whichever applies.
Feedback is very welcome.