Rigging and animating eyes is well supported by the Avastar rig. this documents provides information about how to work with the Eye Rig. If you are an animator, then please move to the second part of this document Animate the Eyes further down on the page.
Set up the Eye Rig for your custom mesh
As long as you only do classic weighting, rigging the eyes is easy:
- Take care that the eyes are separate mesh parts. You can either separate them as submeshes in your head object, or just make separate objects for each eye, it does not matter
- Take care that the eyes are rigged to your Avastar. If the eye meshes are submeshes of the head, then they are already rigged together with the head. if they are separate objects, then take care to bind them to your mesh as usual
- Take care that the entire eye mesh of the left eye is only weighted to the mEyeLeft bone
- Take care that the right eye is only weighted to the mEyeRight Bone
Now export as usual. Things should work fine for you.
Details for the System character
You can understand the following chapter best when you have knowledge about the principles of skeletal animation. We have created a document that hopefully helps to understand the basics:
Now lets take a more detailed look at what is going on with the Eyes in the Secondlife Avatar. So please do this in Blender (Avastar):
- Create a new Avastar using Add -> Avastar ..
- Select the left Eye
- In Avastar -> Settings select the preset named “Skin&Weight”
Now the Armature is in pose mode and the mesh is in weight paint mode.
When you select the left eye bone mEyeLeft, then you see the left eye turns red which indicates that the entire eye mesh is weighted to the mEyeLeft bone.
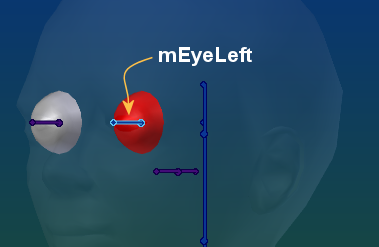
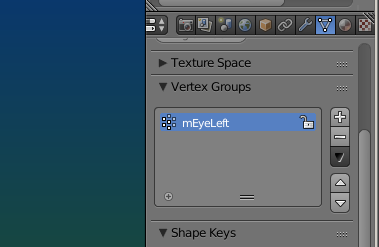
In the Object data properties of the Eye you see there is only one single vertext group (weight map) available, so the left eye has been fully weighted to the left eye bone.
But having each vertex of an eye weighted to exactly one bone and having all vertices of the mesh weighted to the same bone (mEyeLeft) is exactly the same as if the left eye is clamped to the left eye bone.
And just like the left eye has only one weightgroup named mEyeLeft the right eye also has just one weight group named mEyeRigh. And this is all you need to know.. almost
Details for custom mesh characters
mFaceEyeAltLeft and mFaceEyeAltRight is a second set of eye bones.
Animate the eyes
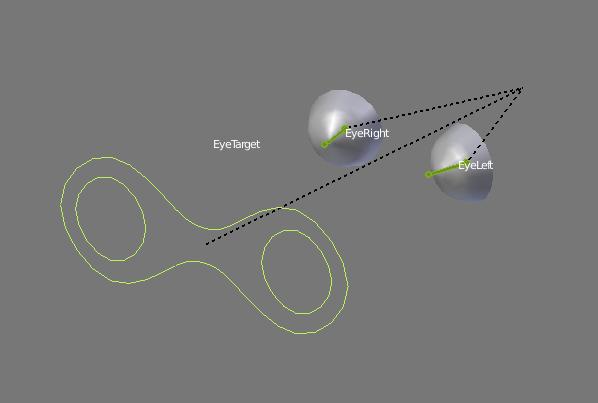
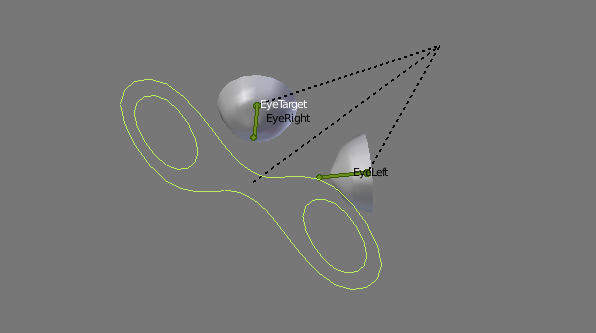
For the System character we have (see image):
- The System Eyes: EyeLeft and EyeRight
- The system target: EyeTarget
Avastar by default has enabled the eye bones for the System character. The setting is available in the Rig Display Panel:
- Eye Focus : show the Eye target bone for the System eyes
- Checkmark: (near Eye Focus) Enable the focus target for animation
Note: By default the Eye Target bones are very far in front of the head (about 2 meters). this is to keep the eyes watch “straight forward” by default.

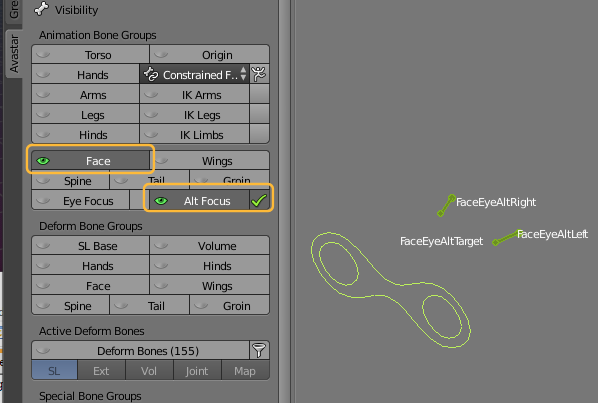
Additionally we have an alternative set for Custom meshes:
- The System Eyes: FaceEyeAltLeft and FaceEyeAltRight
- The system target: FaceEyeAltTarget
Animating the eye targets
- When you move the Eye target in the scene, then by default the eyes follow the target.
- When you move the eye target closer to the eyes, then the eyes start to cross (see image)
- When you move the targets behind the head, then the eyes still follow, although this is no longer a natural eye movement of course.
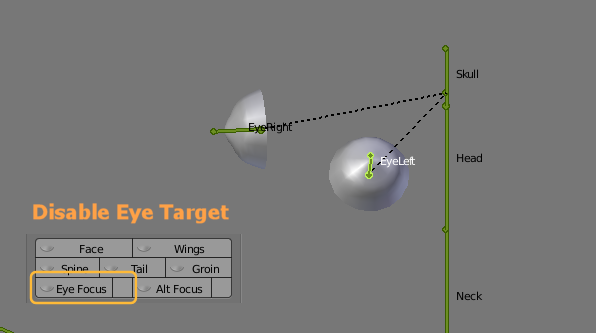
Animating the eyes individually
If you want to animate the eyes separately, then all you need is to disable the eye target. then you can rotate each eye separately.
Note: If you also want to move the eyes around, then you must disable the Eye location constraints as well…
Disable the eye location constraints
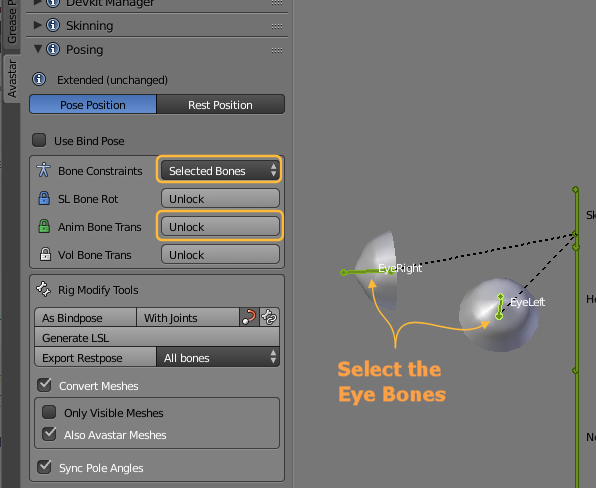
You disable the eye bone location constraints in the Posing Panel:
- Select the eye bones which you want to move
- Open the Posing Panel (Avastar Tool Shelf)
- Set Bone constraints: Selected Bones
- Klick Anim Bone Trans Unlock