This page contains basic routines you may do in Avastar. Working through them will help you become familiar with Avastar.
Tip: When you are still learning...
We recommend that you always begin with creating a fresh new scene with File -> New. That way, if something goes wrong, you can restart blender and run through the routine as a test this time:
Tip: When something unexpected happens...
Restart the routine and note your steps. If you, indeed, get the same unexpected results, you may have found a bug. If you report this to us, and send us your test file, we can tackle the nasty creature and have a new, improved Avastar thanks to you!
Preparations
- Make sure you have the Blender Render selected, otherwise some routines won’t work.
Dictionary
LMB,RMB
Left Mouse Button, Right Mouse Button
SHIFT-Select
Press the SHIFT key while selecting parts (with the right mouse button)
Create a Basic Avastar
- Add -> Avastar -> Basic – quad
- Switch from Solid View Mode to Texture view mode
- Open N-Panel
- Set Shading mode to GLSL
- Open Object Properties
- Open Avastar Materials panel
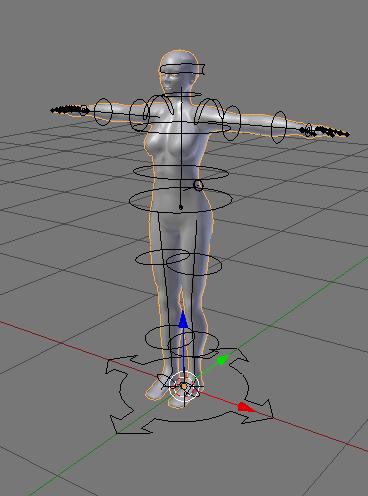
- Select Female
- Select the Lamp in the scene
- Change the lamp from Point to Hemi
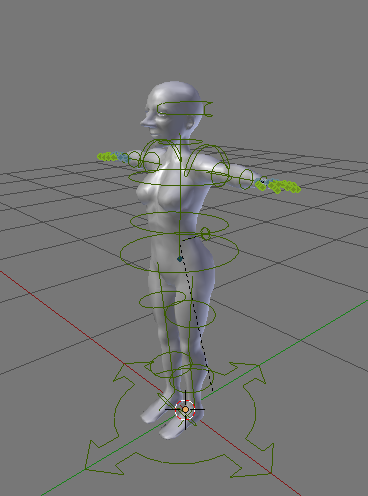
The 3D ViewPort should now look similar to the image aside.
Create a Bento Avatar
- Add -> Avastar -> Extended -> Quad
- Open Tool shelf
- Open Rig Display Panel
- Disable Limit
- Disable Face bone Display
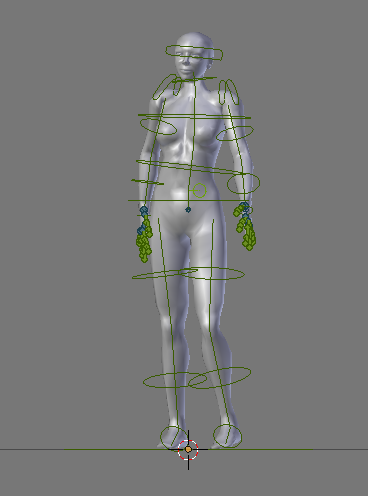
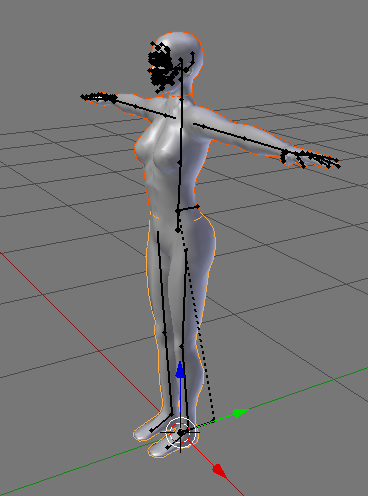
- Grab green bones and move Avastar into a Pose
- Open Tool Shelf
- Open Rig Display Panel
- Disable Shape
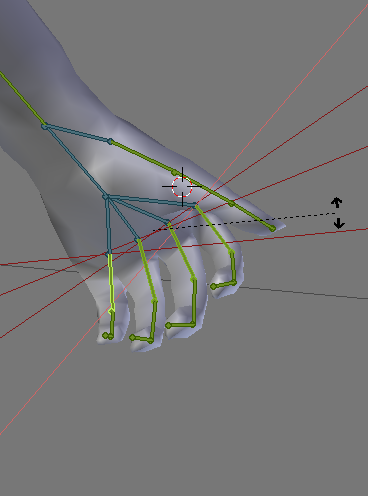
- Select the first green finger1 bones of a hand
- On the keyboard: R x x and then move the 3D cursor to open/close the hand
- Press LMB to finish the hand pose
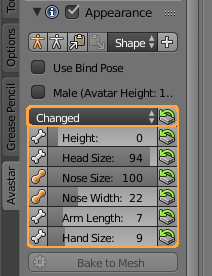
Slider test
- Add -> Avastar -> Extended -> Quad
- Open Tool shelf
- Open Appearance Panel
- Change Body -> Height
- Change Nose -> Size
- Change Nose -> Width
- Change Torso -> Arm Length
- Change Head -> Size
- Change Hand -> Size
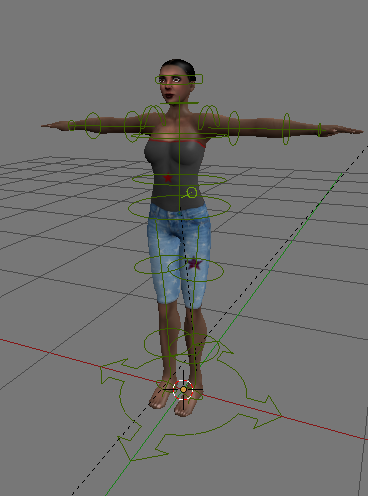
- Select the Section Changed
to see something similar to:
Export a simple SL Clone
- Add -> Avastar -> Extended – Quad
- Optional:
- Open Tool Shelf
- Open Avastar Tab
- Open Rig Display Panel
- Disable Face
- Disable Shape
- Select (and SHIFT Select)
- the HeadMesh
- the UpperBodyMesh
- the LowerBodyMesh
- File -> Export -> Collada (Avastar)(.dae)
Create a single Mesh SL Clone
- Create a Bento Avatar (you can omit the posing, see above)
- Open Object Properties
- Open Avastar Materials panel
- Select Custom (materials with grid texture)
- Optional (verify materials):
- Switch from Solid View Mode to Texture view mode
- Open N-Panel
- Set Shading mode to GLSL
- Select (and SHIFT Select)
- the HeadMesh
- the UpperBodyMesh
- the LowerBodyMesh
- Open the Avastar tool Box
- Search the Shape tools Section
- Set
- Original: Delete
- Enable Join Parts
- Enable Weld Parts
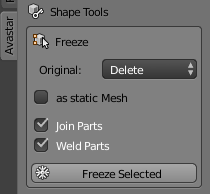
- Freeze Selected