This mode is entered, when you have selected 2 armatures, of which the active Armature is either an outdated Avastar armature or an arbitrary non Avastar Armature, and the other armature is an Avastar Armature. In that case the conversion tool offers to Copy the Active Armature’s configuration to the other selected Armature.
Note: in principle you can select more than 2 armatures. Then the active armature data will be copied to all other selected armatures. However this case has not been tested.
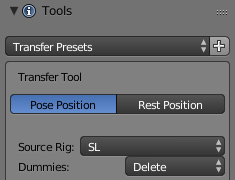
The Header Section
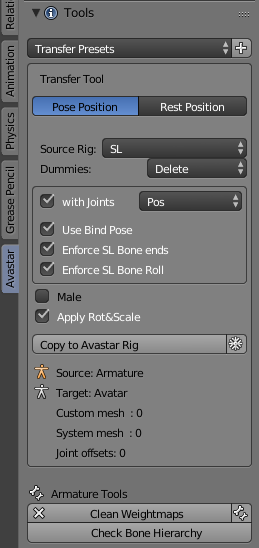
Pose/Rest Position: To Switch your Rig from the Current Pose to Restpose (the same can be found in the Armature Rig data Properties section (right side of the Blender Screen)
Source Rig: Can be SL , GENERIC, MANUELLAB, or AVASTAR
Dummies: You can select to Delete, Hide, or Keep the Avastar Meshes in the target rig
The Update Options
The Import Options allow you to define in more detail how exactly your Rig shall be migrated. Finding the right options can be tricky at times, depending on the nature of your Rig. The options are explained below
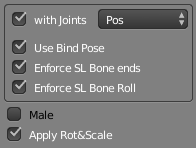
with Joints: The SL Rig can use two Joint styles Pos and Pivot. The difference is that the Pivot Joints are defined with more precision. However there is no strict recommendation which of the 2 joint styles should be used. But since creators are free to choose the one or the other, we support both. If in doubt, then please ask the creator which joint style they have used to create the Rig.
Use Bind Pose: SL supports only the T-Posed Rig. But it also supports bind poses which makes it possible to bind a mesh to any pose (e.g. the A pose). However Blender does not support bind poses, so we needed to implement this into Avastar on our own. If you want to use bind pose rigging then this is your option.
Enforce SL Bone Ends: Your Rig has possibly been imported as a Collada file. But Collada files do not support bone length, so your rig might have ended up with very odd bones at the end of the bone chains. this option tries to get copy the bone size of the end bones (leaf bones) from the Avastar Rig definition)
Enforce SL Bone Roll: Your Rig has possibly been imported as a Collada file. But Collada files do not support Bone roll. This option enables the copy of the bone roll from the Avastar rig.
Male: Use this setting only when the source mesh has actually been created with the Male shape. Note: This is almost never the case. As far as we know Avastar is the only tool that supports the gender switching and most foreign Rigs are made with the female skeleton.
Transfer Meshes: Copy also the Meshes from the Source Rig to the Target Rig. Not sure why this was removed. That might be a bug after all. Or it is now done automatically. Needs to be checked.
Apply Rot&Scale: Often your Meshes contain Scale and Rotation in Object space. While this is not entirely wrong, it often creates unwanted and unforeseeable issues. So it is normally best to apply Scale & Rotation during the update.
The Operator section
The Snowflake icon: When this option is enabled, then the original rig is applied to the meshes (the current pose is baked) before updating. You may want this option when your original Rig is currently not in its Restpose (we suggest to avoid using this option).
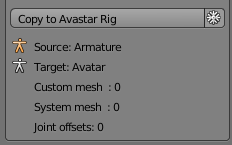
Below the Copy to Avastar Rig button you find an information section which tells you some details about your Rig and the bound meshes:
- Source: Name of the Rig from where the data is copied (source Rig)
- Target: Name of the Rig to which the data is transferred (target Rig)
- Custom Mesh: The number of user made (custom) meshes bound to the Rig
- System Mesh: The number of Avastar meshes (head, body, eyes, …) bound to the rig
- Joint Offsets: Number of identified Joints that have been edited.
Important: The Snowflake option only works when your original rig is oriented in the same way as the Avastar rig (arms aligned along the X axis)
What happens during the update
When all settings are done, then you click the Update Rig button (see image above). Avastar will now step through following activities:
- The original Armature is applied to the Meshes (when snowflake icon enabled)
- A new Avastar armature is created (Basic or Extended)
- The Avastar bones are aligned to match the original rig (If check for joint edits is enabled)
- The meshes are copied and bound to the new Avastar armature
- Depending on the other options the new Avastar meshes are kept, hidden or deleted