DLL load failed: %1 is not a valid Win32 application
This happens on Windows when your Blender Application Data folder is corrupted. We never found a good reason for when this happens, but it does happen.
Fix
Clean up your Application Data. You find the data here:
C:\Users\<username>\AppData\Roaming\Blender Foundation\Blender\<release>
Details
Sometimes another Add-on installation pollutes the Application data folder with scripts and libraries from older blender versions. This can easily make it impossible to install another Add-on. We ensure that our Add-ons never creates such sort of pollution. And here is how you can get out of this issue:
- Locate the Blender Application data folder (see above)
- within the folder locate the subfolder that is named like your Blender release, for example:
Blender Foundation\blender\2.77 - rename this folder to something like
Blender Foundation\blender\2.77_hideNote: The name is not important, use whatever is convenient for you. You even can delete the folder if you like, but see below!
- Now restart Blender
This will cleanup your application data folder. But take care! This resets blender to its Factory settings. Any other Add-on that you have installed is no longer visible and you need to install them again. However you can use the hidden subfolder ( 2.77_hide in my example) to recreate your installation. Although in most cases it seems easier to install all of your Add-ons again.
When the update fails
When you update an Add-on in Blender, then normally the following steps are performed:
- The installer disables the current version of the Add-on.
- The disabled Add-on is removed from the system (deleted from disk),
- The new Add-on version is installed.
- You now can enable the new version manually
However sometimes the first step (disabling the Add-on) does not disable all of the software. So it may happen that the old Add-on leaves some traces which may result in subsequent errors when the new version is enabled in step 4.
When the above situation happens to you, then please proceed as follows:
Step 0: Remove traces
- Save User Setting at the bottom of the User Preferences Panel:
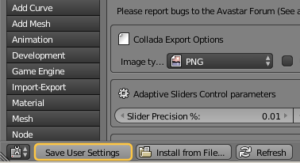
- Then close Blender
It is important that you really close blender.
Opening a new scene or pressing F8 are not enough! - Open Blender and open the User preferences again
- Type “Avastar” into the Add-on search field to locate your Add-on
- Then Enable the Add-on
In most cases this is all that you need to do. The Add-on will enable without errors.
If the above procedure does not work for you, then you need to put blender into a clean state as follows:
Step 1: Remove Avastar
You find the Remove Button in the expanded Avastar Add-on Panel:

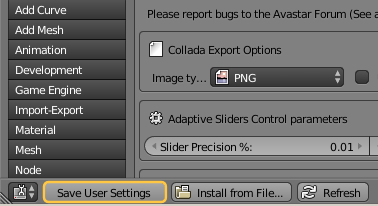
Step 2: Save User Settings
You find the Save User settings Button at the bottom of the User Preferences Window:
Step 3: Restart Blender and Install the new Avastar Add-on
Proceed by installing your Add-on: