Doubles (Find Duplicates)
The Doubles Operator selects all vertices which are recognized as duplicates.
Note: this operator does not preserve the original vertex selection. So after the operator is called, only the duplicate vertices are selected or no vertex is selected when the mesh is clean (has no duplicates)
How to fix:
- Go to Edit mode
- Make sure the vertices are selected (the tool did it already for you)
- Press ‘W’
- From the popup select Remove Doubles
> Weight Limit (too many Weights on Verts)
The > Weight Limit Operator selects all vertices for which the number of assigned weights is > a given number (4 by default).
Note: this operator does not preserve the original vertex selection. So after the operator is called, only the vertices with more than the given number of weights are selected or no vertex is selected when the mesh is clean (all vertices have less than or exactly the given number of weights assigned).
Note: When you have selected multiple Objects you will find a report in the Blender Console with one line per object indicating the number of vertices with too many weights
Note: You can change the settings in teh Operator Redo Panel after you called the function: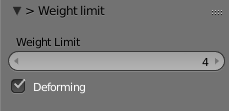
Remind: The operator redo panel appears at the bottom of the Tool Shelf after invoking the Operator.
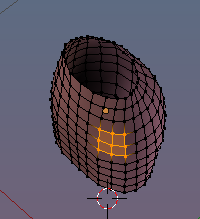
How to fix selected Vertices:
- Either go to edit mode or go to weight paint mode with the vertex selection mask enabled
- Select the vertices which you want to fix (the tool did it already for you)
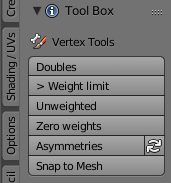
- Open the Tools Tab (Blender Tools)
- Open the Weight Tools Panel
- Click “Limit total”
- In the Operator redo panel make sure the Weight limit is set to 4
How to fix all Vertices:
- Go to weight Paint mode
- Make sure the face selection mask and the vertex selection mask both are disabled
- Open the Tools Tab (Blender Tools)
- Open the Weight Tools Panel
- Click “Limit total”
- In the Operator redo panel make sure the Weight limit is set to 4
Unweighted (Find Unweighted Vertices)
The Unweighted Operator selects all vertices which are not assigned to any Weight Group.
Note: this operator does not preserve the original vertex selection. So after the operator is called, only the unweighted vertices are selected or no vertex is selected when the mesh is clean (all vertices have weights)
Note: When you have selected multiple Objects you will find a report in the Blender Console with one line per object indicating the number of unweighted vertices.

How to fix
There is no tool to fix this automatically. You need to add weights to at least one weight map. You have several options to proceed:
- Use the weight editor in Edit mode
- Use weight brushes in weight paint mode
- Use the Avastar Weight Copy tools
Zero weights (weigthsum == 0)
The Zero weighted Operator selects all vertices for which the sum of all assigned weights is 0.0 (zero).
Note: this operator does not preserve the original vertex selection. So after the operator is called, only the zero weighted vertices are selected or no vertex is selected when the mesh is clean (all vertices have weightsums > 0)
Note: When you have selected multiple Objects you will find a report in the Blender Console with one line per object indicating the number of vertices with weight sums == 0
How to fix
You fix this in the same way as you handle unweighted vertices, see above.
Asymmetries
When you want your mesh to keep left/right symmetric then Blender offers a function which tries to enforce symmetry on a selection of vertices. However this can sometimes be a bit cumbersome because you need to find and select the vertex pairs before applying the operator.
The Asymmetry finder does this for you now as it automatically selects all vertices/edges or faces which are not symmetric on your mesh.
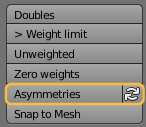
How to fix:
When you click the automatic apply option (the 2 arrows in a circle icon) then all asymmetries will directly be enforced into symmetry.
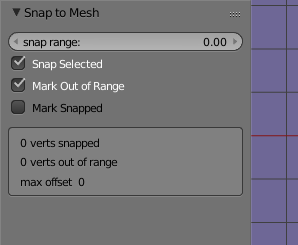
Snap to Mesh
This option is the small sister of the Shrinkwrap modifier. Here you first select a set of vertices in edit mode, then you call the Snap to Mesh function. This will snap your vertices to the closest vertex it can find on any other mesh.
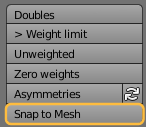
The maximum snap distance can be adjusted in the operator redo window that appears at the bottom of the tool shelf when you click the Snap to Mesh button.
In the operator redo panel you have a few more options:
- Snap range: the maximum distance from a vertex to a snap point if a vertex is not close to any snap point then it is marked as out of range.
- Snap Selected: You can use this tool only for finding the out of range vertices without actually snapping them
- Mark Out of Range verts: After snapping only the out of range verts are marked. This helps to quickly find those verts who could not be snapped.