Maitreya
Maitreya comes with a ready made Blend file that contains an Avastar rig. However this rig was made with Avastar-2.0 and it is not compatible with newer versions of Avastar. Here is how to update your Rig to the newest Avastar version. If you have already created mesh attachments then just add your meshes to the selections as described in the steps below.
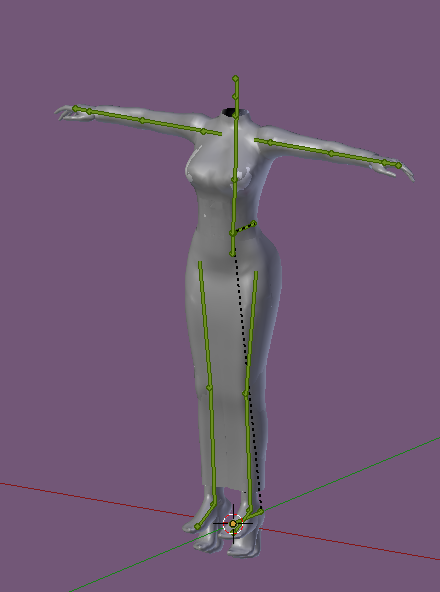
Open the Maytreya Mesh Body Kit Complete Blend file that you received from the Creator. Then make sure that all Meshes are visible (display layers are enabled) and the Armature is selected in Object mode.
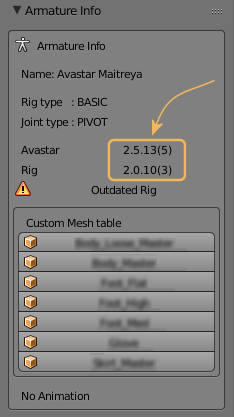
when you now open the Tool Shelf and expand the Armature Info panel, you should see something like this:
You see the Rig version is outdated. Here is how to fix that and a couple of other flaws in the Maitreya file:
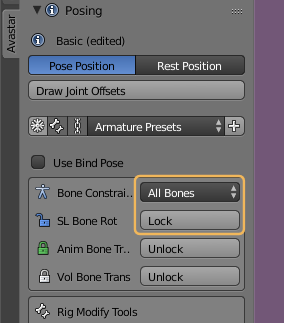
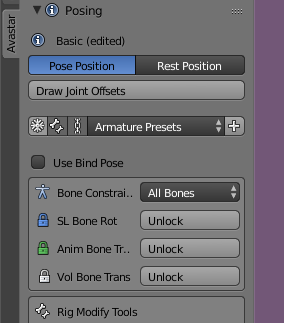
Fix Bone Locking
- Select the Armature in Pose mode
- Open the Posing Panel in the Tool Shelf
- Lock all Deform Bones
Adjust Rig Display (optional)
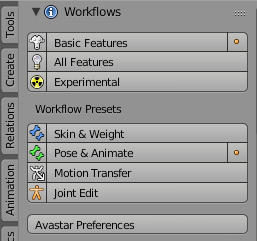
This is actually not a strictly necessary step, but it complies to our workflows. If you have not yet done so, please proceed by taking a look at the Workflow Panel.
Here is a safe way to setup the Avastar defaults manually:
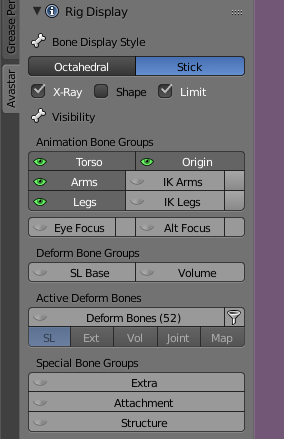
- Open the Rig Display Panel
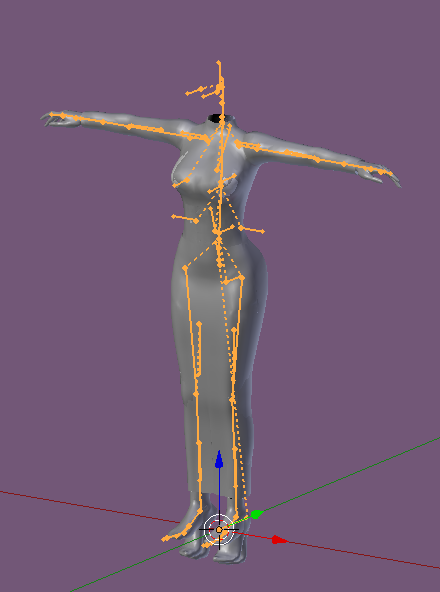
- Make sure the Torso, Arms and Legs are visible (see images below)
- Optionally you also can make the Collision Volume bones visible
Again: This is just optional. You might want to keep things as they are made by Maitreya if this serves your personal workflow better.
Fix Reference Meshes
In newer versions of Avastar (since Avastar-2.4) we have improved the appearance sliders to gain more precision. we have to do one cleanup step to get everything in place:
- Select all 7 Maitreya Meshes in Object mode
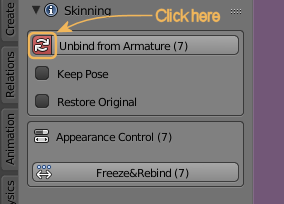
- Open the Skinning Panel
- Rebind the Meshes (the red double arrow as shown in the image)
Important: When you skip this step, then your meshes will not react to any slider and your export might be distorted!
Now you can check that the Appearance sliders actually work:
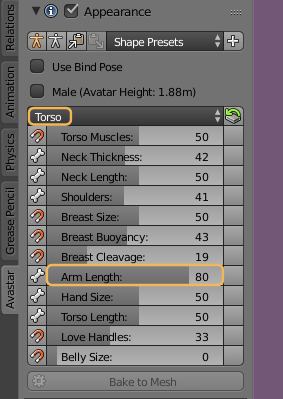
- Open the Appearance Slider Panel
- Try out if the sliders do what you expect them to do
- Tip: Use the Arm length slider in the Torso section. If that works, then all is well.
Important: Once you are done with your testing, then please click the white Stickman icon in the top row of the Appearance Slider Panel. This is to prepare the next step!
Note: Some sliders may not have any influence on the Mesh. Please refer to Maitreya documentation which sliders should work.
Fix the Rig
This is the final step top get your Maitreya Developer Kit back to work:
- Make sure you have clicked the White Stickman Icon
in the appearance Panel (see previous step) - Select the Rig in pose mode or Object mode
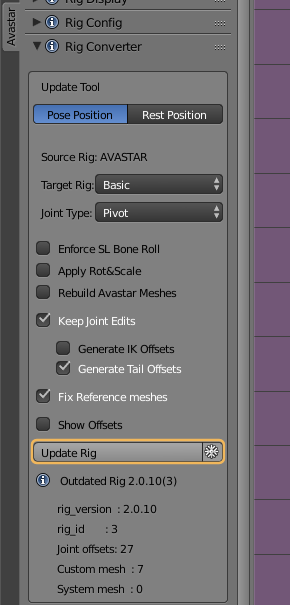
- Open the Rig Converter Panel
- Set Target Rig to Basic
- Disable Apply Rot&Scale
- Make sure that the checkboxes for Keep Joint edits and Generate Tail offsets both are enabled.
- Then click the Update Rig button
Save your work to a new blend file
Now your Maitreya Developer kit should work with the newest version of Avastar. You may want to store this blend file for future usage.
Optionally you now also can add your just created Blendfile as a new developerkit integration into the developerkit manager. This would give you the benefit that you can setup a new Maitreya project with just one click.
- todo…
Start your work …
Now you can also use the Avastar Workflows. If you are not familiar with the workflows, then please take a look at the Workflow Panel document. It will help you to get along with Avastar.
Tip:
- Use the Skin&Weight preset to work on your weight maps
- use Pose&Animate preset to test your mesh attachments
and to create poses and animations
Please let us know if this worked for you and if we can do any improvement on the documentation or on how Avastar works together with Developer kits.

