
What you have done so far
- You have created a custom mesh attachment or a custom character.
- You have added an Avastar Rig to your Scene.
- You have adjusted your custom mesh size and shape to the Avastar Rig.
- Your Custom Mesh is not yet bound to the Rig.
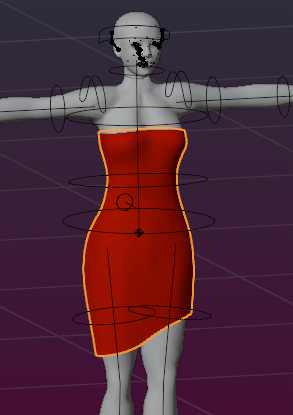
Now you can pose your Armature, but your custom mesh stays still and won’t move along with your pose. We will change this now…
What you will do next
- Specify from where to take the initial weight maps
- Bind the mesh to the Rig
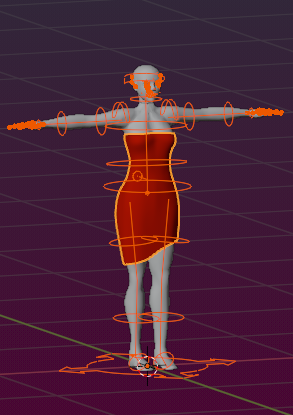
To get Started you must select the Armature (to which you want to bind the mesh model) and your Mesh model.
Note: The order of your selecting the objects is not important.
From where to take the initial Weight Maps
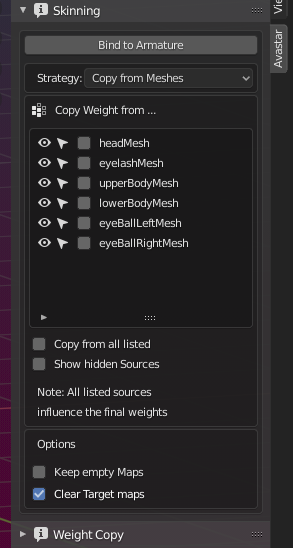
Now open the Skinning panel. There you find a section similar to the one shown in the picture. Here you can
- Specify the Copy Strategy (how to transfer the weights)…
- and the “weight Sources” (from where to takes initial weight Maps)
- Finally call the Bind to Armature function to do the binding.
Note: If you do not see this section then either your Rig is not an Avastar Rig, or you have not selected both the Rig and the mesh together.
For Experts: Remind that you must select the Mesh in Object Mode, while you can select the Armature either in Object Mode or in Pose Mode.
The Copy Strategy
We offer 4 Copy Strategies:
- Preserve Weights: You use this strategy if your mesh already contains weight maps (vertex groups having the same name as corresponding bones in the armature). Avastar will then just take those weight maps unmodified.
- Create Empty Groups: Add weightmaps (vertex groups) to your mesh, one for each bone. However there is no vertex assigned to any of the added weightmaps.
- Automatic from Bones: Calculate the weightmaps from the Bone heat distribution. this generates reasonable weights on the fly.
- Copy from meshes: Get weightmaps from other meshes already rigged to the armatures (this is the default setting)

You probably need to experiment a bit to find which choice is best for your particular situation. In the toggle box below you find some basic explanation and a decision guide:
Details about Bind to Armature
- Preserve Weights, if you want to keep the Mesh weights as they are. You do this when your mesh already has weights. this can happen if your mesh is a copy, or it is reused from another project, or it has been weighted within another software.
- Create Empty Groups: If you want to create the weight maps all on your own, then this is the option for you. Avastar will then create weight groups (one for each bone) but keep all newly created groups empty. So you can fill the groups with weights how ever it is convenient for you.
- Copy from meshes, if you want to copy from the other meshes which are bound to the same armature. You do this when your new meshes are very similar to already existing meshes for which you already have approved weights and which are already bound to the Rig. For example you have created a weight template character for your projects, or your meshes are very similar to parts of the Avastar character. Then you want to copy the weights from your source meshes.
- Automatic from Bones, if you want to Automatic Weight from Bones algorithm (see Blender Manual: Groups_and_Parenting). This gives very smooth results in general. However the Bone Heat Algorithm tends to spread the weighting too far away from the Joints. Which may make the custom mesh look a pit puffy when you add volume to the mesh (fat, width, belly, etc…)
Important: Regardless of which choice you take here, you almost always have to carefully check your animation and fix weighting issues manually.
What if the options do not match your needs?
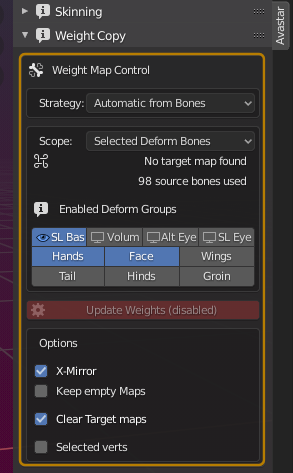
The Weight copy during binding gives you only a subset of options. Avastar has many more possibilities to copy and even generate weights for you. You will find these options in the Weight Copy Panel which becomes available once your mesh is bound to the rig (see picture).
So to use the Weight Copy panel, you could first Bind with Preserve Weights, then continue in the Weight Copy panel.
Note: The Weight Copy Panel is empty if your mesh is not rigged!
Related reference guides:
What to do when binding fails?
Issues with Automatic from Bones
When you decide to get your weights Automatic from Bones, then sometimes Blender reports back that it could not calculate weights for one or more vertices. This is typically caused either by meshes which contain 2 or more separated sub meshes (a prominent example: Teeth) or by malformed meshes. You then need to check:
- Is your mesh made of multiple sub meshes?
- Do you have intersecting faces in your Mesh?
- Do you have duplicate vertices in your mesh?
Often this problem appears when you Join separate Meshes into one mesh before you rig them. In that case you better rig the meshes first and join them later when the weighting is finished..
Issue with copy from meshes
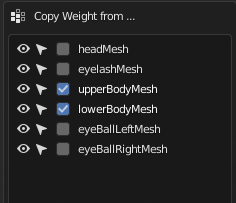
There is actually only one situation where copy from meshes fails. that is: If there are no meshes to copy from in the rig. So you have to make sure that at least one source mesh is selected from where weights shall be taken, as shown in the picture.
Now your mesh is bound to the Rig. Go ahead with the next chapter: