Note: The video was made with an older version of Avastar, so the user interface has changed. However, this document has been updated to Avastar 3.00.
Prepare Attachment for Binding
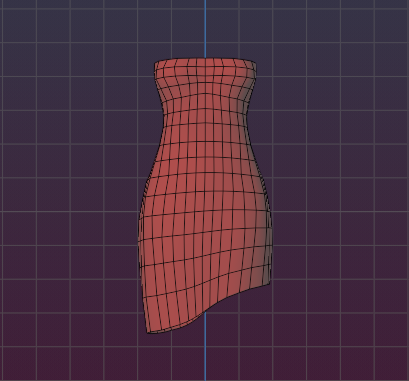
I assume you got some simple dress , skirt or whatever in your blender scene. The item does not need to be weighted!
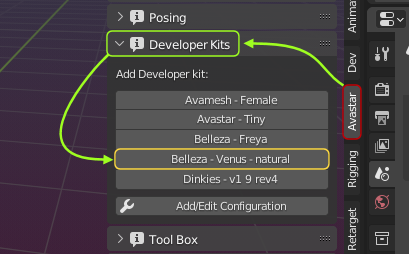
I further assume you have configured your developer kit by using the Developer kit Manager. In this tutorial i add a Belleza Venus Natural character to the scene just for demonstration.
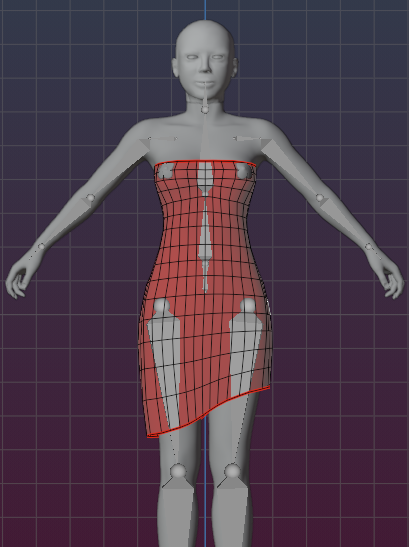
Now your scene should contain:
- Your Mesh item.
- A copy of the Belleza Venus mesh using the Avastar Rig.
Remember: Your Mesh item is not yet bound to the Rig! This tutorial is all about how to do just that.
Add geometry
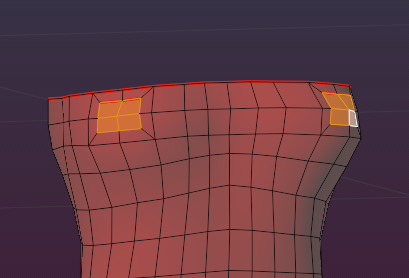
I add some more faces to the dress where it covers the nipples:
- Enable face select mode.
- Select the faces around the nipples.
- “i” (for inset) then adjust the inset size.
Please do not yet adjust the faces. We will do this in a moment (see below)
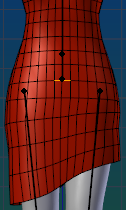
Make the upper part of the dress symmetric. This helps us later to save some editing time:
- Enable vertex select mode.
- Select the upper symmetric part of the dress (See first image below).
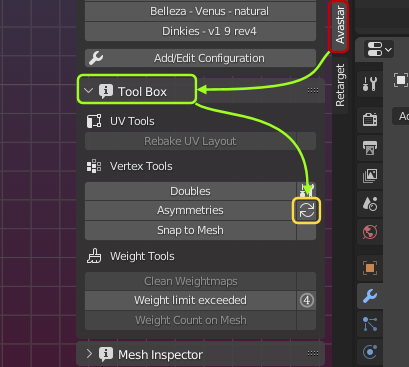
- open the AvastarTools box (in the tool shelf).
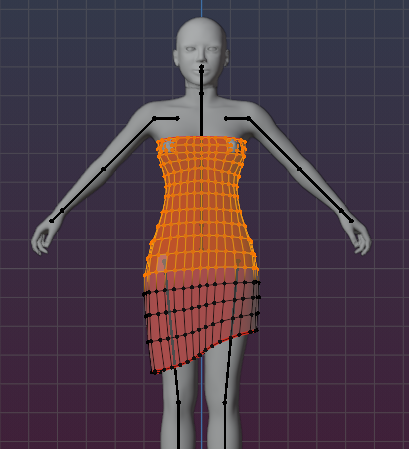
- Snap selected vertex pairs to their mirrored locations as shown in the image aside.(1)
(1) This is a blender function! You can also call it from the 3D View’s footer menu:
Mesh - Snap to Symmetry
Note: The symmetry function does neither remove nor add vertices to the mesh. It also has an Operator redo panel where you can adjust the settings.
Adjustments
- Enable X-Axis symmetry
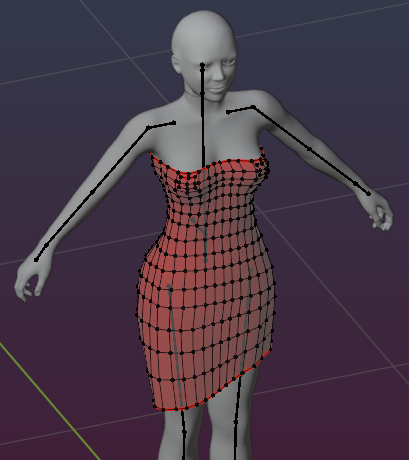
Now you can adjust the dress to the character shape.
Note: If the Mesh is symmetric (we did that above) and if you have enabled x-axis symmetry (we enabled that above), now you only need to adjust one side. The other side of the upper part of the dress follows automatically.
Binding
Bind the Mesh to the Armature should now be a matter of a few clicks only:
- Switch to Mesh Object mode
- Select the Mesh and the Armature
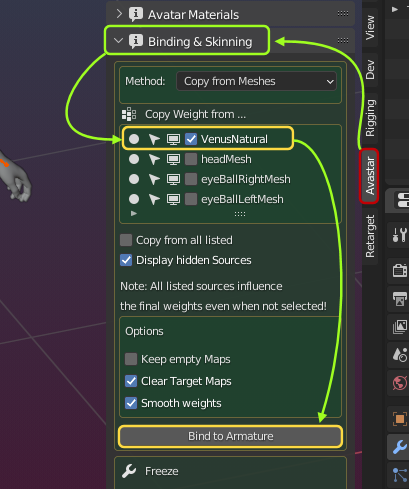
- Use the Copy from Meshes option to get the weights from the developer kit.
- Select from which meshes you want to get the weights
- Make sure the option Clear Targhet Maps is enabled
- (optinally) enable smooth weights. Smoothing often gives better results.
Now you are ready to Bind to Armature
Check
Check if mesh is fit for animation
- Make sure you have the mesh selected.
- Make sure your timeline is on frame 0.
- Open the Avastar Settings panel.
- Select the Skin&Weight workflow preset.
- Select the Armature from within the Outliner.
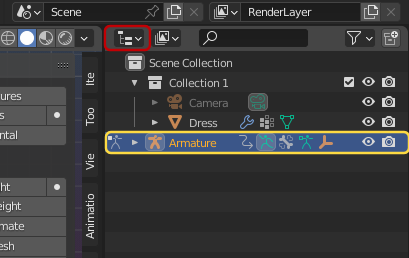
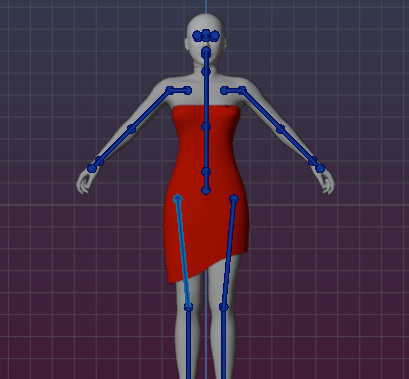
The Armature should be in Pose Mode now and you should see the blue/purple deform bones
- select all bones.
- “i” – Rotation (on frame 0).
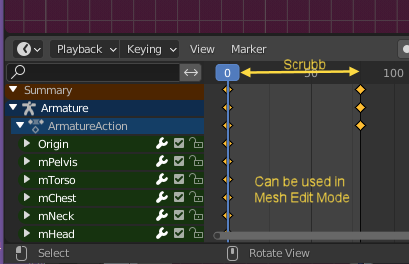
- move timeline to frame 80.
- rotate the hips by +- 40 degree.
- select all bones.
- “i” rotation on frame 80.
Now you have defined a simple animation. This animation can play also in Edit Mode. Hence you can use it in mesh edit mode by scrubbing along the timeline!
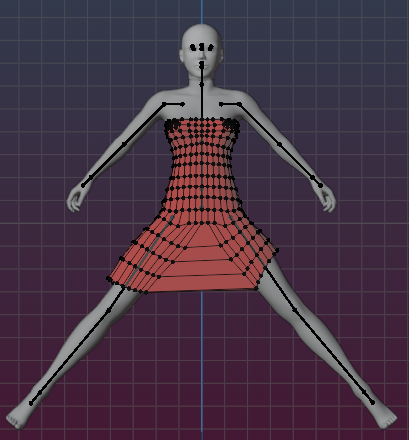
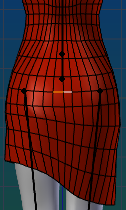
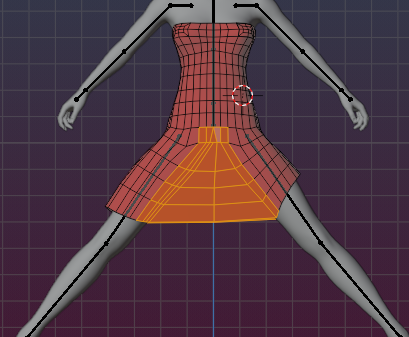
While we scrub along the timeline, we can see the dress gets stretched a lot when the legs are rotated. This is also true when the character makes a big step forward instead of spreading the legs sidewards as shown in the image.
We have to fix this by adding extra loops and adjust the weight maps!
Fix stretching
Add extra topology to fix the over stretch
- Set timeline to frame 0.
- select the dress in edit mode.
- select 2 center edges on the stomach.
- select the related edges on the back as well.
- Hide the selected edges (press ‘h’).
on the stomach side
on the back side
Add edge loops
- Use CTRL-R to add 2 edge loops on the backside and 2 edge loops on the front side like shown in the image.
- Unhide the hidden edges (press ALT-h).
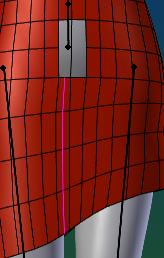
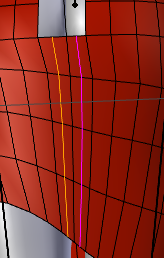
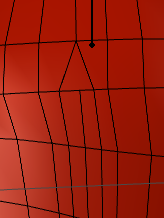
- Use “k” and cut edge loops as shown in the image.
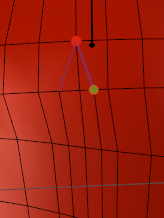
- Optional: Dissolve the vertical edges in the center see 2nd image.
The goal is to only create Quads (faces with 4 edges) and Tris (faces with 4 edges)
- Select the front and back part in mesh edit mode.
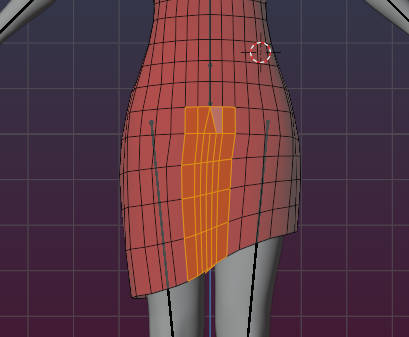
- Move on the timeline to Frame 80 to see the stretched mesh.
Obviously we still need to do a bit more to get a smoother distribution of the edge loops…
Smooth Weights
- From the 3D Viewport bar…
- Mesh …
- weights …
- Smooth
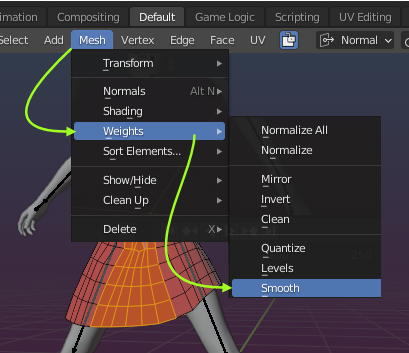
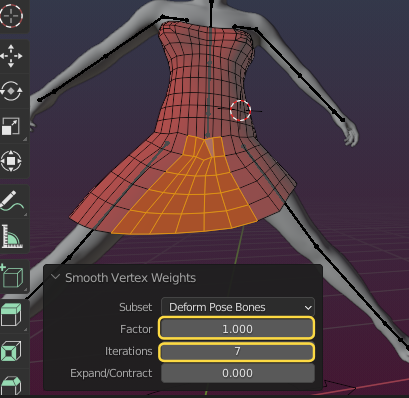
- then adjust the settings in the operator redo panel:
- Factor set to 1.0
- Iterations set to 7
Of course you need to play with the numbers until you get a smooth result.
The final result will look similar to what you see in the image aside.
Export & Enjoy
Export your mesh from Blender/Avastar
- Select the dress in Object mode.
- File – Export – Collada (Avastar).
- Select your export file name.
- Export.
Take care that the advanced option use bind pose is enabled. You need to export with this option because the Belleza kit comes in an A pose and it should be used with the bind pose option enabled (See the Developer kit manager documentation for further explanations)
Import your Mesh to SL:
- Take care that you import with Weights.
- Important: Do not import with joints!
Wear your dress together with the Belleza Body. It should fit well and work nicely with standard SL animations.