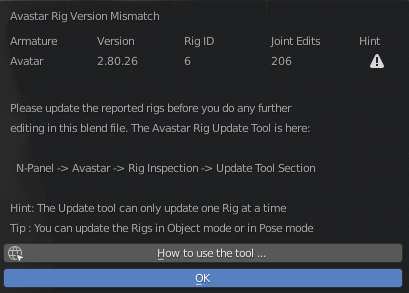
When you open a Blend file that was made with an older version of Avastar, then you often get a warning note about Rig Version Mismatch. This indicates that the rig has an outdated setup and needs treatment.
If your Rig has been setup in a clean way, then all you need to do is to open the Rig Inspector panel, then Migrate your rig. basically this is a 2 click task.
This document is for when your rig was not setup in a clean way and the easy migration does not work as expected. Here you learn step by step how to fix your issues.
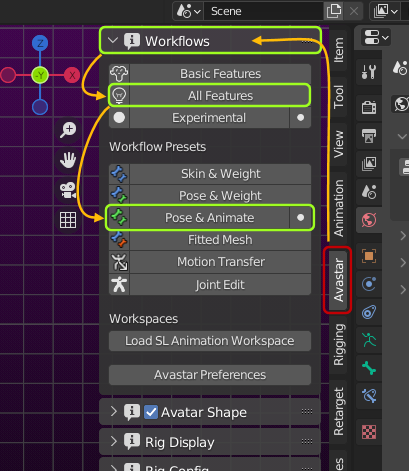
Initial Step: Enable All Features
Please enable All Avastar Features even when it appears to already been enabled. You might notice a couple of extra buttons in various Panels.
Please consider to switch back to Basic features once you are done with cleaning up your Rig.
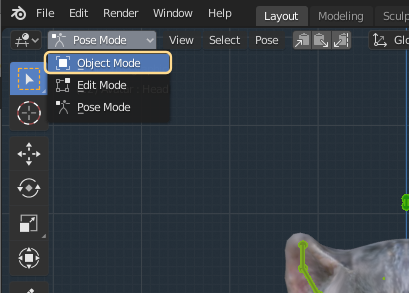
Preparation: Select the Armature in Object mode
- Make sure only the Armature is selected!
- Make sure the Armature is in Object mode
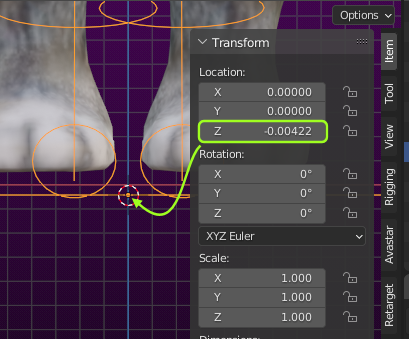
Adjust the Armature location
It is strongly recommended to have the Armature at the center of the scene. Although the armature can be anywhere in the scene it makes your life much easier to move it to <0,0,0> (Center of the scene) in Object mode
In the image you see the armature has got a very small offset. This could have been a mistake or a left over from some very early version of Avastar. in this case you would just move the armature Z to 0 (see image).
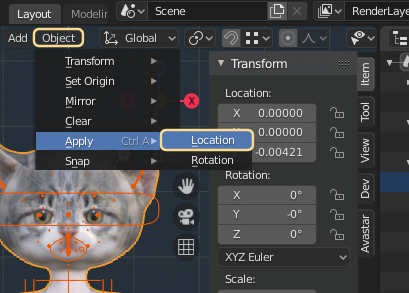
While this is normally not an issue for Avastar, we still recommend to keep the pivots of all bound meshes at the same location as the Armature. So you need to check the bound meshes as well:
- Select all Meshes which are bound to the Armature
- Then Object -> Apply – >Location
This step will move all mesh pivots to the center of the scene.
Tip: If you are in doubt about how to select all meshes, then you can Apply location separately for each mesh and for the Armature.
Important: If you keep the locations at arbitrary values, then older versions of Avastar sometimes let the meshes jump to unexpected positions. So, please double check that the Location of all meshes and the Armature are at the Scene Origin.
Remove joint offsets
This is a somewhat radical action, but it might help with broken joint edit data. However normally this action does no real harm to your model when done correctly. You do this in Armature edit mode, but please take care:
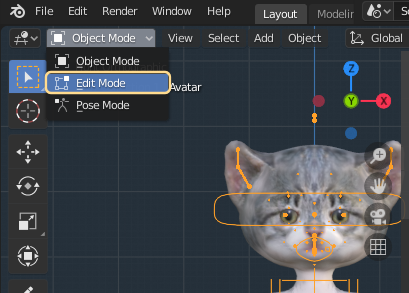
- Make sure that only the Armature is selected!
- Now move to Edit mode
Note: It does not matter which bones you currently see. You only must be sure to have the armature in edit mode.
- Open the Avastar Posing Panel
- Locate the Button “Remove Joint Edits”
- Make sure the adjacent snowflake icon is enabled
- Then click on the button
If the Remove Joint edits button does not appear, then:
- you have not enabled all features (See Workflow panel)
- or you are not not in Armature edit mode
- or you have disabled the Shape Sliders (See Avatar Shape Panel)
Note: If you forget to enable the snow flake icon, then your rig will return to the SL Default rig. You do not want that!

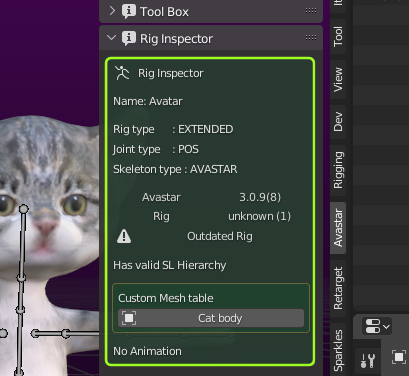
Rig inspection
In the Armature Info section you can see what Avastar found out about your Rig. However you can ignore this for now. Please scroll down until you get to the …
Set the alignment Options
If you see no Alignment options, then do not worry, then your rig has no alignment issues. You can advance to the next step below. Otherwise…
- Make sure the alignment option Origin is set to ‘Armature’ (see below)
- Then click the double arrow
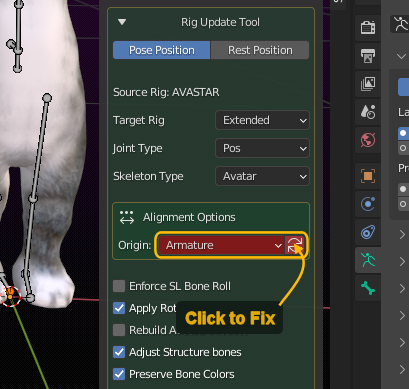
Note: We want that the root bone and the Armature Origin are at the same location. It is your decision if you want to move the Armature Origin to the root bone or the root bone to the Armature Origin.
Update the Rig
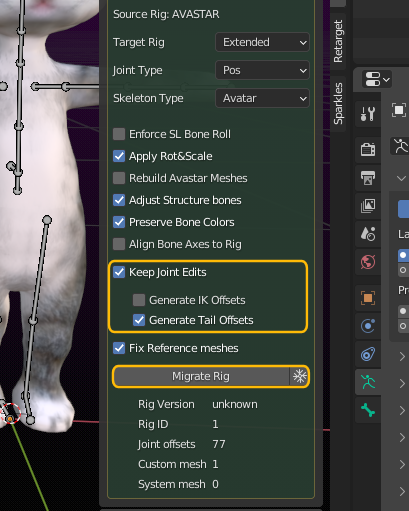
- Scroll down to the Update tool
- Double check that Keep Joint Edits is enabled(1). This option tells Avastar to recreate the previously removed Joint Edits (see further up)
- Keep all other settings at their defaults (see below)
- Click Update Rig
(1): Important If you do not see the Check for Joint Edits Option, then you have not removed the joint offsets in the previous step. In that case you must go back further up and make sure you have removed the joint offsets before you get back here and proceed!
If your rig jumps you have not aligned the Origin to the root bone, or you have not applied location to the rig or the meshes.
If your rig is OK but your meshes jump around, then revert the step (CTRL-Z) and enable the snowflake icon (see image) and try again.
Tip: Sometimes you must disable the Option Apply Rot&Scale to get the Rig upgraded correctly. In general you may need to try a few settings to get this step done. If you see no apparent issues after pressing the Upgrade button, then please move on and test if the sliders still work (Avatar Shape panel).
Test your upgrade Rig in Pose mode
There is nothing more to say here. Just Test it. If it works then all is well. If it does not work, then check if you made a mistake in one of the steps above.
Tip: If you have animations for your model, then also try to run them and see if the rig plays well.
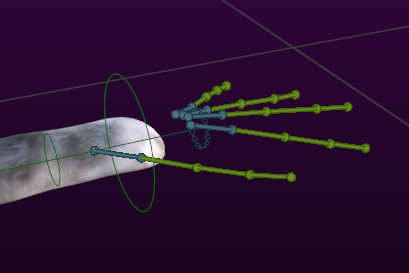
A note about updating the Hand rig
You may notice that the hand structure bone heads get moved to odd places after upgrading your rig. This is so because the hand structure has changed significantly. You may need to edit the bone locations once you have upgraded the rig.
Please take a look at the Default Avastar Skeleton to see how we changed the rig in that area. You possibly may want to adjust your rig similar to how we have set up our Hand rig.
A note about missing bones
Sometimes bones might have been removed from the original rig. this might have been done on purpose or unintentionally. However, Avastar currently recreates all bones when migrating a Rig to a newer version. Since there is no initial information about where missing bones are located, Avastar can also not predict where to place them. So it moves them to their original locations.
Hence you must take cleanup actions and either
- remove the bones again
- or place them to correct locations
- or just hide and ignore them