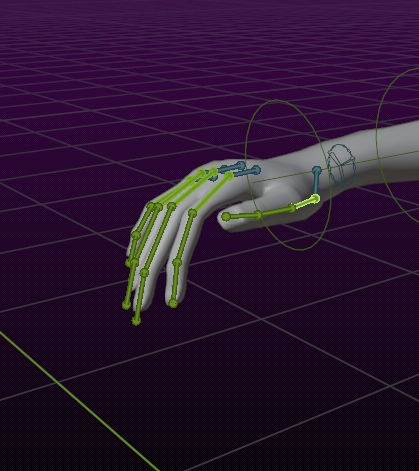
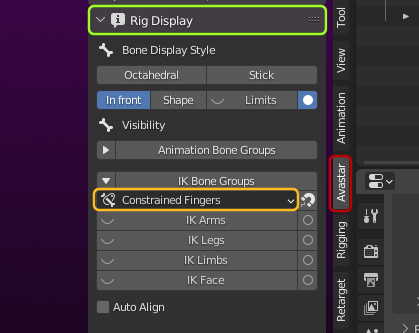
The Avastar Finger bones provide two animation methods with different advantages. You either can select the Constrained Fingers (default) in the rig display panel. This allows you to setup realistic hand poses in a very short time with just a few clicks.
But you can not create every possible pose with the Constrained Fingers.
Or you can select the Simple Fingers which gives you more possibilities to pose each finger bone individually with no restriction, but you also can mess up the pose easily.
Most important: Switching between Constrained Fingers and Simple Fingers needs some careful adjustments (see further down on this page).
Lets get into some more detail…

Constrained Fingers
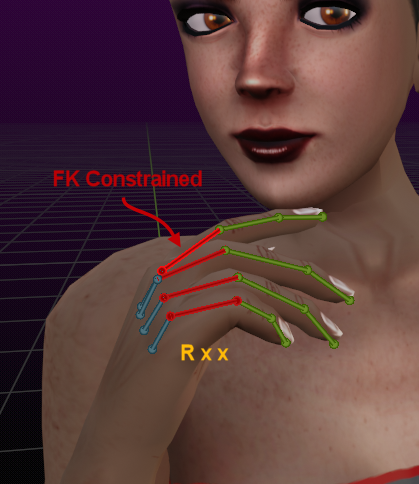
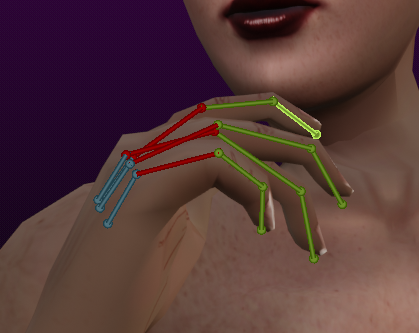
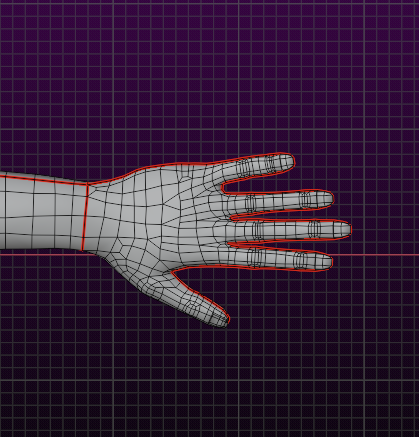
With the Constrained Fingers you typically select only the first bones of the fingers. The bones are marked in red in the image for better recognition, but actually they are also green!The specialty here is: When you rotate those bones along the local X axis (by typing ‘R’ for rotate, followed by 2 ‘x’ for local x axis) then the child fingers will automatically curl up following the rotations of the first finger bones.Note: The rig is constructed so that when you select all first fingers (and first thumb bones) then R xx will open and close the hand in a reasonable way while you move the mouse.
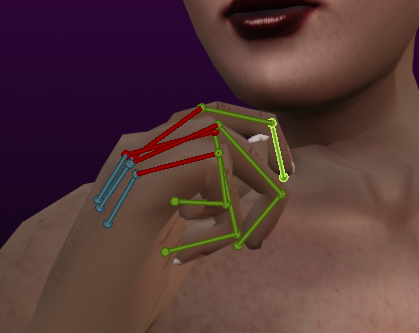
Of course you can rotate each finger to a different angle to place the hands into a variety of poses. You also can select the second and third fingers and rotate them as well, either all together or one by one. The Constrained Fingers are always animated into realistic gestures.
Simple Fingers
If you want to create special poses which can not be created with the Constrained Fingers, then you can use the Simple Fingers instead. Here you will pose each finger bone individually.
This mode allows you to place each bone of each finger in exactly the way you want. However there is another caveat here…
Switching from Constrained Fingers to Simple Fingers
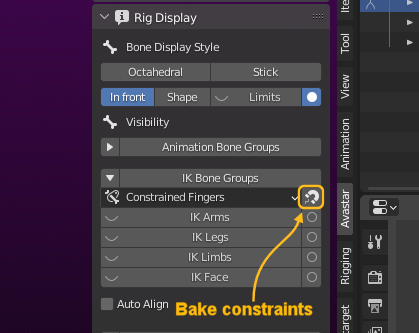
You can perform a switch from constrained fingers to simple fingers easily:When you have selected the Constrained Fingers setting, then you find a little magnet icon on the right side. When you click on this icon, then the finger pose is baked into the Finger bones.
However this operation comes with an ugly caveat…
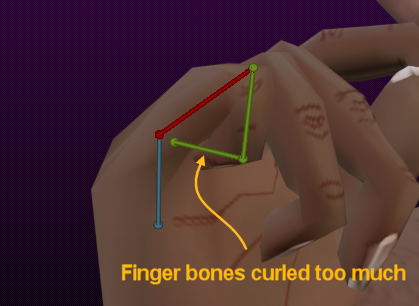
After baking all fingers get additional curling and your gesture seems to be destroyed…
The reason for this extra curl is: After you baked the Constraints into the bones, then you still have the constraints active. So you get the rotations applied twice, once from the still active constraints, and once from the baked rotations.
However, as soon as you switch from FK Constrained fingers to FK Simple fingers, the extra rotation from the constraints goes away and the gesture is correct again. But now you can continue with individual bone gesture adjustments as you like. But from now on…
Never mix Constrained Fingers and Simple Fingers!
just as with the baking of constrained fingers: When you rotate the fingers individually and then switch from Simple Fingers to Constrained Fingers then the constraints will again add additional rotations.
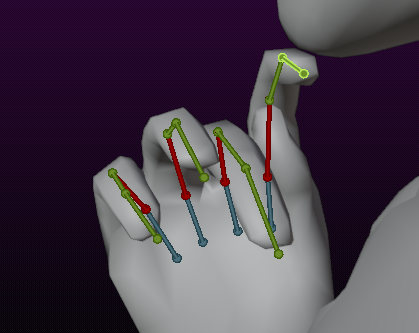
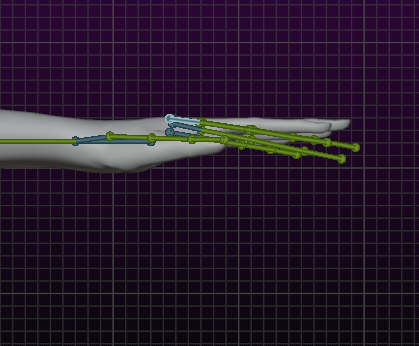
In the image aside i tried to visualize what happens. Here the finger bones get rotated much more than anticipated as soon as you switch to Constrained Fingers.
Unfortunately this behavior can not be easily fixed. Hence you better keep with Simple Fingers once you have decided to follow that path.
Once more because it is so important:
Sometimes you do not see that your finger rotations actually are getting too large until you store the blend file and reload it. The reason for this is that the auto FK is not always applied immediately on top of the already existing rotations when you switch the mode. Because of this we strongly recommend that you either use the Constrained Fingers or the Simple Fingers and never mix both modes.
Adjusting the Hand Rig to Custom meshes
In this chapter we will focus on custom hands. I am using a slightly modified version of the avamesh model here. If you want to follow this document, then you can prepare your scene as follows:
- Open the Avastar Tab
- Open the Devkit Manager panel
- click on Avamesh – female
- Select the mesh
- open the Skinning Panel
- Unbind from Armature
- Remove the armature and all its children
Now you have the starting model.
Adjust the hand rig
- Add a new Avastar (use the 3 – Skeleton )
- Make sure the rig is selected in Pose mode
- Open the Rig Display panel
- Make hands and arms visible
- Set Hand Constraints to Simple Fingers
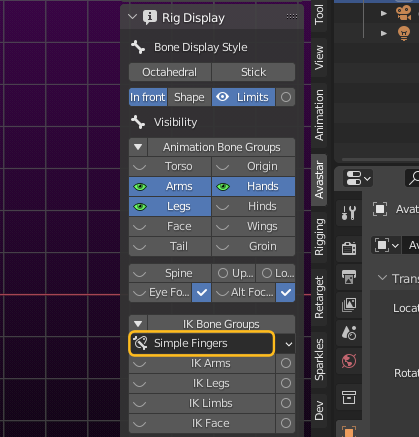
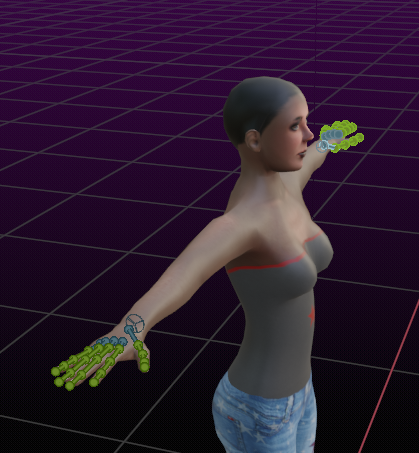
- Now adjust the rig to one hand. And make sure you work on the green animation bones!
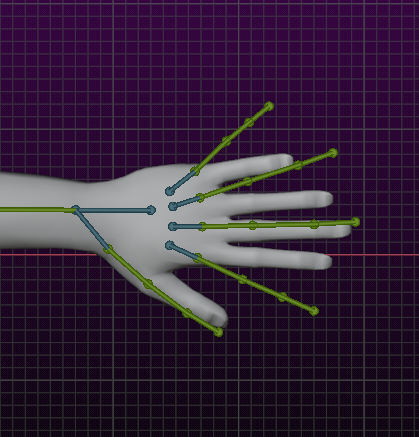
- Begin in top view
- Only use rotation, do not(!) use translation or scale.
- You may rotate the steel blue structure bones as well.
After some tweaking …
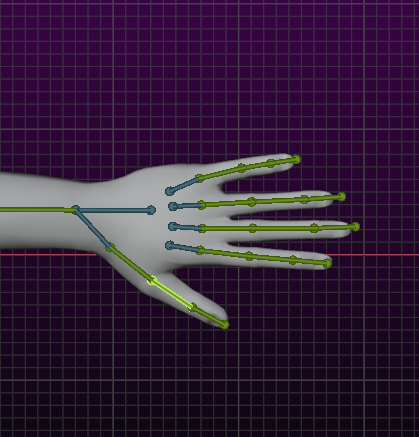
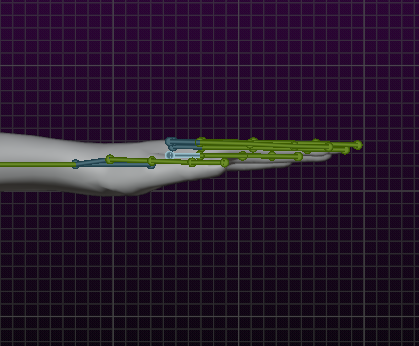
Switch to side view and adjust the fingers again. For the thumb we later need to do a bit of special tweaking…
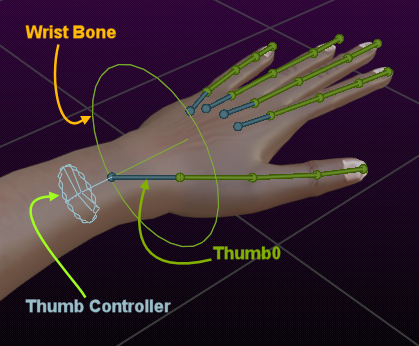
Now all fingers are correct, but the thumbs still need a bit of tweaking. For this we need to know about 2 special control bones. …
Here i have enabled Bone shapes. This may help to understand how the bones operate:
- The Thumb Controller rotates the thumb
around the Wrist bone (keyboard: “R” ) - The Thumb0 controls the angle between
Thumb0 and Wrist bone (keyboard: “R”)
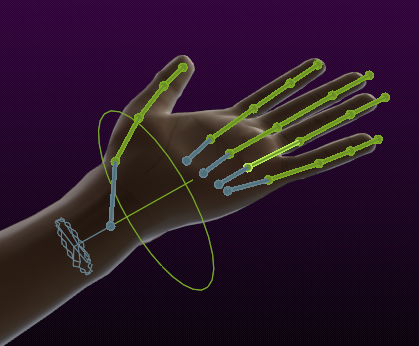
Finally the hand rig is adjusted for one side of the character.
- Select all adjusted hand bones (rubber band select, see below)
- Copy them to the pose buffer
- Mirror paste them to the other side
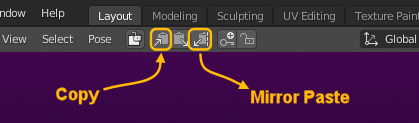
Rubber Band Select: You can select the entire hand by using ‘B’ (enables rubber band selector) and then drag the rubber band around the bones you want to select. When you release the mouse button, then all bones inside the rubber band are selected.
Next we will make this our new Default Rig!
Create the new Restpose
Remind: Until now we only have posed the Armature to match the Hand meshes, but the meshes are not yet bound to the Rig. Also (because it is posed) the armature no longer is in its Rest pose. So lets first define the current pose as our new Rest Pose:
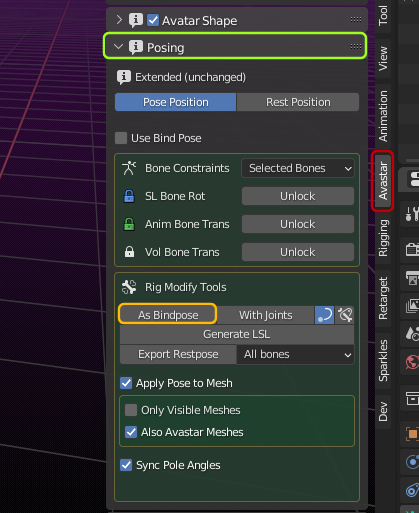
- Select the Armature in Pose mode
- Open the Posing Panel
- In the Rig Modify Tools section:
Click on “As Bindpose”
Hint: Since we have no meshes assigned yet the Apply Pose to Mesh is not relevant. Just keep the defaults, it does not hurt.
Now we have defined a new Restpose and we can use this pose all the time from now on. But note: This is a bind pose.
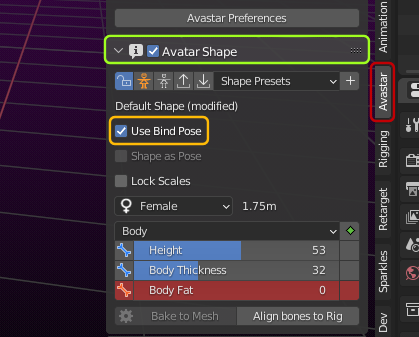
You can verify that your Rig is in Bind pose:
- Open the Avatar Shape panel
- Check that the Use bind Pose option is enabled
Bind the Mesh
Remind: By now we have adjusted the rest pose of the Rig to match the hands. But still the hands are not yet bound. This is an opportunity to show you a nice little trick. We are only interested in getting the weights for the hands. We want to use weight from Bones, but we also want to only weight the hands and keep the rest of the mesh untouched. Here is how it goes:
- Select the armature (in Object mode)
- SHIFT Select the mesh (in Object mode)
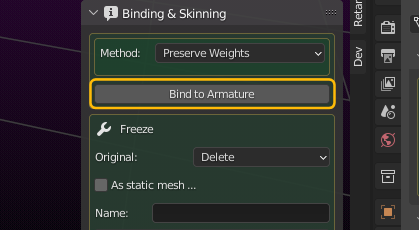
- Open the Binding&Skinning Panel
- Set the Method: Preserve Weights
- Bind to Armature
Now the mesh is bound, but it still has only those weight maps which it hand right from the begin (so normally/typically it has no weight maps at all). However, now we want to get weight maps generated only for the hands:
- Select the Armature
- SHIFT Select the Mesh in Object mode
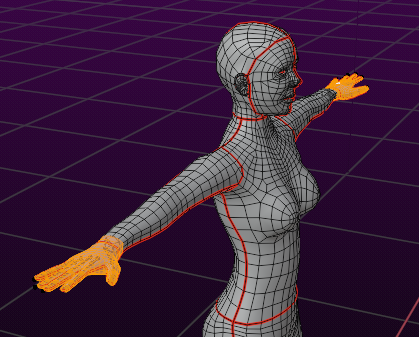
- Then go to Edit mode
- And select the hand vertices
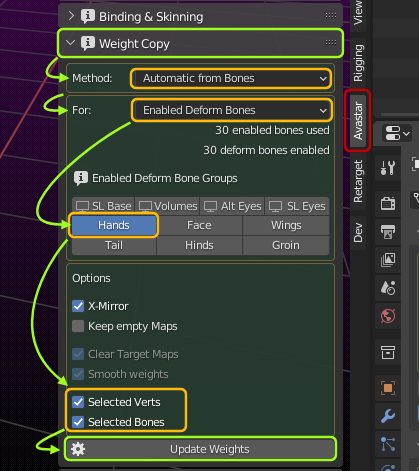
- Open the Weight Copy Panel
- Set the options:
- Automatic from Bones
- Enabled Deform Bones
- Enable the Hands deform group
- Disable X-Mirror
- Enable Selected Verts
- Enable Selected Bones
- Now Update Weights
Ok, the last step was a bit tedious, but we actually got weight maps exactly for what we wanted to get weight maps, not more not less. So… Mischief accomplished: Custom Hands are weighted and rigged.
Important: Please make sure that before you test your animation set your rig to Pose&Animate mode and switch from Simple Fingers to Constrained Fingers.
Now you can check if the weights have been generated as expected. But please be prepared that you might need to tweak parts of the mesh a bit. that is normal!