Before Install
Q: What do i need to get started ?
- Get Blender from blender.org
- Make yourself familiar with Blender!
- Purchase Avastar from the JASS-shop
- or Purchase Avastar via Paypal
Disclaimer...
Q: I got installation errors. What next ?
When the update fails
When you update an Add-on in Blender, then normally the following steps are performed:
- The installer disables the current version of the Add-on.
- The disabled Add-on is removed from the system (deleted from disk).
- The new Add-on version is installed.
- You now can enable the new version manually
However sometimes you can not enable the addon after a new version is installed. this can happen because the first step (disabling the Add-on) does not disable all of the software. So it may happen that the old Add-on leaves some traces in the running Blender, which may result in subsequent errors when you try to enable the new Addon Version.
When the above situation happens to you, then please go ahead as follows:
Step 1: Remove traces
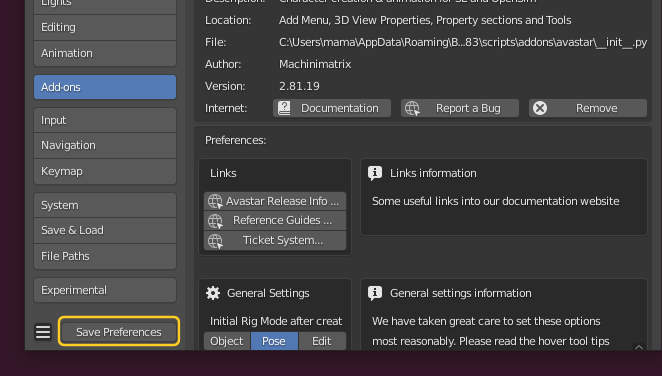
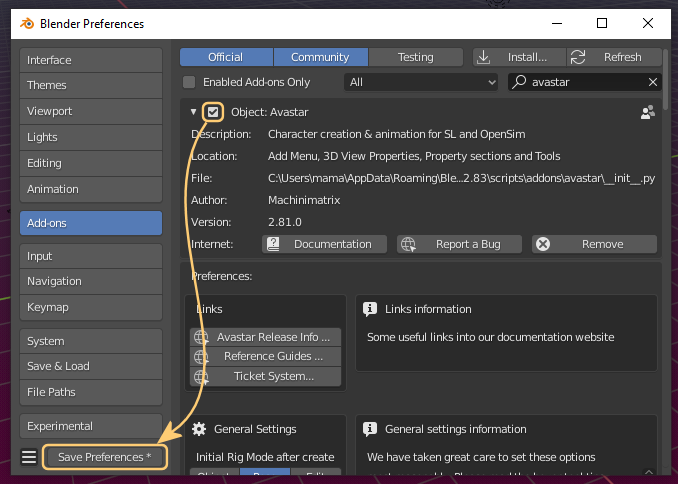
- Save Preferences at the bottom of the User Preferences Panel
- Then close Blender
Note: It is important that you really close blender.
Just opening a new scene is not enough! - Open Blender and open the User preferences again
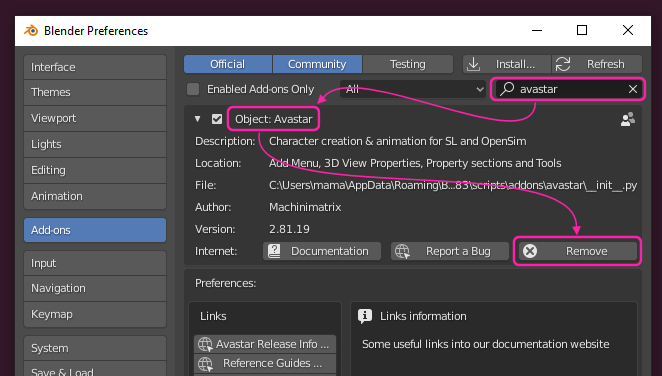
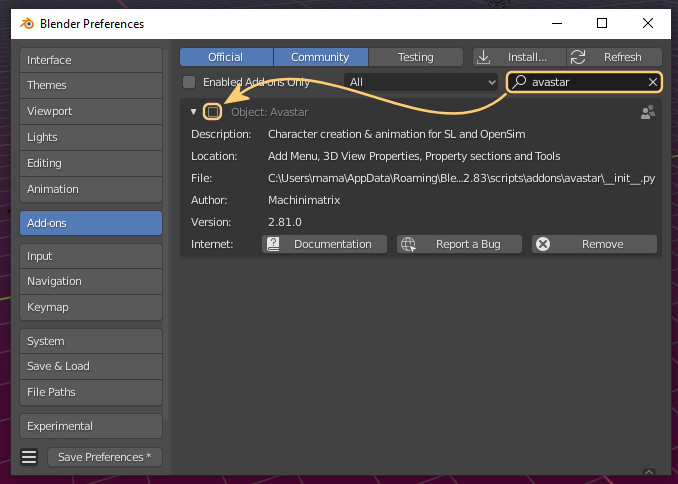
- Type “Avastar” into the Add-on search field to locate your Add-on
- Then Enable the Add-on
In most cases this is all that you need to do. The Add-on will enable without errors.
If the above procedure does not work for you, then you need to put blender into a clean state as follows:
Step 2: Remove Avastar
Step 3: Save User Settings
Step 4: Restart Blender and Install the new Avastar Add-on
Go ahead and install your Addon
About this Document...
What does Avastar provide?
What does this Document provide?
abstract: I show you how you can install Avastar on or newer. We provide a short video which shows the installation process step by step.
We expect that you have basic knowledge about Blender.
Download
Download your Addon
Q: Where is my download ?
During your purchase you have received a download link.
You received the Download link on the local Chat window.
You received the download link via E-mail.
If you are a registered user …
then please login now. Then open the download link that you got from us. You will be automatically forwarded to your product download page and your new product will be listed there.
If you are not a registered user, …
then you still can open the given download link. You will then be redirected to a temporary download page from where you can download the software.
However, the download link will become invalid 8 days after purchase.
Q: Where does my software run?
The Avastar Add-on runs wherever Blender runs. You only have to ensure that Blender is installed properly. Then the Add-on will be working as well.
Q: Expand Add-on or keep the zip file?
Blender Add-ons are always installed in zip format. All attempts to install the unzipped files will fail. So to ensure that your computer does not unzip the file after download, please review your browser settings.
For Mac Users:
If your Browser automatically expands the Zip file during download, then please do this:
- Open the safari preferences
- On the General tab:
- Uncheck “Open safe files after downloading”
Q: Is there an Archive of older Releases?
Yes, we keep older releases available for the case where you find something broken in the newest product release. The older releases are collected in a the_archive sub folder within your Download Folder.
Q: What does the Avastar Filename say?
We are often asked why the zip file is named as it is named. There is a reason. Here is the explanation:
avastar-M-m-rrrr_blender-B-bb.zip
- avastar: the product name
- M: The major product release
- m: The minor product release
- rrrr: The product revision number
- B-bb: The earliest version of blender supported by this particular Add-on version
Usually you are safe to download the zip file with the highest available product revision number.
Only if you encounter a bug in Avastar you should consider to switch back to an older Avastar release by installing that over your current release. There is no need to uninstall first!
Finally install your Add-on as explained below
Install
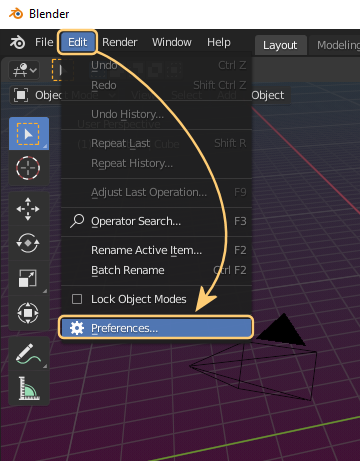
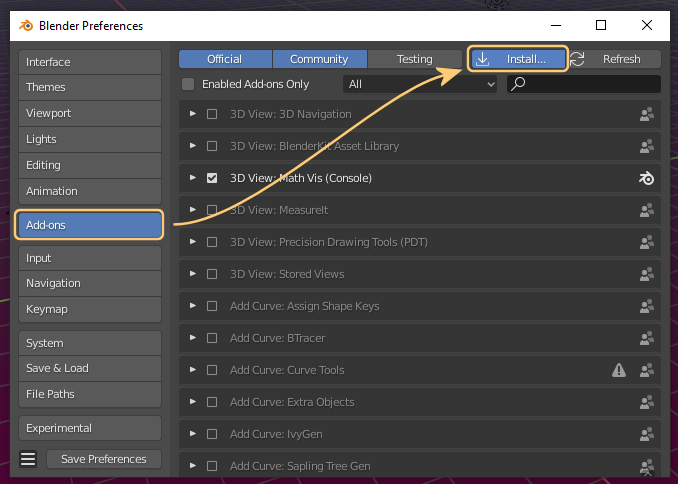
We expect that you have successfully installed Blender and Blender works properly. Now start Blender and…
- A file selector opens.
- Navigate to where you have stored the avastar-m-vv-rr_blender-B-bb.zip file
- Select the zip file
- Finally click “Install Add-on”
- Back in the Addon Tab type “avastar” into the search field As you type you will see that the list of displayed Add-Ons shrinks and quickly you can find the Avastar-module
- Enable the module
- and finally Save Preferences
- Done!
Some details ...
- If the Avastar Add-on Panel is collapsed, then please expand it now to see the Add-on details. Please take a closer look! You find some important information here.
- To enable the Add-on you must check the checkmark at the top left corner of the Avastar Panel
- In the last step you Save User Settings as your new default settings
Verify
You can verify that Avastar has been successfully installed by navigating to the new Avastar menu entry in the Add section. Please ensure that you are in Object mode as that is the only mode from where you can add new Avastar characters. When you click on Avastar, a new Avastar mesh character will open up for you. Hint: The grey cube in the Center of the Screen can be removed. It is not needed for our purpose. If you do not yet know how to remove objects, please visit our Avastar Newbie page, then return here. 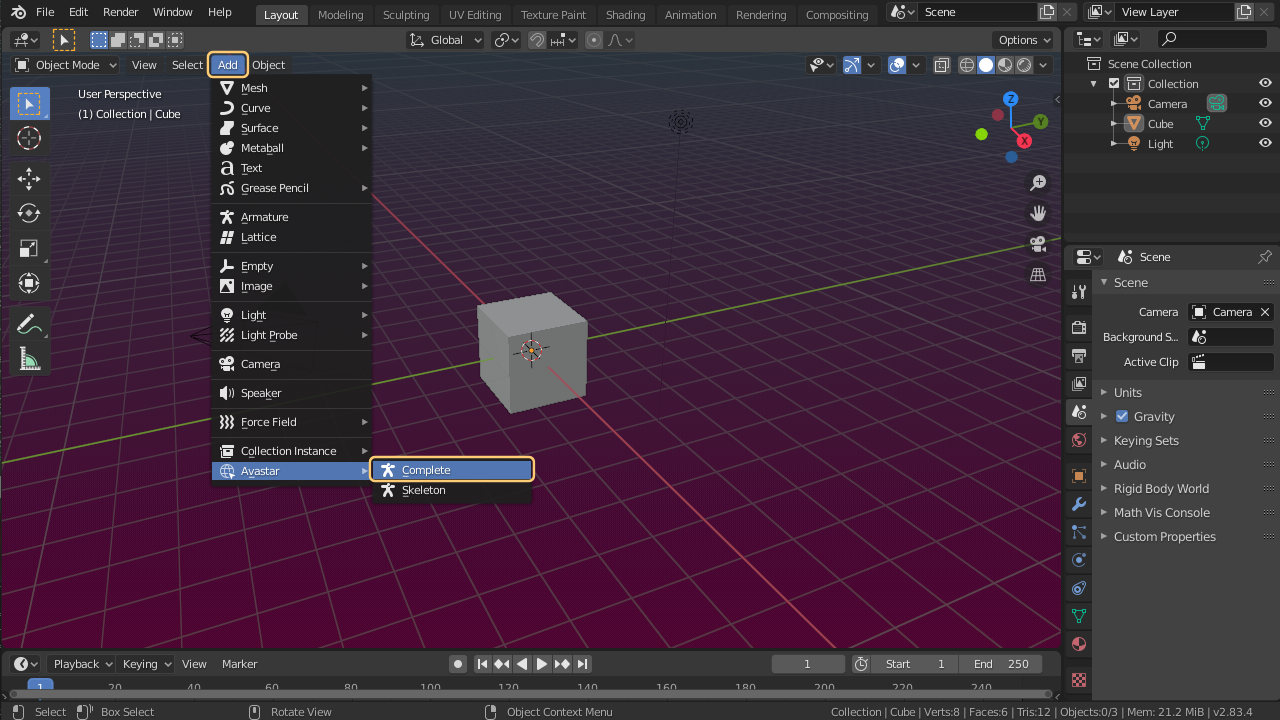
Welcome to Avastar
Where to go next ?

