Preparations
How to add a new Avastar Character
In Blender
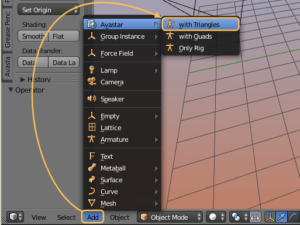
Navigate to:
add -> Avastar -> With Triangles
The Avastar character is based on the
SL Avatar definition files
from Linden Lab.
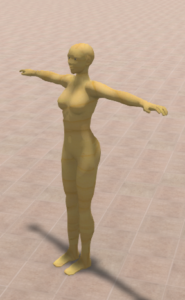
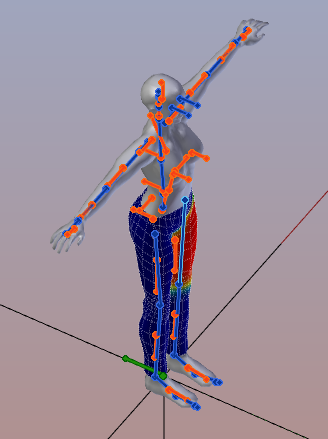
After a short time (typically 2-4 secs) a new Avastar character is created in the 3D View and at the current 3D cursor location .
Back in Second Life
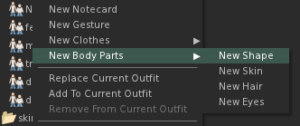
When you use Avastar’s default shape then you also need to test your work with a fresh created shape in SL.
What else you should know
- New Avastar characters can only be created when you are in Object Mode!
- A new character will be placed at the current 3D Cursor location.
- You can hide (‘h’) or remove (‘x’) not needed parts of the Avatar meshes (like the skirt or the hair for example) without breaking the tools.
- You can create as many characters as you like aside each other and so you can create multi-character animations.
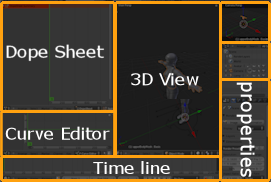
Note: Of course you can switch to whichever screen you prefer instead. But note that you will want access to the Timeline, the 3D View, the Dope Sheet and the Properties Editor.
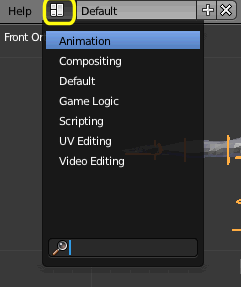
Details about the Animation environment
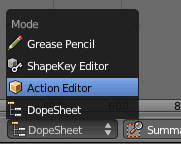
In the Dope Sheet switch the Mode from Dope Sheet to Action Editor with the pop up menu in the header.
Hint: If the Mode Popup menu does not appear, then move the mouse over the menu bar of the Dope Sheet window, then press middle mouse button and while keeping the MMB pressed, drag to the left side.
In the Action Editor mode you can create new Actions. You find the corresponding popup menu in the Dope sheet menu bar:

Press the white plus sign to get a new action and name it “FirstAnimation”.
Hint: you can edit the action name right inside the popup menu.
Adjust the timeline

Create the Start frame
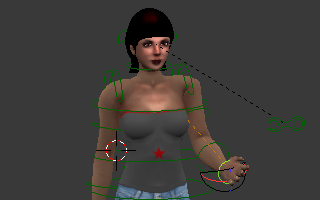
I assume that you are still in Object mode now. In the 3D View ensure that the armature is selected by right-click on one of the rings surrounding the avatar. The rings should now appear in bright orange.
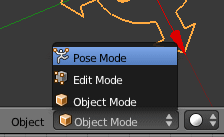
However while playig with the Pose you will note that we have placed a few constraints to the various parts of the skeleton. We did this mainly to keep you from ripping the character into pieces by dragging the bones to unrealistic positions.
Note on Rotation
The easiest way to rotate the bones is to use the rotation manipulator controls. For your first steps you may want to select the curve segment in the 3D Manipulator widget so Blender will show the rotation manipulators when you select a bone:
You may want to use the Rotation mode “Normal”. I found this the most convenient mode when working with the mouse.
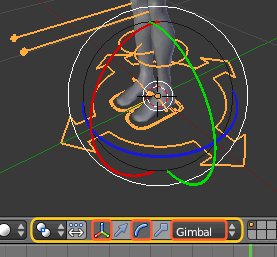
As you get more experienced with Blender you will use keyboard shortcuts more and more. Maybe you will even skip the 3D Manipulator after a while when you realize how efficient the usage of shortcuts actually is.
More Animation details
More about Rig Display Properties
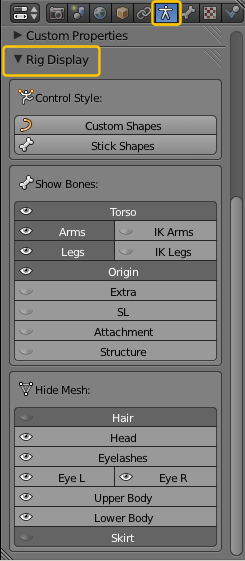
More about the Rig Display
Rig Display Style
The Rig Display section gives you full control over which parts of the Mesh and the Rig can be seen at a given time. By default only the Control bones and the main parts of the Avastar mesh are visible. But sometimes it is desirable to hide or unhide parts of the Rig or parts of the Avastar meshes.
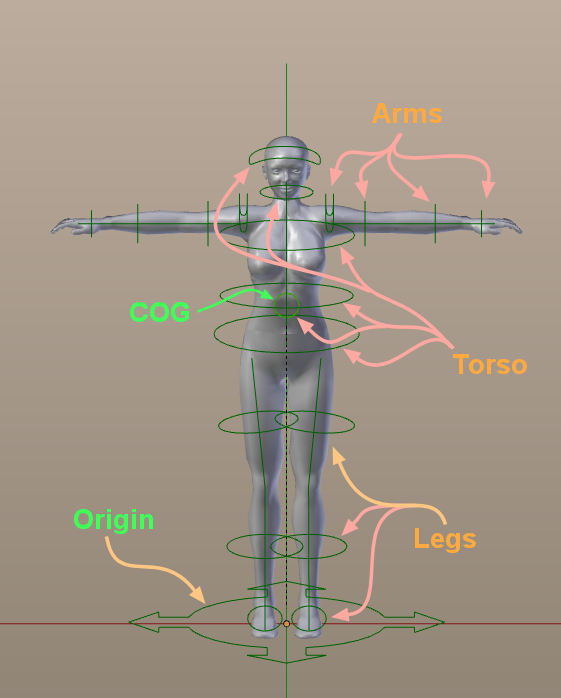
Furthermore the control bones (green) use custom shapes by default. That is, they are formed as rings which are placed around the Avastar body. The benefit of the custom shapes is that they can be selected easier. But sometimes it is desired to switch from Custom shapes back to Blender’s default shapes (Sticks or Octahedrons).
The Rig Display panel is subdivided into three major parts:
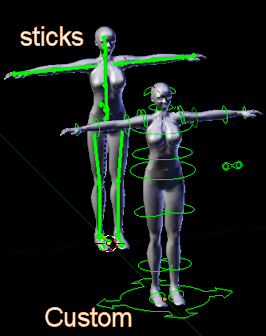
Control Style settings
The first 2 buttons in the Rig display settings panel are used for switching between custom shape and blender’s default shape:
- Custom Shapes: Set all control bones to use custom shapes (Default)
- Stick Shapes: Set all bones to use Blender’ default shapes.
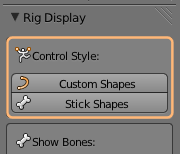
You can switch between both display options at any time. But when you switch to Custom Shapes, then the bone X-Ray setting is automatically disabled, while when you switch to Stick Shapes, the X-Ray setting is automatically enabled.
More about the Skeleton
As explained above we can now move and rotate the skeleton as we like. We see that the mesh moves along with the bone movements and we will finally end with our start pose for frame zero of the animation (where you want the bones for the start pose) Remind that we are only moving and rotating the green skeleton handles for now.
SL Control Bones
The Avastar Skeleton contains 2 additional Control Bones with very special properties:
The COG
Center of Gravity bone. Use this bone to set the location and rotation of the whole character. The COG bone will be recorded in your animation and its movements will also be transported to your online world later.
The Origin
All movements are relative to the Origin bone. Moving this bone around will not affect the animation in any way. If you are doing multiple character animations set their origins slightly apart to where pose balls would start. Once you are happy with the location hide the bone.
SL Base Bones & Collision Volumes
Mandatory rules
- Weight only the blue SL Bones (and the orange Volume Bones).
- Animate only the green bones (and possibly the IK Bones).
- Never add weight to the green SL Control bones.
- Never use the blue SL Base bones for animating.
Store the Intro Pose
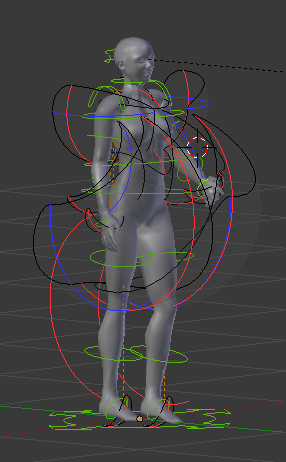
Once you are happy with your first frame posture press the a key twice in the 3D View to select all bones (it toggles the selection so the first time it will deselect everything if you had a bone selected). The Rig should now look similar to what you see on the image to the right.
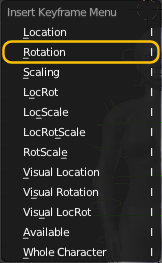
Now press i to insert a new key frame. From the appearing popup menu select Rotation (see image below).
Almost always you will set just rotation key frames. The exception is if you are moving the COG or IK control bones, in which case you should set the location too with Location or LocRot for both.
The Action Editor
You should see the Action Editor gets populated with the bone names and a yellow diamond at frame 0.
Note:We have simply selected all bones for our pose. This poses a potential problem:
Assume that you wanted the current animation to play “on top of” your default stand pose. In the Stand pose the avatar head can be moved freely. But when you add this animation, the head will move according to this animation and “override” the default head movements.If you do not want to override the head animations, then you have to remove the head data.
The easiest way to do that is by left click on the corresponding Bone name in the Action Editor(“Head” in our example) and then delete the entire bone from the animation (press “x” on the keyboard).
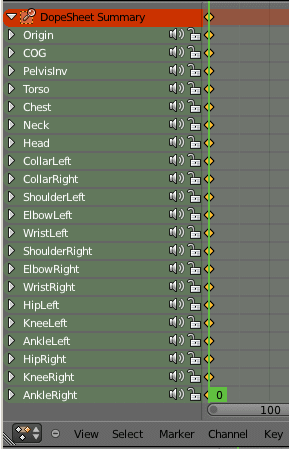
Note: You can also “mute” the bone by clicking on the little speaker icon next to the bone name. If a bone is not listed in the action or is muted it will not be controlled by the animation.
Note: In more advanced work you can play with creating sets of animations which control only a few bones each, and which you can mix and match with the Gesture editor in Second Life.
Add the Ending Pose
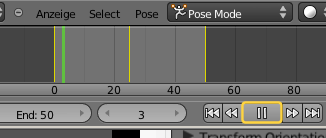
- Lets imagine the animation will run at the equivalent of 25fps. Click on the timeline on frame 25 which is one sec later (see image below)
- Repose the avatar how you want it to appear one sec later and again select all the bones and insert a rotation key frame (a to select all and i to insert key frame). Do something simple like a bow or a hand wave for your first animation.
- Click on the timeline at 50 (two secs into your animation), then pose and key frame the bone rotations for the final frame.
Prepare the Export
You find the “Animation Export” panel in the Render Properties section of the Properties window.
- Make sure the mode is set to BVH
- set the FPS to 25
- Set the Start frame to 1
- Set the End frame to 50.
- Make sure Prepend reference is checked.
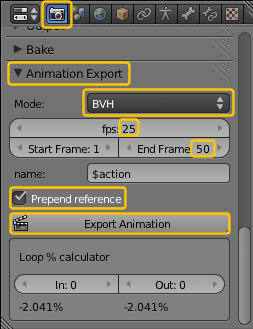
Export the Animation
- Finally, export the animation by clicking on the Export Animation button. You will be prompted for a filename and location which by default will take on the name of the action you set before.
- Once saved, fire up your Viewer, and from the file menu select Upload then Animation. Find and upload your animation, it will appear in your Animations folder. During upload you will have to choose an appropriate priority.
- Run it and show off your creation.
This tutorial has only scratched the surface of what is possible. Things you will want to explore next are using the IK controls, looping part of the animation, animating only certain bones, using the Graph Editor… Feel free to download my own firstAnimation with Avastar.
