Some creators of full mesh bodies provide Mesh Development Kits. These kits typically contain Reference Meshes and reference weight maps for the developing of body attachments (clothes).
If the development kit already comes as rigged to Avastar then you are already done. This guide is about how to fully integrate the development kit meshes into the Avastar Rig.
Brief instructions for a safe integration.
I assume you got the Developer kit in some readable form, e.g. as .obj (Wavefront) or .dae (Collada) file or even as ready made blend file. I also assume that your model has not yet been rigged to Avastar.
- Open the blend file that contains the development kit meshes or import the development kit meshes to a fresh new Blend file
- If the development kit is rigged to another (non Avastar Rig), then you can continue on the next paragraph Migrate from foreign rig or just unbind the mesh from the other armature, delete the other armature, and continue here.
Now you can proceed as follows:
- Create a new Avastar
If your developer kit contains a full character, then you probably want to create only the Rig.
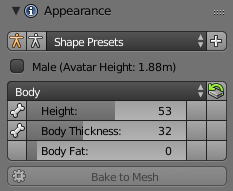
But you are free to create the Avastar meshes along with the Armature. - In the Appearance panel locate the Shape presets. There you see 2 stickman icons, one orange, one white. Select the white icon.
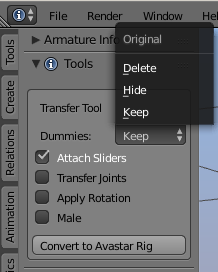
- Bind your mesh to the avastar rig with Keep weights
Migrate from foreign Rig
If your mesh development kit is rigged to another (non Avastar Rig) then you can also try the Avastar Migrate tool:
- Open the blend file with the mesh development kit
- Select the Kits armature
- in the tool shelf, Avastar Tab, Tools Panel
- Convert to Avastar Rig
If the automatic transfer does not work, then you also can try to unbind the meshes from the armature, then proceed as explained at the begin of this document.
To be done … A working example

