Motion Transfer Tools
In a Nutshell
- Create a new Avastar Character (or use an existing one).
- Import your BVH animation file.
- Map the corresponding Bones.
- Transfer the Animation.
Loading an animation file
Blender supports the import of BVH files out of the Box. You find the importer in the Top menu at:
File -> Import -> Motion Capture
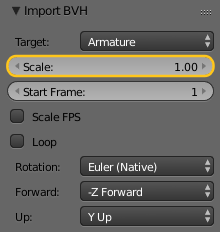
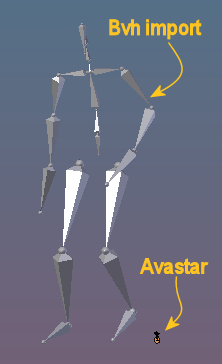
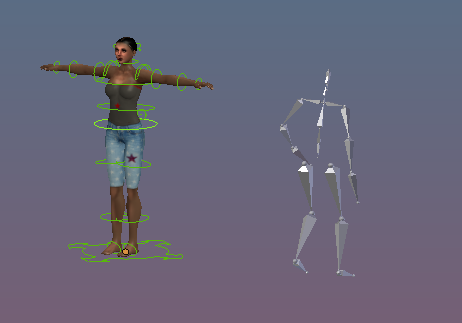
Note: You probably have to set the Scale factor to match the imported Armature and the Avastar armature. Otherwise you can easily end up in a situation like in the image aside.
Fixing Scaling
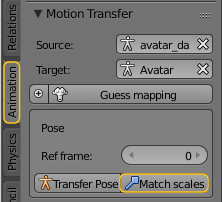
Even if the BVH Scaling matches roughly to the Avastar size, in most cases the match is not perfect. Because of this we have added the Match Scales function.
After you have imported the BVH file, You find the Match Scales tool in the vertical Tools Shelf Animation tab, in the Motion Transfer panel. we get back to this again in a moment.
This function rescales the imported Animation rig to match the Avastar rig’s Skeleton. but note, we only rescale along the Z-Axis. X and Y always get the same scale than
Mapping bones
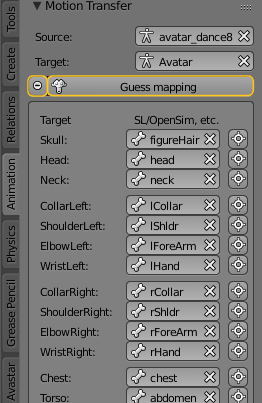
When it is collapsed, then the Bone map is hidden inside the Guess mapping button. You can expand the Map by clicking on the small + Icon left to that button.
A list of Bones shows up. The left column (Target) is a read only list of Bones in the target Rig (Avastar in our case). While the right Column is a list of bone names which appear in the just imported Rig. Initially the Map is empty and you have to fill it manually.
However, we have added a Map Guessing tool, which works nicely for Animations that already have been made for SL. You can just test the Guessing tool and see if your imported Animation rig is recognized. In the case above the guessing tool has identified the Animation Rig to be an SL/OpenSim compatible rig, thus all available Bones are automatically assigned and we do not need to bother with that.
Mapping utilities
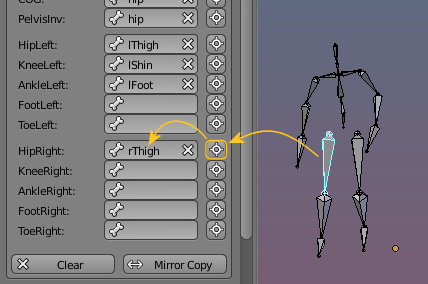
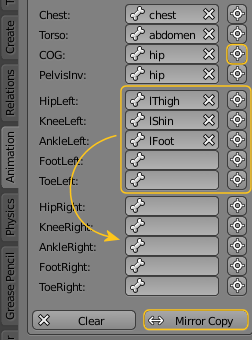
The Bone picker lets you select one Source bones from the Animation rig and manually map it to a bone on the Target rig:
- Open the Animation source Rig in pose mode
- Select a bone
- Click on the corresponding assign icon in the map (see image)
Now the source bone is assigned to the corresponding target bone (In the example rThig of the Animation Source is assigned to HipRight in the Avastar target)
The Range Mirror Copy lets you copy the limbs. Thus you only need to assign one half of the bones, then use this tool to automatic fill the symmetric bones on the other side.
- Assign one side of your animation source Rig to the corresponding bones in the Avastar rig
- Click on Mirror Copy to transfer the assignments to the other side of the Rigs.
The Clear Tool removes all associations in the Bone Map.
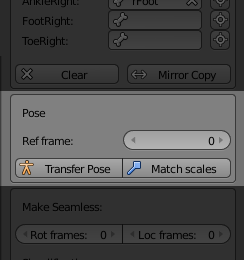
Pose tools
Note: The Reference Frame does not need to be part of the transferred set of timeframes. Actually in most cases the timeframe 0 is not used by the imported Animation. So it can be used to create a matching pose.
Create a reference Frame
The following approach is only one possible way to go. This works nicely when both the target rig and the Avastar rig use the same rest pose (namely the T-Pose). The workflow is as follows:
- Set the timeline to timeframe 0 (or any timeframe that is convenient for you)
- Ensure the Avastar Rig is in Rest pose.
- Open the Source Animation rig in pose mode
- Select all Pose bones
- Reset scale, rotation and Transformation (ALT +S, ALT +R, ALT +G)
- In the Viewport press “i” and select “Rotation”. This creates a new keyframe for the Rest Pose.
- Ensure the RefFrame in the Motion Transfer Panel is set to the timeframe where you just added the T-Pose (timeframe 0)
- Now you are prepared to Transfer single poses or the entire Motion (see below)
Transfer Pose
Note: Timeframe 0 contains the Reference pose, while timeframe 1 has been transfered from the imported animation to the Avastar timeline.
Timeframe 1 before pose has been transfered
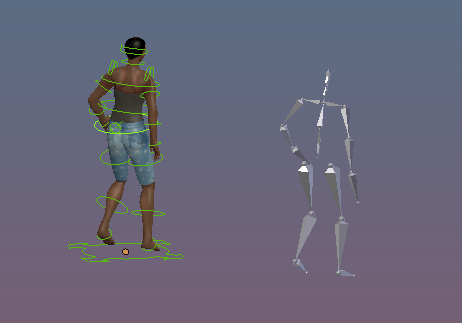
Timeframe 1 after pose has been transfered
Match Scales
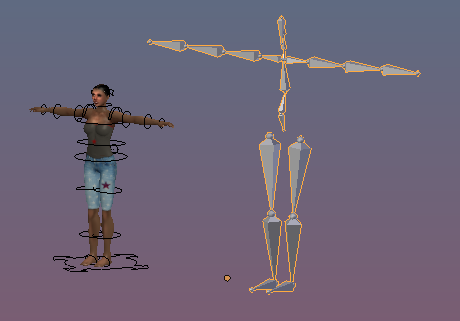
Before Match Scales has been applied
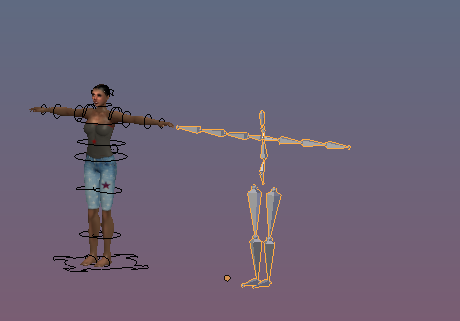
After Match scales has been applied
Make Seamless animations (experimental)
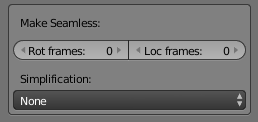
The numbers define the timeframe range over which the easing shall take place.
Simplify (experimental)
Simplify can be used to reduce the number of keyframes used in the imported Animation. We provide 3 options here:
- No Simplification (default)
- Lowes Global
- Lowes Local
These simplification methods are described nicely by Eyuphan Bulut in a scientific paper about
Keyframe extraction from Motion data
Transfer Motion
You have to ensure that all parameters as explained above are correctly set. otherwise your animation will become distorted.
