The Material Presets Cheat Sheet
- start Blender
- in the 3D View: add -> Avastar
- in the properties: move to Object Properties
- Select a Material Preset
- in the Material Editor: setup materials
- Is Avastar installed ?
- Need to get started with Blender ?
- Blender docu is in Blender’s Help section.
- Find online docu: RMB -> Online Manual
Selecting a Material Preset
However assigning materials can be a bit time consuming because you have to select every mesh part and assign the materials all by hand. Because of that we have added a Material Preset chooser into the Armature Data Properties (see image to the right)
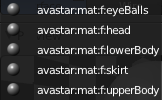
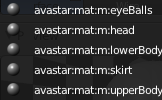
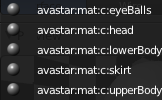
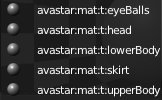
In the Avatar Materials panel you can technically select from 4 material presets, “Female”, “Male”, “Custom”, and “Template”. When you select a preset, then Blender will create a set of 5 materials for you: These Materials are for “eyes”, “head & lashes”, “upper body”, “lower body” and “skirt”.
But Avastar does one more thing: It first checks if the materials have already been created. In that case it will NOT(!) add new materials but simple reuse the already existing materials. Thus materials can be setup once and then later reused for all your Avastar characters.
The material names follows a name convention:
avastar:mat:[f|m|c|t]:[eyeBalls|head|lowerBody|upperBody]
- avastar (constant)
- mat (constant)
- f|m|c|t (to distinguish template set)
- [eyeBalls, head…] (Character part)
Of course you do not need to use the presets for your work. You always can select your very own conventions and your very own materials. The preset selector only helps you to quickly setup a material set.
Default Settings for Material sets
Currently all material sets use copies of blender’s default Material. So without any further preparations Avastar will only create material placeholders for you. Thus even when you select a Material set, your character does not look different from the default. You still need to setup the materials by yourself.
But the good news is: You can setup your material sets beforehand. As long as you take care of the name conventions (see above) Avastar will recognize your materials and reuse them. This is why Avastar first checks if a material does already exist!
Setup your own materials
I use following trick to create my own material settings:
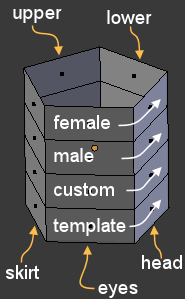
- I create a placeholder object like a cylinder with 5 faces on its circumference and 4 faces along its long axis
- Then i create 4 times 5 materials using the Avastar name convention.
- I assign each material to a different face of my placeholder object.
- I move the placeholder object to layer 10, make it invisible, not selectable and not renderable (to get it completely out of sight)
- And store my setup as default (File -> Save User Settings)
Now whenever i create a new Avastar and switch between the different Material presets, then Avastar will recognize that the materials already exist and reuse them from my placeholder object.
The Unique Option
Sometimes you actually do want to have multiple characters using different material sets, for example when you create a crowd scene. For this special case you can enable “Unique” option. Then Avastar will use a slightly different name convention for the material settings:
<rigname>:mat:[f|m|c|t]:[eyeBalls|head|lowerBody|upperBody]
- <rigname> The name of the Avastar armature
- mat (constant)
- f|m|c|t (to distinguish template set)
- [eyeBalls, head…] (Character part)
Thus even in this case you can preset your materials to a certain extend. For example if you typically create lets say 3 Avastars “Michael”, “Victoria” and “Sally” with their unique skins, then you can setup the materials as described in the previous chapter. Except that you replace “avastar” by the name of your character’s armature(s).For example: “Sally:mat:f:upperBody”, “Michael:mat:f:upperBody”, etc…
Then you can proceed as follows to let Avastar reuse your materials:
- Create an Avastar
- Name it according to your names (“Michael”, “Victoria” and “Sally”, whatever…)
- In the material preset selector enable “unique”
- select the correct preset
But that is a pain!
Yes it is a pain. But isn’t it more pain to set up your characters every time when you create a new Avastar character ? If you want your characters to be skinned, then you will end up with some sort of prepared skin sets anyways. Avastar supports that for now.

