Binding (Assign Armature)
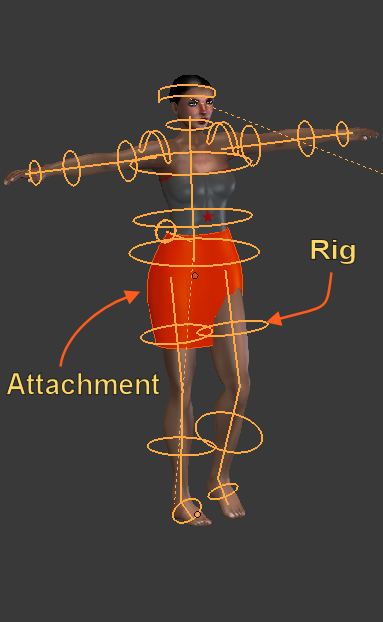
After you have modeled your mesh (Character or Attachment) the next step towards animating your work is skinning the mesh. This is basically the process of attaching the mesh to a rig (Armature) and defining how exactly the mesh gets influenced by the Armature’s Skeleton. Avastar’s Skinning Panel provides a convenient starting point for this work.
Basic Preparations
Cleaning up the Mesh
Ensure that the mesh does not have any implicit scale or rotation from one of its parent objects. This issue typically happens when your mesh is still parented to another object (Mesh, Rig, Empty,…) which has a scale and or rotation defined.
Easy Fix (recommended)
- Select the Mesh
- Object -> Parent -> Clear and Keep Transformation
- Object -> Apply -> Rotation and Scale
Advanced Fix (not recommended)
- Select the parent of the Mesh
- Apply Scale and Rotation
- Do the same for the Parent’s parent and so on…
This avoids unexpected behavior and it ensures that your object can be bound to another rig without distortions.
Hint: It is in general best to have as few objects as possible in your visible layer. So you best move all objects into another invisible layer which are not directly involved in the bind action. This ensures that you keep track of what happens.
Reposition and Bind
You prepare the binding step as follows: First you align your new mesh attachment as good as possible to the Avastar character. Then you select both the armature and the new mesh attachment:
- Go to Object mode
- Select the attachment with RMB. If you want to bind multiple new attachment at once, select all of them now (order does not matter).
- SHIFT RMB select the Avastar Armature.
Now you have selected the Rig and all mesh attachment which shall be bound to the Armature.

Note: If you are familiar with Blender, then you can simply parent the selected meshes to the armature (using Object -> Parent -> Armature Deform).
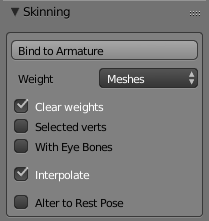
The Skinning Panel
Note: You can not expect that this function automatically creates optimal results! Hence you must be prepared that in most cases the resulting weight maps have to be fine adjusted manually. Please look at the Create an Attachment tutorial on this website.
The Skinning Panel Options
Weight:
This Property defines from where the Bound meshes will get their initial weights. We provide 4 Weight sources here:
Hint: The automatic weight assignment sometimes runs into an issue where it can not find solutions for one or more vertices. This is typically due to intersecting and/or unconnected mesh parts in your object.
This option will only create missing weight maps. Weight maps which already exist in the Mesh will not be touched and kept as they are.[break] Hint: The Empty option should be rarely used. In almost every case you will be better with the next option.
This option is almost identical with the Empty option, only you will not be cluttered with empty weight Maps. Since weight maps are created on the fly during your weighting activities, in almost every case this option is the best to use when you intend to create your own weight maps.
Note: Directly after a mesh was bound to an Armature, you will find this section replaced by a weight Generator section from where you can regenerate your weights completely or partially at any time. For more details see in the skinning help section.
Clear Weights
Selected verts
With Eye Bones
Interpolate (only available with Weight:Meshes)
Alter to Rest Pose
What is Alter mesh to Rest Pose ?
This video is about what the Alter to Restpose feature actually does for you[break]
Below you find some explanation.
In principle this option does the equivalent of the following procedure:
- The current pose (“mesh pose”) is made the armature’s default pose.
- The mesh is parented to the new default pose
- The pose is set to the actual T-Pose (and the mesh gets bent into T-Pose)
- The mesh is frozen (pose applied and mesh unbound from the armature)
- The armature’s default pose is set back to T-Pose
- The mesh is parented to T-Pose.
- When now the armature is posed into the original “mesh pose” then the mesh looks exactly like it looked when it was not yet parented.
- When your mesh fits well to the Avastar mesh, then you probably want to initialize your weight maps by setting the Weight option to “Meshes”.
- Only when you have to pose the Avastar in order to get a good alignment to your mesh, then you will also want to enable “Alter Mesh to Rest Pose”.
Note
When the option “Alter mesh to Rest Pose” is enabled then your mesh will be altered on vertex level. The mesh will actually be bended into the Avatar Rest Pose (which is the T-Pose). Such that when the current pose gets applied later then the current shape of the mesh is almost exactly preserved.
