About this Document...
Content:
- Create a Basic mesh character
- Import a Mesh to your online world.
The first Video (above):
- Create a Character.
- Use the Shape sliders.
- Use the Collada Exporter.
The second video (further down):
- Use the SL Importer for Upload
What does Avastar provide?
Avastar basically supports the creation of animatable Models (Avatars&attachments) and the creation of animations. Therefore the tool adds various functions and user interface elements to Blender.
The full functionality of Avastar can be a bit overwhelming on first sight. You should be prepared to spend some time and patience to get it all working nicely for your projects.
What does this Document provide?
This document is a quick start into Avastar. You should get comfortable with the tool within a very short time. In this section you will learn how to prepare Avastar for your work on attachments, custom characters and custom animations.
However this article only scratches the surface of Avastar’s feature set, so there is a lot more to detect and we invite you to make your own experiences as well.
We expect that you have basic knowledge about Blender.
Before you start
The Cheat Sheet
- Startup Blender.
- 3D-View: add -> Avastar
- Toolshelf: Avastar -> Avatar Appearance
- Shape your character with the SL Sliders.
- Toolshelf: Export your character
- SL: Import the model.
Some useful Hints
- Is Avastar installed.
- Get started with Blender?
- Check Blender’s Help section.
- Find online docu: RMB -> Online Manual.
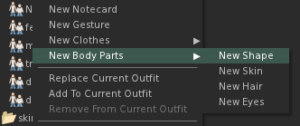
- In SL: Create a fresh Shape.
This Shape matches with Avastar’s default shape. - The gender setting is supported as well.
Create an Avastar Character
We first create a default Avastar character. This Object is normally used as a reference for your Avatar attachments. But it also can be used to create your own Mesh character.
For what you can use the Avastar
- As dummy model for your clothing attachments
- As Model for your Animations
- As Basis mesh for your own character
- As Basis for your non human character creations (Create Avatar with “rig only”)
How to add a new Avastar Character
In Blender
Navigate to:
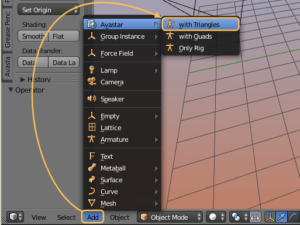
add -> Avastar -> With Triangles
The Avastar character is based on the
SL Avatar definition files
from Linden Lab.
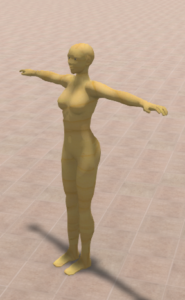
After a short time (typically 2-4 secs) a new Avastar character is created in the 3D View and at the current 3D cursor location .
Back in Second Life
When you use Avastar’s default shape then you also need to test your work with a fresh created shape in SL.
What else you should know
- New Avastar characters can only be created when you are in Object Mode!
- A new character will be placed at the current 3D Cursor location.
- You can hide (‘h’) or remove (‘x’) not needed parts of the Avatar meshes (like the skirt or the hair for example) without breaking the tools.
- You can create as many characters as you like aside each other and so you can create multi-character animations.
Adjust the Character Shape
After you got your Avastar character you might want to change its shape, or maybe you prefer to work with a Male character instead of the default female Avastar? This is where the Appearance Sliders Section comes into play:
How to use the Appearance sliders
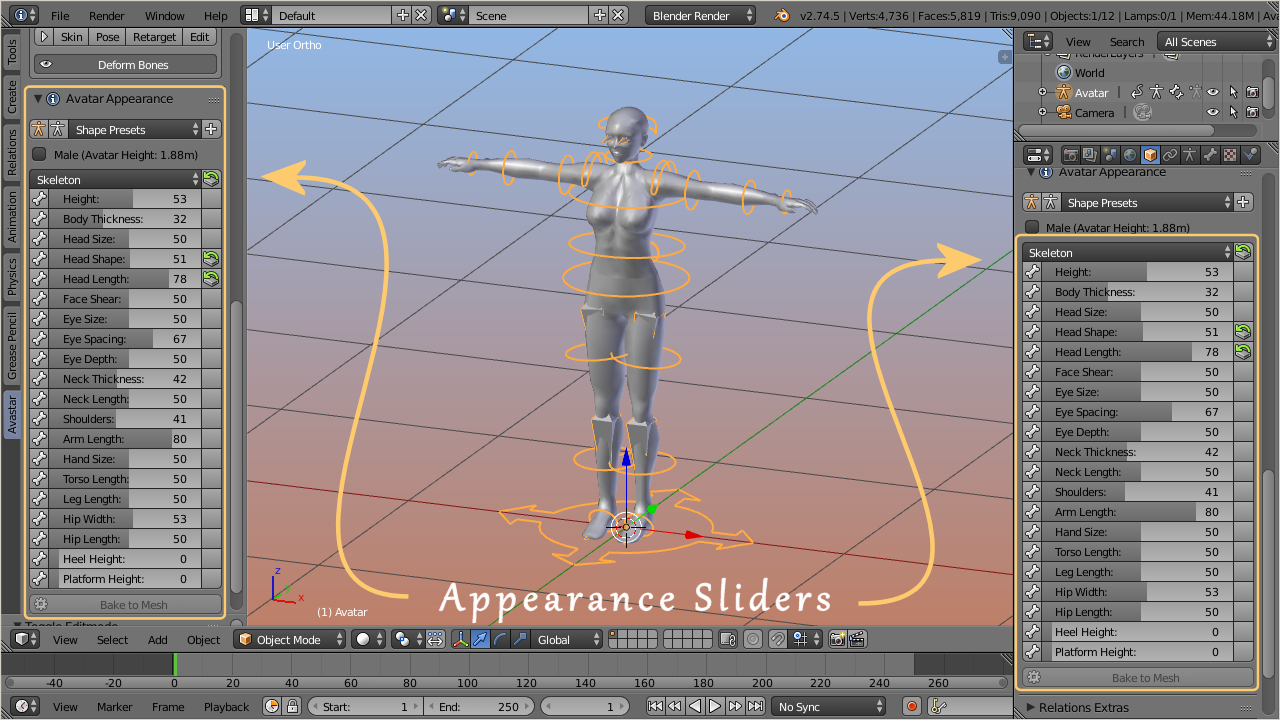
We support the same appearance slider system as you can find in SL, OpenSim or other compatible worlds. You find the sliders in the Object properties of the Avastar Character:
- Go to object mode.
- Select the Rig (RMB on the yellow circles around the mesh).
- Open the Tool Shelf – Avastar Tab
- Here you find the Appearance Panel (see image).
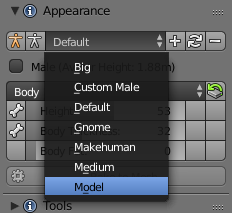
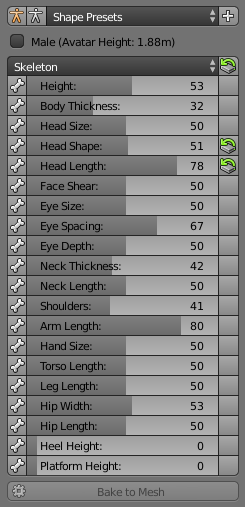
- Shape Presets: Here you can add your own Slider configurations. When you click the white + sign the current shape slider values get stored as new Preset (see also below).
- Orange Stickman: Reset the Shape to the SL Default Shape (like create new Appearance)
- White Stickman: Reset the Shape to the SL technical Rest pose (may be useful when you bind to a mesh that used the default SL Skeleton (like workbench or avatar.blend)
- Male: When enabled, the Shape switches to Male gender. The current absolute Avatar Height is displayed in parantheses)
- Sections: A popup Menu for the different Shape Sections (In the Image the Body Section is displayed). This is equal to the Appearance Editor in SL or OpenSim.
- Section Reset: The icon on the right side of the Section Selector allows to reset the entire Section to its Default values.
The Shape Presets Selector
The Preset Selector can be used to store your custom Shapes. For example when you attempt to work with a fixed set of Standard Shapes, you can add these shapes as Presets: All you need to do is:
- Define your shape (by moving the Shape Sliders, see below)
- Create a new Preset
The Section Sliders
The section subpanel of the Avatar shapes panel contains the Sliders for the section specific shape keys. The values assigned in SL match exactly with the slider values in Blender.
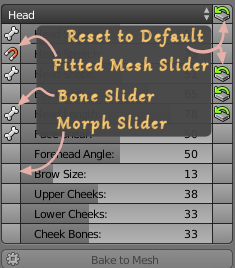
- Some sliders have a small Bone icon on their left side. This indicates the slider affects the bones (bone sliders).
- Some sliders have a small magnet icon on their left side. This indicates the sliders affects a fitted Mesh bone (Collision Volume bone)
- All other sliders affect only the mesh (morph sliders).
- The icons on the right side indicate that the slider value has been changed. Click on these icons to reset the corresponding Slider Value to its default.
- Note: The Reset icon on the Top Right of the section panel resets the entire Bone Section to its Default Values.
- We have added 3 extra sections (Changed, Fitted and Skeleton) which do not appear in the Second Life Shape editor.
- The Changed section is empty by default and will be populated by the list of changed Shape sliders of your Avastar.
- The Fitted Section contains all Sliders which affect Fitted Mesh Bones (Collision Volume Bones).
- The Skeleton section (see image) contains all sliders which affect the bone length of the Avastar character.
- On top of the list (in the Section Header) you see a Reset button. This button will reset all shape sliders of the current Section to its factory defaults.
- Each slider can be dragged, or you can click on it and then type in a number.
- If a slider has been changed then you see a reset icon right to the slider. Clicking on that icon resets the slider to its default value.
Bake to Mesh:
This function makes all slider changes permanent for the active (and selected) Custom Mesh. Take care: This function deletes all Custom Shape keys and the Mesh gets changed!
Hint: This option is not available (greyed out) for the Avastar Meshes.
Special Feature: The Mesh deformer
The Mesh deformer is an old development that came to live a couple of years ago. But the project has never been going public in Second Life. However we keep basic support for the Mesh deformer available, because other compatible online worlds might possibly support the Mesh deformer.
Export your Work
After you have changed your Avastar character’s shape to your likes, you are ready to begin with working on your mesh attachments. However, this is a first step document, so we will take a moment and demonstrate how you can take the Avastar character back into Second Life. And what you see here is the very same procedure that you will later use for exporting your attachments (see “Create an Attachment”):
How to use the Collada Exporter
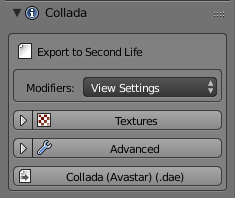
Export your Character as Collada
Hint: You usually can keep the default settings and just click on the “Collada(Avastar)(.dae)” button. A File Selector will pop up. Here you can navigate to your export directory and then export your file as a Collada file (using the file extension “.dae”)
The Export option Subpanels
The Exporter provides a couple of export options for special cases. Please use these options with care.
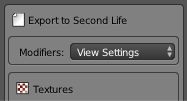
Modifiers
By default Avastar applies all mesh changing Modifiers except the Armature Modifiers to the exported meshes. However, some modifiers have 2 sets of options, one option set is for rendering, the other option set is for the Viewport. We provide 3 options here:
- Apply according to the View Settings (the 3D Preview settings)
- Apply according to the Render Settings (the settings for Blender’s own Renderer)
- Don’t apply modifiers and only export the base mesh
The View settings will be applied by default. These settings are very closely related to the Blender Render System. In most cases you can actually just use the defaults. We will get back to this when we talk about how to use (or not use) Modifiers.
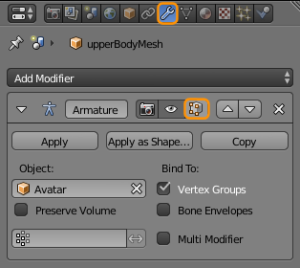
Armature Modifiers define a relation between your mesh and your Skeleton (Armature). You find the Armature modifier in the Modifer Stack (see image). Armature modifiers are always defined for the mesh. Armatures them self have no Armature modifier.
We will get to armature Modifiers in the “Create an Attachment” tutorial.
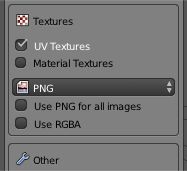
Textures export (advanced)
Note: But for rigged meshes the images are not recognized.
- UV Textures & Material Textures: Blender supports Material based textures and UV textures (which are directly assigned to polygons). Normally you want to export only the UV textures. In rare cases it is more desirable to export the material based textures instead. But beware, Blender does not export the render results, but only the source images!
- Image Type: The image format is typically predefined in the Blender Render settings. However we found it convenient to provide an immediate setting in the Exporter. By default the image type will be applied ONLY to generated images.
- Use ‘Image format’ for all images: If this option is set, then Blender will use the selected image format for all exported images. If the option is disabled, then only the generated images will be affected.
- Use RGBA: Blender can export the Alpha channel for images. Normally this is controlled in the render settings where you can specify to use either RGB or RGBA for image exports. If the currently selected export format supports Alpha then enabling RGBA here will export images with Alpha channel even if the render settings are set to RGB and vice versa.
Hint: You may want to NOT use RGBA because of the Alpha glitch. However this is not a general advice. There are many situations where using Alpha images is even recommended (for example when you want to create an Alpha mask).
Hint: If the format of the exported image(es) does not support an Alpha channel then the “Use RGBA” option is simply ignored.
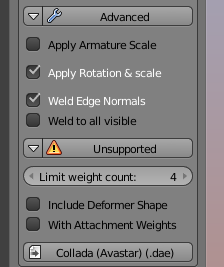
Advanced options
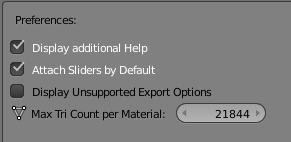
Unsupported Options
Avastar also provides some advanced export options. However those options are noy shown by defauilt as they are only rarely used.
You enable these options in the Avastar Addon Panel (where you initially enabled the Addon after you installed it):
Limit Weight Count: In SL the number of weights per vertex is strictly limited to 4. We believe this number is sufficient for all weighting tasks. In cases where this limit seems to be too low we always found the real problem was due to bad mesh topology and bad rigging.
Setting this number affects the maximum number of weights which are exported by Avastar. We strongly recommend to keep this number set to 4.
With Attachment Weights: SL does not allow weighting of attachment points. Hence we suppress the export of weights for attachment points by default.
Note: The Avastar Collada exporter automatically applies scale and rotation to your mesh attachments. However it is still a good idea to apply scale and rotation also in blender, because some blender tools are affected by these settings as well!
Important: In some cases you may want to modify the Avastar character beyond what you can do with the Avastar Shape Sliders:
- Create a tiny or a giant.
- Add extra shape beyond what you can do with sliders.
- Modify the Avastar Meshes into something totally different.
- Join the character parts to have one single mesh body
- …
The reason for this behavior is: Blender does not support editing Meshes which have Shape keys defined. The Avastar Meshes make heavy usage of Shape keys. Hence you get major fail as soon as you touch the meshes.
Editing the Avastar character can be done, but you need to prepare the meshes first as described in the “Editing Avastars” workflow document.
Import your Character to SL
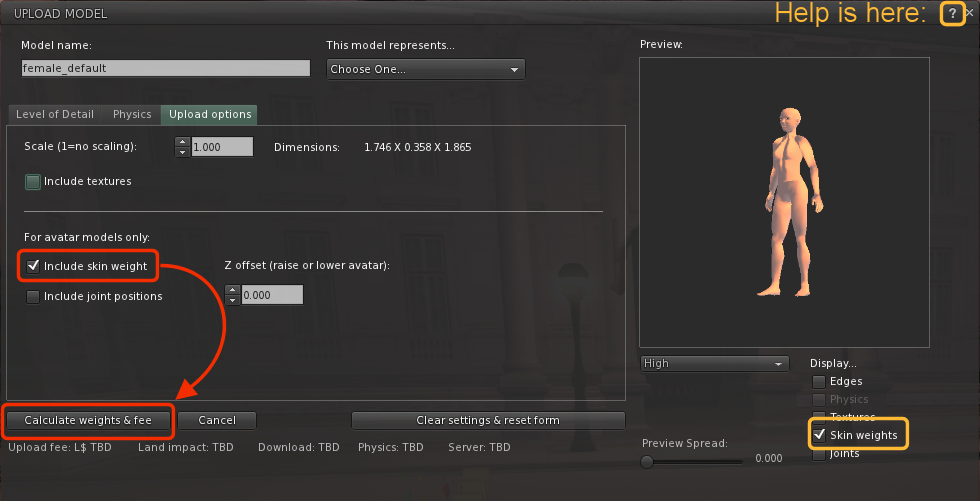
Once you have exported your Mesh character, you only need to import it to your target System (like SL or a compatible online world). Although this is easy in principle, there are a few pitfalls in your way. So let us take a deeper look into the Mesh Importer.
The Video explains:
- How to import a rigged Mesh to SL, OpenSim or similar online worlds.
- How to use an Alpha mask for hiding the default character
- How to use image textures to texturise your character.
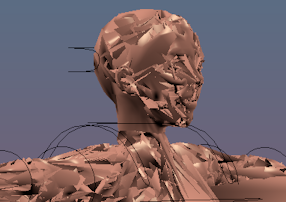
- Potential problems with your meshes (visible seams, wrong shape, missing face animations)
The Upload Panels in detail
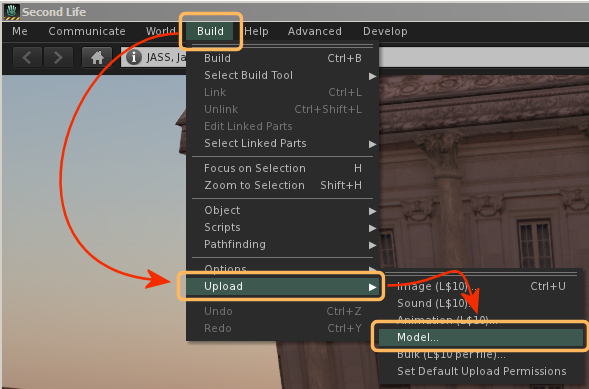
Upload the model (import the Collada file to SL)
The LOD Panel (The entry page)
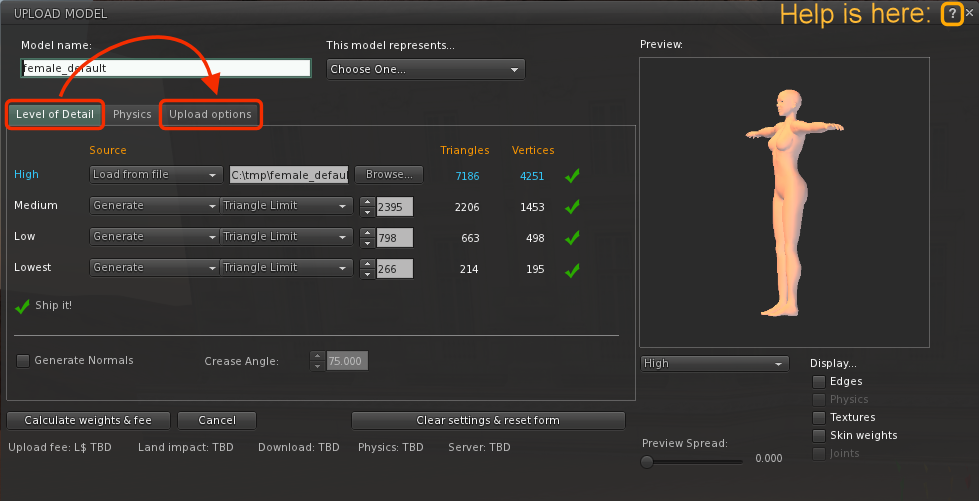
The Options Panel (Here you enable rigged mesh)
Now we are done with our first Mesh creation. You can simply wear the mesh and see how it moves with the default animations..
