[raw]
This tutorial shows a workthrough from modelling up to optimization and texturing.
In this tutorial we will create a shoe-model using the box modelling technique. I will make use of Blender 2.5 and show how to efficiently use the modifier stack during modelling.
The tutorial is structured into 10 chapters. For each chapter i have provided a video sequence which demonstrates in real time what you learned within the chapter. The videos are all available from the left sidebar of this page. All chapters are strictly focussed on techniques and no preassumptions are made about the final environment where your work shall be used. However there are 2 exceptions:
- In chapter I will briefly show you, how you can prepare a foot model for your work. I used a character which i modelled with the MakeHuman character creator and rigged with the Bone set of the default Avatar. Actually we will not make much use of this model, so you can safely skip over chapter I.
- In chapter X of the tutorial i show you how to import the finished shoe to OpenSim or similar online worlds. So here is where your process will most probably become different if you work for another environment. If you are familiar with the upload to OpenSim or your target system is not compatible to OpenSim, You can safely ignore chapter X.
The following prerequisites are needed for this tutorial:
- Blender 2.59 (actually any recent Blender version should work)
- If you want to go through chapter 1, then you might want to download my avatar_workbench.blend which is a modified version of avatar.blend from Domino Designs and contains the MakeHuman character as well as the default avatar. If you are a JASS-user then you have the original (unmodified) avatar.blend already in your inventory. But of course you also can just use the original avatar.blend from Domino designs if you prefer.
Chapter 1: Preparations
- Setting up a simple foot model based on the avatar.blend from Domino Designs
- Brief introduction into the Grease Pencil tool
- read more …
Chapter 2: Box Model
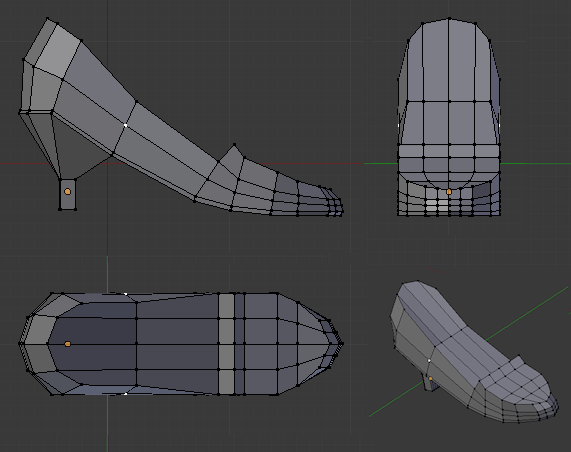
- Create the basic shoe shape by using the box modelling method.
- Tris and Quads
- Introduction to the Mirror Modifier
- read more …
Chapter 3 From Box Model to Shoe Model
We will now start smoothing the very rough first model. And for simplicity we will start with a symmetric model. I will add one edge loop and cut the shoe into 2 slices:
Then i remove one half of the shoe and add a mirror modifier instead.
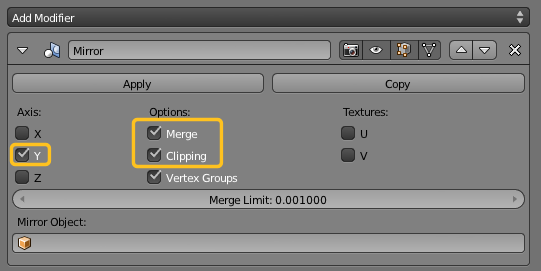
- The mirror goes along the Y axis.
- I have enabled Merge to get a nice transition from the mirrored part to the non mirrored part.
- I have enabled clipping to avoid overlapping edges.
At the end the shape looks similar to what we already had before, but now we only need to modify one half of the vertices. The other half will automatically be adjusted. We start modelling the shoe tip as follows:

Then we proceed on the verse. For the verse we add one extra edge loop first:
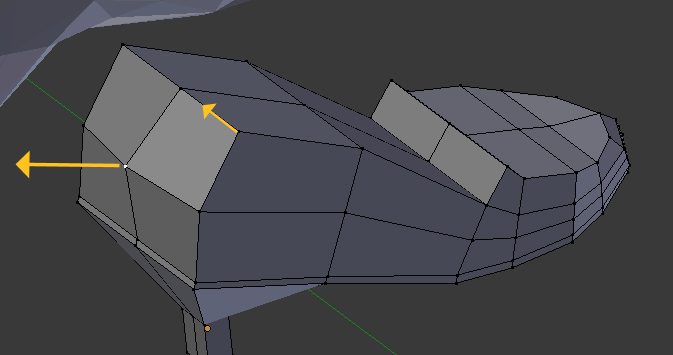
Then we push the vertices on the middle of the verse a bit backwards, and the upper corners a bit inwards to form a rounded shape:
To get a bit more freedom for modelling we add another edge loop:
Of course we see 2 edge loops because the mirror modifier will mirror all we do on one side to the other side. Finally after a bit of shifting the vertices around, we end with this form:
Chapter 4: Getting smooth
- Introduction to the Subdivision Modifier
- Introduction to the Solidify Modifier
- Improve the Model
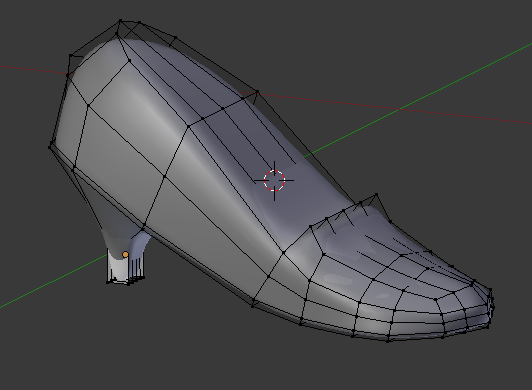
The shoe does not yet look really beautifull. It still very blocky, but you will later see, that what we have created by now is just the rough definition of the shape and it will probably later be used as our “low” LOD level (see further down). So let us now get some more faces on the model. I use a subsurf modifier and add 2 levels of subdivision. Furthermore i set the entire shoe to smooth shading:
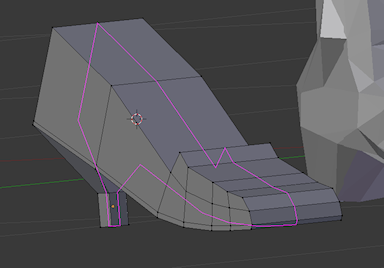
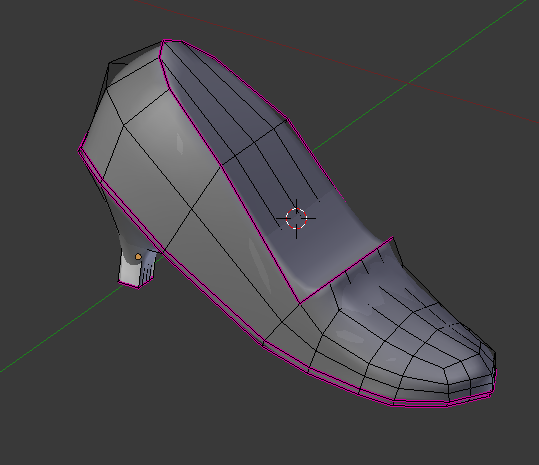
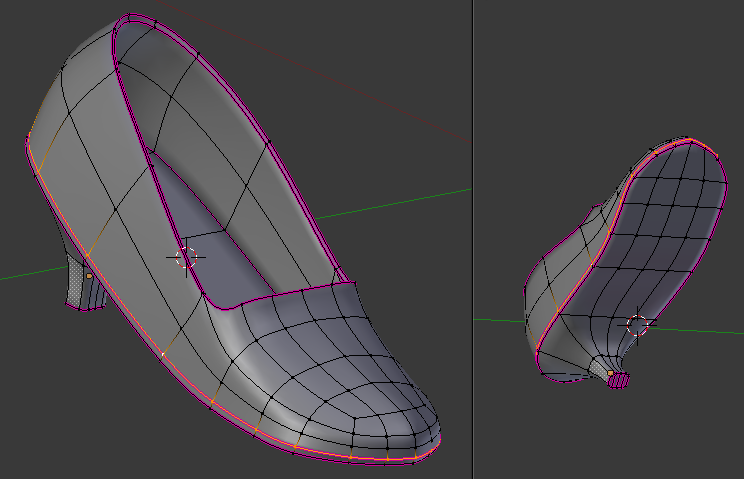
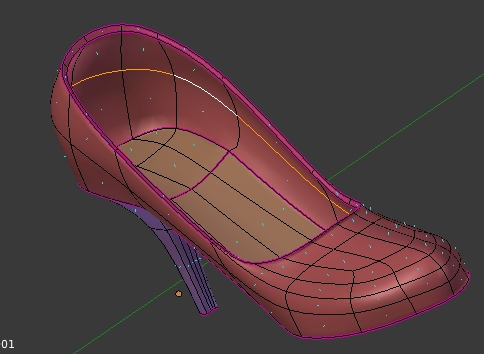
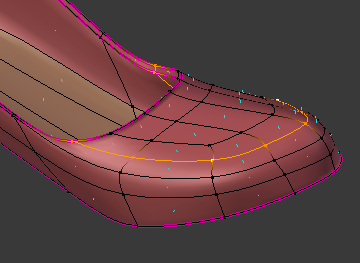
We have used the Catmull Clark subdivision algorithm. this makes very smooth edges. But at some parts we really want to keep sharp edges. So we will crease some edge loops (the loops marked in purple are fully creased):
Please note that we might not need as many faces as we just introduced by adding the Subsurf modifier. Probably we can live well with only one level of subsurf. We will get back to this later when we optimize the mesh.
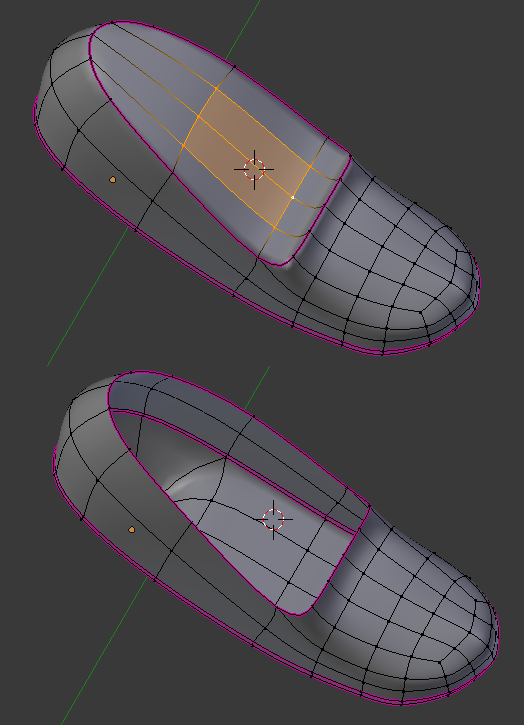
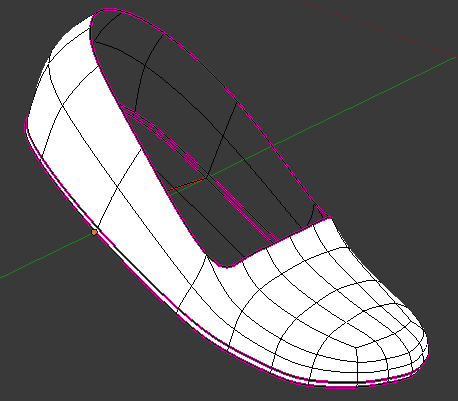
First we face one other problem: the shoe is closed. We could decide to keep it like this, because the foot will anyways fill out the entire shoe. But let us say we want this shoe to be exposed in our shoe shop. So we would need something that really looks like a shoe and not like a brick. I will first remove the closure:
Now we see that we have no sole inside of the shoe. For now the sole is just a row of faces on the outside of the shoe. The inside has no faces on the sole. We have 2 options now. Either we split the shoe into 2 parts ( one mesh for the sole plus heel, and another mesh for the upper part of the shoe) or we find a solution where the interior of the shoe is modelled and connected to the outer part, thus forming one single mesh. Since ripping the shoe into 2 or more parts does not give us full control over the seams (where the parts will later have to be matched), i will show you a nice trick, how to get to a correct and beautiful single mesh solution without much work. However it will contain a caveat and we will have to take care of this in the final step before we actually export our finished shoe.
But let us go one step at a time.
And actually i will cut the shoe into 2 pieces, but later i will join the parts again.
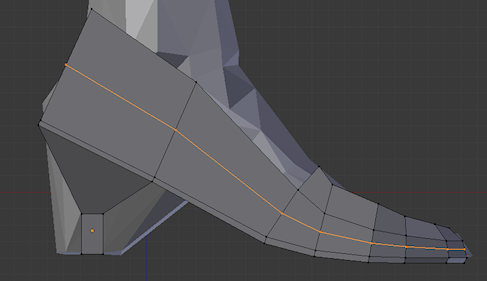
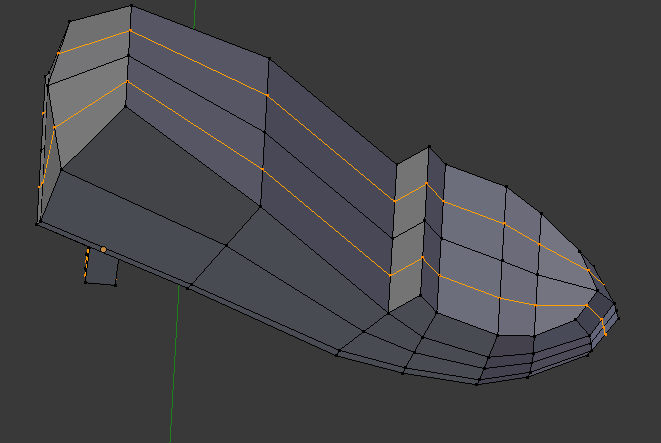
Let us cut the heel into a separate object for a moment. First mark the highlighted edge loop as seam:
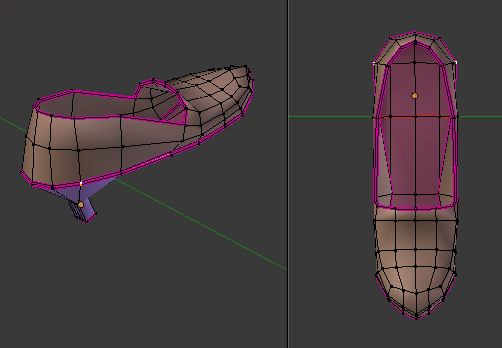
Then switch to face select mode and select only the heel. Then split the shoe into 2 parts by using “p” -> selection. And finally switch to local view so that you only see the upper body of the shoe:
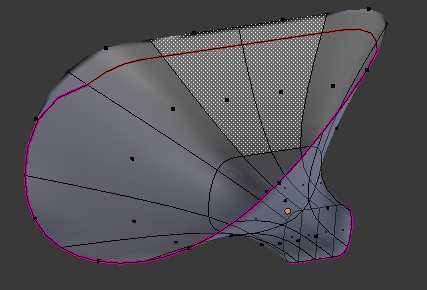
So we have a hole in the sole. But we can fix that quickly by adding some faces:
Chapter 5: Solidify
Now let us take a closer look on the inside of the shoe. Remind that our goal was to construct a shoe for our Shoe shop and not a shoe to be worn. So in our case it is crucial to also model the inside of the shoe.
But right now this model has only one side. Let us for demonstration purposes switch to texture mode for a moment:
You can see that actually the inner part of the shoe is transparent. As i mentioned that is not a big deal when you wear the shoe, because you can not look into the shoe as long as it is worn. But as i mentioned before, we want this shoe to be rezzable in our shoe shop and there we want a complete shoe, right ? So we have to add a sole and the inner part of the shoe sides to get a good looking object.
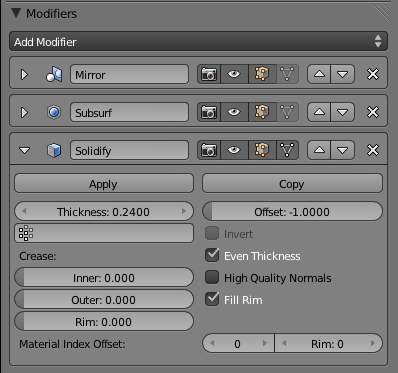
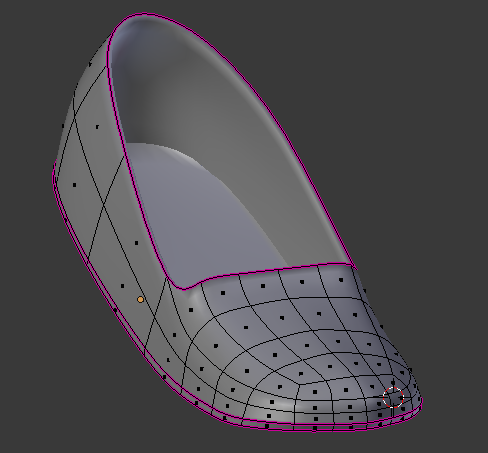
Let us turn back to Solid mode and see, what we can do. So we are lucky and we can use another modifier called “Solidify.” This modifier will add all we need automatically:
I used a width of 0.24 Blender units here.And as you can see, the inner part of the shoe has now been nicely filled with a secnd layer of faces, thus forming the complete interior of the shoe without need to do any manual modelling.
However we will have to revisit this later when we do optimizations. This modifier clearly adds faces where we do NOT want them to be.
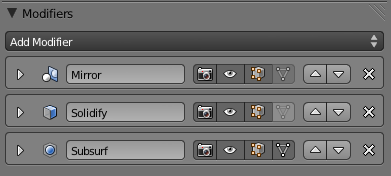
Please note, that right now the Solidify Modifier is placed at the bottom of the Modifier Stack, hence it will be the last modifier to be processed. Since the Subsurf modifier has added a significant amount of vertices, i tend to move the Solidify modifier upwards above the Subsurf modifier to save some computer resources. So let us rearrange the modifier order as follows:
Now we want to replace the heel into our model by joining the 2 objects in object mode. But attention here! Something has happened. The true reason why i have split off the heel before was that i do not the solidify applied on the heel. But now after rejoining the modifier instantly grabs the heel and does its (unwanted) job here too, and thus i messed up the heel. Here is how the heel looks after rejoining:
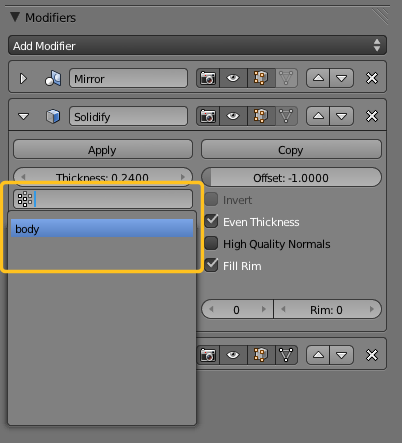
We can see, that the heel has also been solidified. But we can change that fortunately. The solidify Modifier can be constrained such that it only affects a specific vertex group. So let us put all vertices of the upper shoe into a new vertex group (i name it “body”) and assign the vertex group to the Solidify Modifier:
- Select the entire upper body of the shoe (all except the heel part)
- In the Object Data Properties section add a new vertex group and name it “body”:
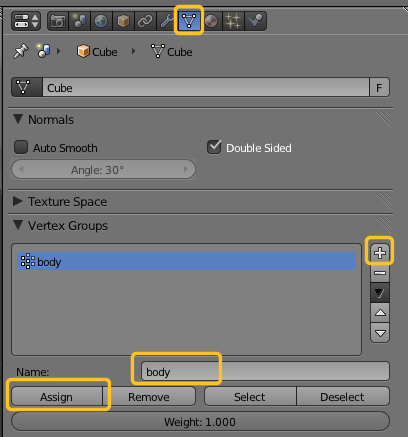
- Associate the vertex group to the Solidify Modifier:
And now the sole looks pretty again:
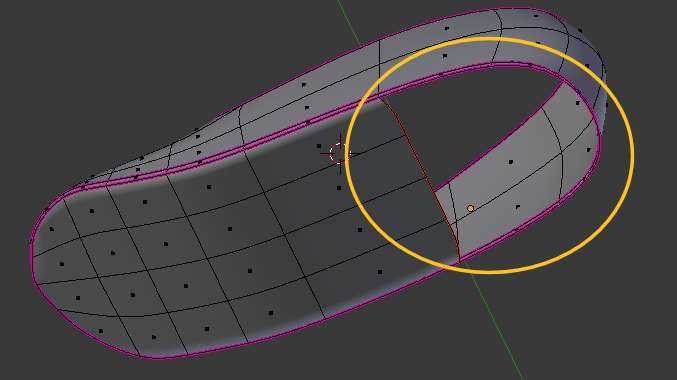
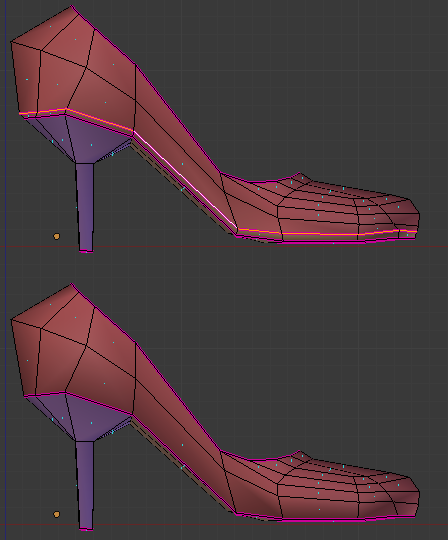
Only on the upper part on the image we see some strange effect. The upper seam is where we had the sole connected to the body. Then we splitted the sole and rejoined it later. Hence the entire edge loop where we split the pieces is now duplicated, once for the heel and once for the body. But since we actually did not move the heel, both edge loops are still located at the absolute same location.
So we just need to select the entire shoe, then remove doubles and we are done. Actually we will remove 12 duplicates, but since half of them result from applying a Mirror modifier, we really remove only 6 duplicates:
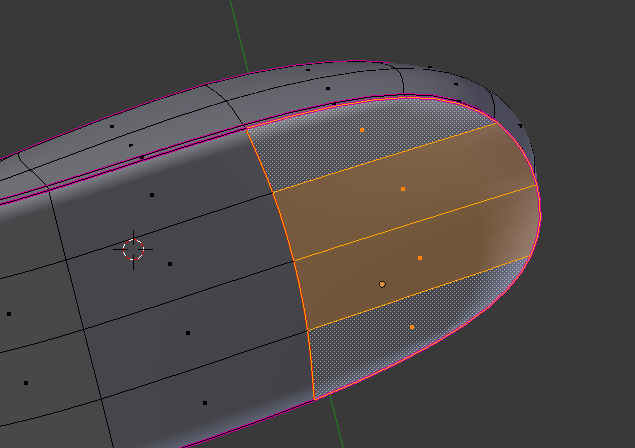
We still have 2 remaining problems. The contact surface between the heel and the upper part contains a hidden surface. You can examine that by only selecting the contact area and hide the rest of the shoe. Then we see that the sole is duplicated.
But here we only need one layer because the heel already fully covers the bottom part of the shoe. We can get rid of the extra surface by removing the selected faces from the body vertex group. But it is much easier to keep this extra surface and remove it later, when we optimize the object for our game engine.
The other problem we have is not so obvious and it may be related to a bug in Blender. When i applied the Vertex group to the Solidify Modifier above, the heel was excluded from the solidification. But we will later see, that when we apply the modifier, all faces on the heel will be duplicated. This is unexpected behaviour and thus i believe this is a Blender bug. I will return to this issue in chapter VIII about optimization.
When everything was done correct, then the model now has still one clean surface, we only used Quads (all triangles have been avoided or removed during our journey up to here) and all edge loops span over the expected range, most of them are still true closed loops ending in themself. So the model here is ready for fine tuning. It is even well suited for rigging in the case where you wanted your shoe to follow the foot movements…
But the shoe is not finished. It looks not right yet. So we have to add some typical shape patterns for shoes.
Chapter 6: Improving the Shape
Let us first add 3 basic materials to the shoe, we will want one material for the sole, one for the body and one for the heel. This is absolutely not important. But it helps to visualise what we do. So i did not select the colors to be cool and good looking, but just as place holders for later. Here is the shoe after defining the materials: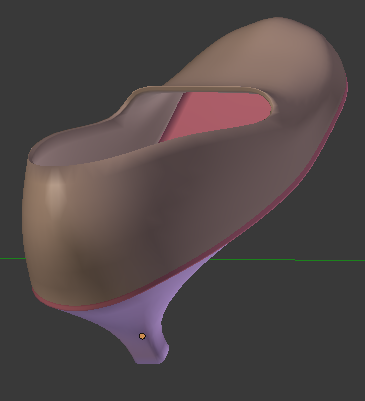
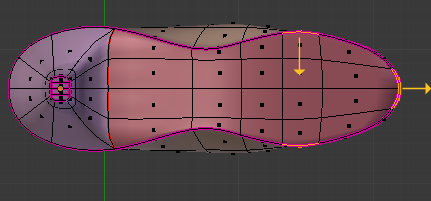
Now i take a closer look at the sole. Right now it is bright and not very ellegant. I want it a bit thinner in the middle part. I move the selected faces inwards ( towards y ) and i also rotate them slightly round the z-axis so that i keep a smooth outline:
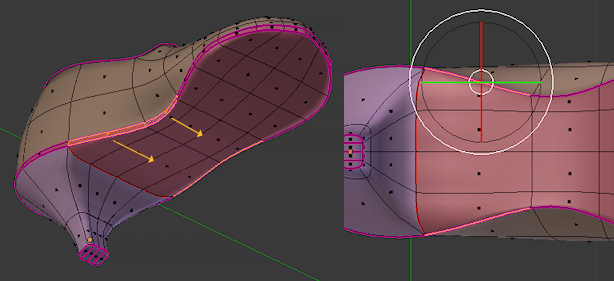
Also make the shoe tip a bit longer (in x) and thinner (in y) using propotional edit mode:
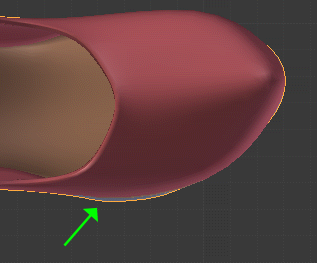
And finally i make the upper front edge of the shoe a bit more rounded. It may be easier to temporarily disable the subsurf modifier to better rearrange the vertices:
Note that the sides of the shoe are a bit to high. I have changed this in the final shape below but i did not show this step in the tutorial.
Chapter 7: Adding Asymmetry
Until now the shoe looks a bit odd. This is mainly because it is designed fully symmetric along the y axis. Usually shoes look a bit bended inwards, and the left side and the right side of the shoe differ slightly. We could now simply apply the mirror modifier and then continue with shifting the faces and vertices around.
But this is inconvenient and time consuming. Especially when something is going wrong. Then all you can do is save your work frequently and revert to a previous version when you messed up the model. Furthermore we might later want to make some major (and symmetric) modifications to the mesh and thus it wuold be very good to keep the mirror modifier intact.
I will show you how you can add such asymmetries without actually changing your modelling-mesh. In other words: the mesh itself will be kept fully intact (and symmetric). While the asymmetry is fully separated. This will help us a lot when we later want to create several different flavours of shoes. Fortunately we have the Lattice Modifier which can do what we want. And the good news: This indeed allows us to add some asymmetry to the model without applying the mirror modifier.
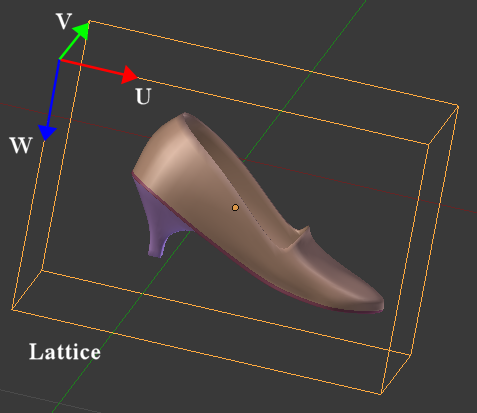
So in order to use a lattice, we will have to create a lattice object first, then add a Lattice modifier to the shoe and finally associate the lattice to the lattice modifier.
Here we go:
- Go to Object mode
- SHIFT+a -> Lattice
This will create a new Lattice object named “Lattice”. Note that the lattice is initially much larger than the shoe. But you can scale it down to a box which contains the shoe. It should look like this now (the axes of the lattice are named U,V and W, see also further down):
- Now we select the shoe again and add a Lattice Modifier to the modifier stack.
- As before i shift the “Subdivision Modifier” down to the bottom of the stack.
- And i connect the Modifier with the “Lattice” Object itself by seelcting the Lattice from the Object list in the Lattice-Modifiers attribute panel.
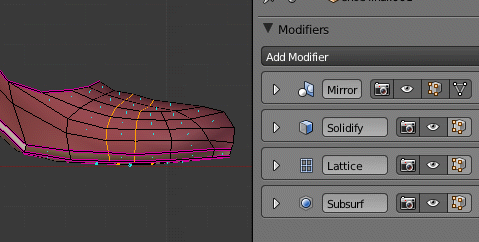
The Modifier stack and the Lattice modifier should look like this now:
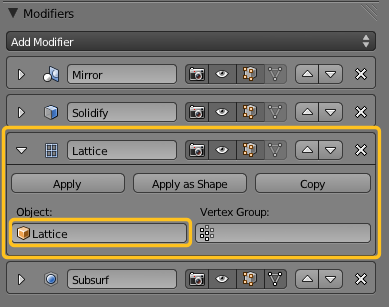
When you now select the lattice object, then go to edit mode you see 4 control points which can be selected and moved. The shoe will be deformed while you do this. But with only 4 control points we can not do much. So we add a few control points as follows:
- Go to the Object data settings for the Lattice. there you find 3 sliders to control the number of control points along the U,V and W axes of the lattice. Their values specify the number of control points along the lattice axes. So let us set the U value to 5:
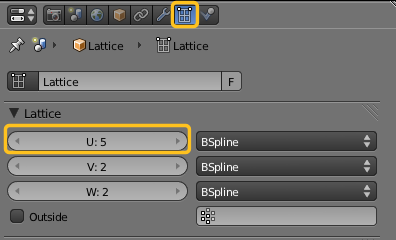
And here is how the lattice has changed by now: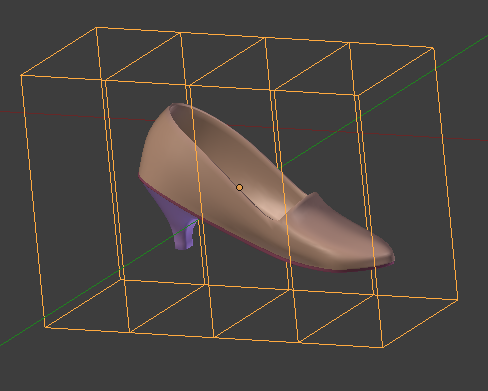
- Now we can go to edit mode and add a few asymmetries to our object. After some tweeking the lattice and the shoe have changed like this:
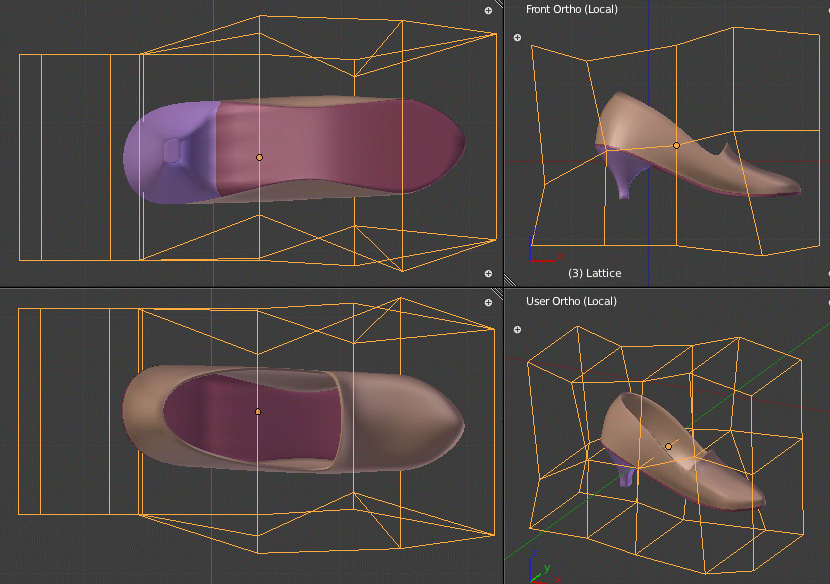
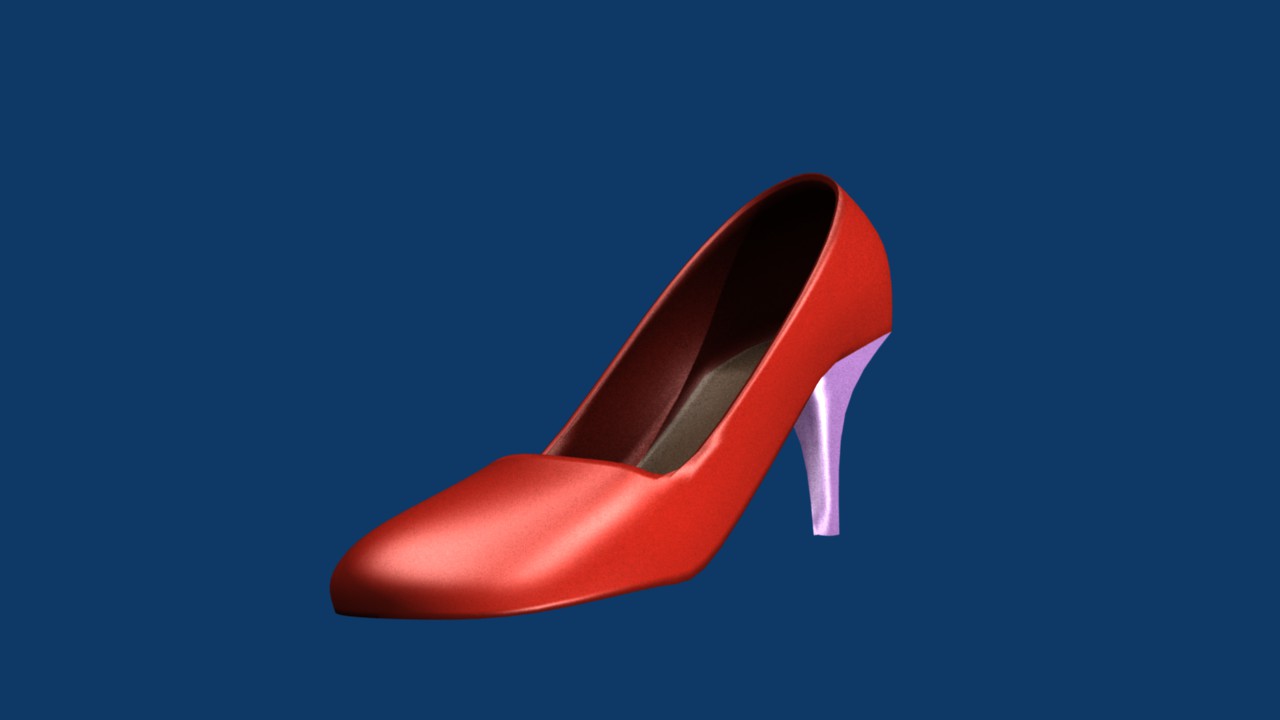
Now we can safely go back to the mesh and do more symmetric changes without loosing the asymmetry we just introduced. And i think the shoe needs a lot more of tweeking before it looks really nice. Here is one possible result, how it may look after i tweeked the mesh a bit more (only by moving vertices, nothing added, nothing removed, and the lattice was kept as for the basic model above):
Of course you also can add or remove faces from the mesh. So you can very quickly do basic changes to the model without loosing the fine details.
Chapter 8: Optimize & LOD
- Apply Mirror modifier and Solidify Modifier
- Cleanup artefacts introduced by the Solidify Modifier
- Apply Subdivision Modifier
- Remove unimportant Edge loops
I will use the final tuned shoe shape for my optimizations. The goal here is to reduce the final model complexity as much as i can with minimal impact on the shape.
First of all i will make a copy of my shoe. I want to keep the original shoe for several reasons:
- I will later use the original for texturing the shoe.
- I will use the original as refference, so that i can see what deviations i introduce during the optimization process.
- I will keep the original at a safe place in case i mess up the optimized version.
It is also recommended to save your work frequently during the optimization process.
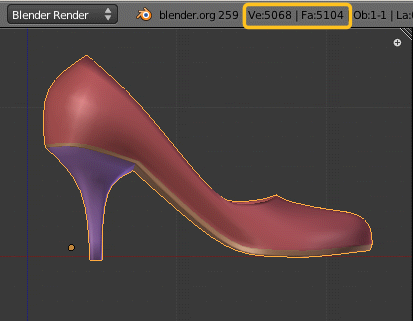
I will place the model on a separate and empty layer (2) . It is important that only the shoe is on that layer! Only then i can see the actual number of faces for the shoe on Blender’s top Menu as long as i am in Object mode. Note: the final number of faces is what we get when we apply all Modifiers! And that happens when we do the export to our target system.
So when we go to Object mode now we see that the model contains 5104 faces, which is by far too much! Now we have to take into account what we are going to do with the shoe.
- We either can optimize for making a realistic looking model which can be displayed on our shoe shop. Then we could take special care of the outside part, but we would need to keep the inside part still looking good as we must expect people to inspect all parts of the shoe in close detail.
- Or we can optimize for a shoe which is worn on an avatar. In that case we can really remove most of the inner part of the shoe but want to keep the outer part as nice and round as possible.
In this tutorial i will first optimize the shoe as exposition model. And i will later take the final model to derive a wearable shoe from it. My goal is not to make a shoe with minimal face count, but a shoe with reasonable face count and reasonable amount of work. You always can go and optimize the model further after you have done the basics.However i won’t cover this in this tutorial.
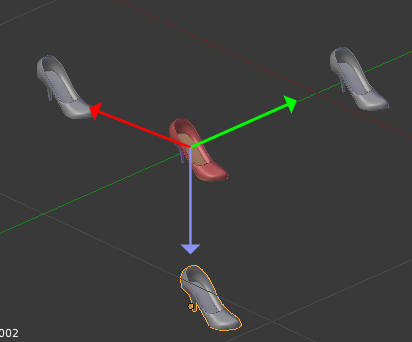
So let us first create a “reference frame”. I make yet another copy of the shoe and place that copy on another empty layer (3). Then i apply all modifiers to that copy. Finally i remove all materials from the shoe and create 2 more copies of it also on layer 3.
- Then i shift one copy to negative x,
- the other copy to positive y
- and the third copy to negative z.
When i now display layer 2 and 3 together, then i get a picture like this:
When i now select the colored shoe (our optimization model) and switch between top,front and side view, then i have a nice way to check how the shape of the optimization model changes with our ongoing optimization efforts.
I will start by going to edit mode, disable all modifiers except the mirror modifier, and check what i can remove on this low level:
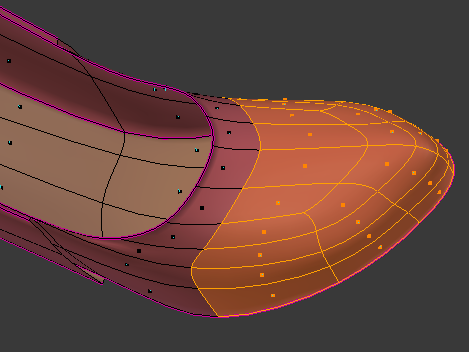
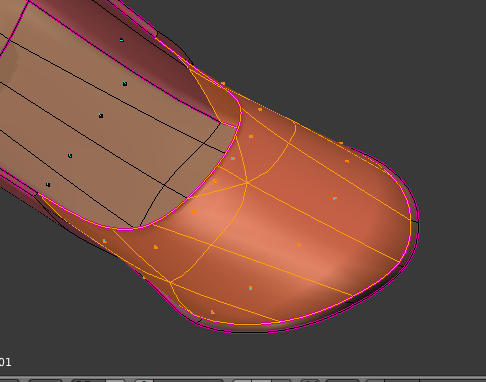
I have marked 2 edge loops which i probably can remove without problems. Indeed after removing these edge loops we actualy have removed more than 1000 faces! And the look of the shoe is almost the same as before. Only when i switch to top view, i see that the shape has changed slightly.
But this can be corrected by moving the corresponding faces a bit. But we also can decide that this sort of deviation does not matter too much. We can further reduce the shoe tip as shown in the accompagnying video tutporial ( “Chapter VIII Optimize & LOD” )
There is another edge loop we can safely remove. We have introduced an extra edge loop for the sole. But we can decide to remove this loop and later add it again into our texture. So let us remove it.
A quick check against our reference frame verifies that the shape has not changed at all and we are now already down to 3440 faces. Note that there is also another edge loop on the backpart of the shoe, which we can safely remove (as shown in the accompagnying video, where i was able to reduce the shoe to 2128 faces up till here).
Now we have to go a bit deeper. The next step is to apply the solidify modifier. We will see that we can gain a lot by optimizing the generated faces. But in order to apply the modifier, we also have to apply the Mirror modifier. We can recreate a mirror modifier later if needed. But within this tutorial we are now done with it. So i proceed as follows:
- i apply the mirror modifier (because it is on the top of the stack and needs to be applied first!
- i apply the solidify modifier.
- I can also remove the lattice modifier for now. I can add it again later without problems.
So all we have in the modifier stack should be just the Subsurf modifier (and the lattice modifier if you decided to keep it on the model)
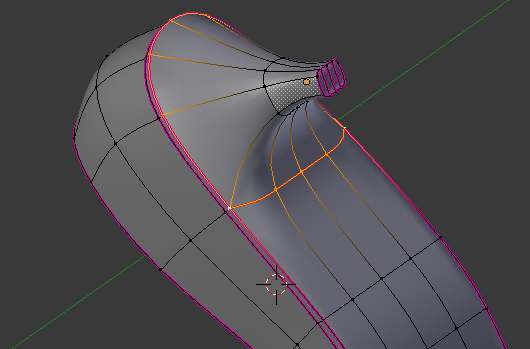
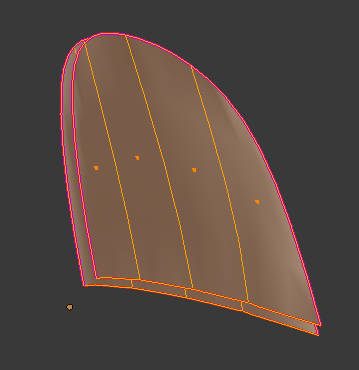
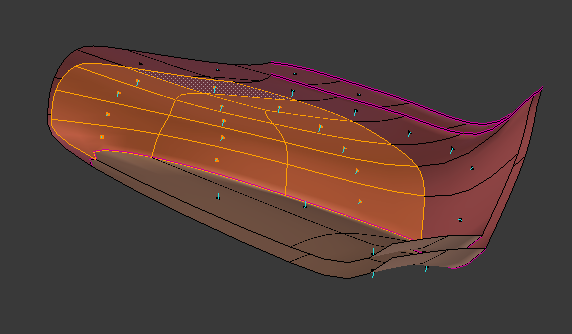
In the folowing image i have hidden all except the tipo of the shoe. You can clearly see that now the shoe has got 2 surfaces, one inner part and one outer part. The selected part is buried deep inside the shoe and it does not at all add to the visible shape. I will therefore reduce the number of faces on that part.
To achieve this i will first unhide all vertices, then hide only the outer part of the shoe tip:
It is not easy to see, but we still have only the inner part of the shoe selected. I will reduce the faces by removing the selected part and rebuild it with much less faces. the result looks like this:
And now we are at 3072 faces.
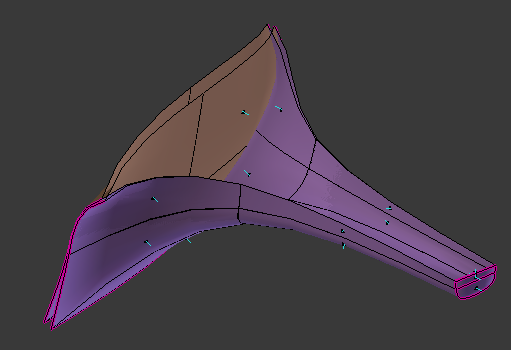
Let us turn to the heel. I already mentioned that here we have duplicate faces because of a possible bug in the Solidify Modifier. Let us hide all but the heel:
We apparently only need the outer part and we can safely remove the inner part by selecting it and then delete faces. And now we are at 2600 Vertices. So we have already saved about 50% compared to the original object. Let us continue…
This edge loop does not add much:
Trashing it gets us to 2424 faces.
trashing this one gets us to 2224 faces:
Ok, this is enough on this level. Now let us take another look at the Modifier stack. WE have the mirror modifier. We can not do muh here. The lattice modifier does not add vertices, so nothing to do. But the Subsurf modifier is where we can do something.
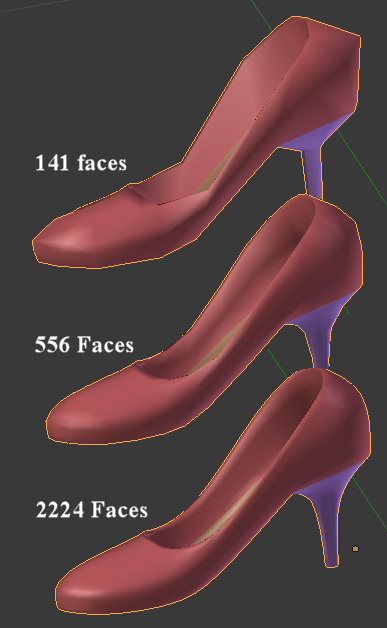
Right now it has added 2 levels of subdivision. When we reduce this to only one level of subdivision we intantly end with 556 faces and with no subdivision at all we end up with 141 faces. Not too bad. Here is a comparison:
Now we have a decision problem. When we just keep things as they are now, we already have 3 reasonable levels of detail which we can use without any additional work. And we not only have these LOD meshes, but when we are going to texturize we already have 3 UV compatible objects and we do not have to create separate UV maps for each LOD mesh.
On the other hand we really can further optimize the 2224 faces shoe without changing its shape at all. that is because the subsurf modifier creates detail all over the surface, where we already know that parts of the shoe never will need high detail.
Now we have to decide where to go next. We either can try to optimize the smooth shoe by applying subsurf. This may give us another reduction to about 1000 faces at the end. But then we have to UV unwrap each model separately.
Or we keep things as they are and live with the 2224 faces for our highest level of detail.
Or we can decide to just use one level of subdivision for our highest level of detail and live with the rough look but have 554 faces which is reasonably low.
Since reducing the High LOD mesh does not reveal new knowledge, i will skip over that part and use the simple alternative here, namely i will use the 2224 face model as high level, the other 2 as medium and low level of detail meshes.


