Project Bento:
Since 17-december-2015 we got new bones for the Second Life Avatar. This is the result from project “Bento” which started somewhere around may-2015 very silently and completely unnoticed from the public.
In a nutshell, the Second Life Avatar now has:
- Hands with 3 bones for each finger
- 2 Wings with 4 Bones on each side
- a Tail with 6 Bones
- a face rig with 30 bones
What you need to start
The bento Viewer
You need the special Bento project viewer that has all new bones included. You get this viewer from Linden Lab:
And once you have instelled the viewer, you have to visit the Aditi Beta grid. You can switch to the beta grid right besides the login button:
Avastar-2.0.1 or newer
We provide a pre release of our upcoming Avastar-2 Addon for testing the new skeleton on Aditi. If you have purchased Avastar after 11/2014 or if you have purchased a regular yearly update support package, then you find the Avastar-2 Addon in your download folder.
If you have not yet purchased Avastar or you have purchased Avastar before mid 11/2014 then you need to purchase a yearly update support package:
(*) Avastar-2 Bento Rig is only good for the SL Test Grid (Aditi); also contains regular rigs usable on both grids.
Before you begin
The blend file used in the “Bind to Pose” video: bindpose.blend
Note: We provide the above material (blend file) as is and only for demo purposes. If you intend to reuse parts of this blend file for any other purpose than learning for yourself, then please ensure that you have the appropriate rights to do so.
The original of this file was downloaded from blendswap.com
Ready to go
Once you have installed Avastar-2 you need some patience. its not like things have magically become easier. However we tried to keep things as easy as possible.
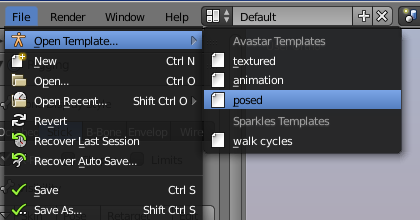
The easiest way to get started with Avastar is to use the included Avastar template:
File -> Templates -> Posed
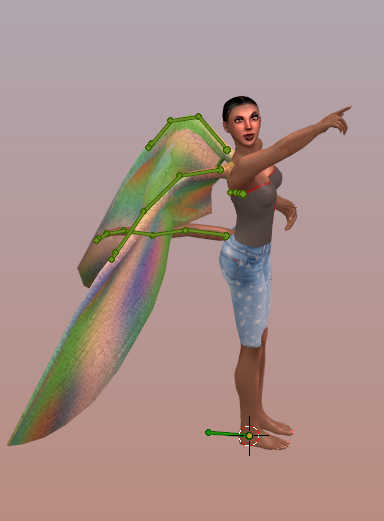
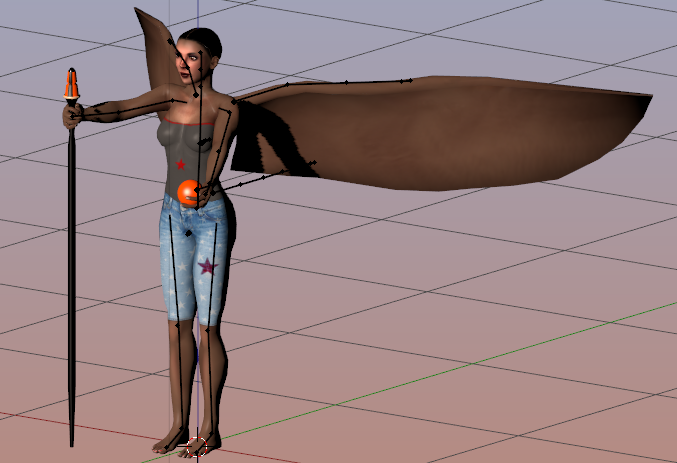
The above mentioned Template contains a ready made and fully rigged Bento Angel (see below)
Where are the new Bones?
You find the new Bones in the rigging panel (see image aside). We have noticed that the rigging panel has become too big. Because of that we have split the panel into 2 sub sections
- Display
- Config
You can enable the visibility of the subsections by clicking the buttons at the top of the Rigging panel (see image)
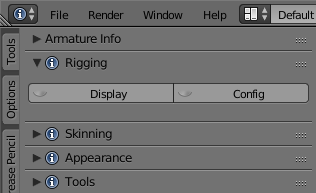
The Rigging Display Section
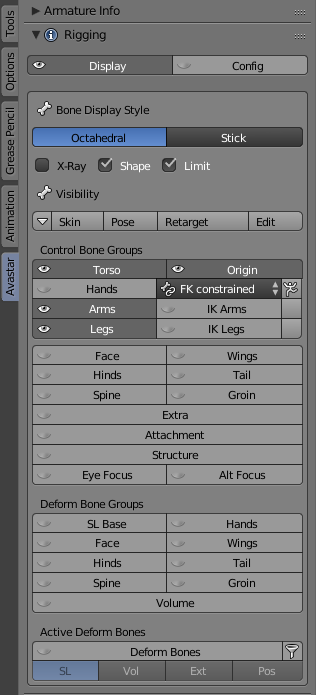
Important: You see the rigging panel contains 2 set of bone groups:
- Control Bone Groups (to be used for animation)
- Deform Bone Groups (to be used for weighting)
The control Bones are only good for Rigging and animation purposes. The Deform Bone Groups are only good for weighting purposes.
The Active Deform Bones
At the bottom of the panel you find one additional subsection for the active Deform Bones (see image)
When you enable the Deform Bones Button, then you see all bones which have been set as Deforming Bones (Avastar does this automatically, you can modify the settings in pose mode, see armature Bone Properties section)
Please never mix up those. When you do weighting tasks please always only use the Deform bones, while when you animate please always use the Control Bones.
Any other workflow is likely to fail.
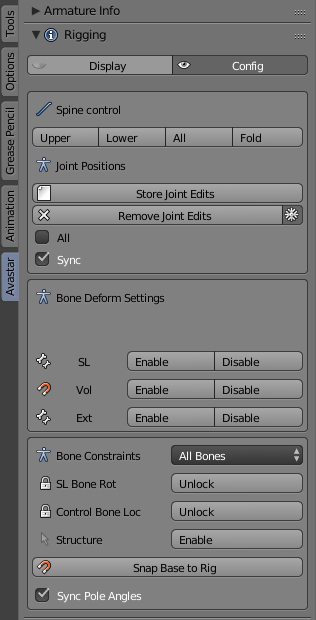
The Rig Config Section
The Rig Config Section allows you to configure the Rig in various ways needed when you are working with non human characters and when you need to edit the Avastar Skeleton itself to match your Creatures.
Important: This panel changes slightly depending in which Object mode the Armature is. The image at the side shows the section when the armature is in Edit mode.
Note: To get button specific documentation please enable Blender tool tips (they are enabled by default). Then you get additional information about each button by hovering the mouse cursor over the button and wait about 1-2 seconds. Then the tool tuip shows up in a small popup window.
Once you have the bones visible on the 3D View you can go ahead as usual. they are just a bunch of extra bones. There is nothing really special here.
Add custom entries to the Avastar Add menu
For Sparkles users: Here is how you can get your quaded Menu entries back:
- Open the user preferences
- Open the Addons Tab
- Locate the Avastar Addon Pannel
and open it - Create new menu entries in
the section “Character definitions
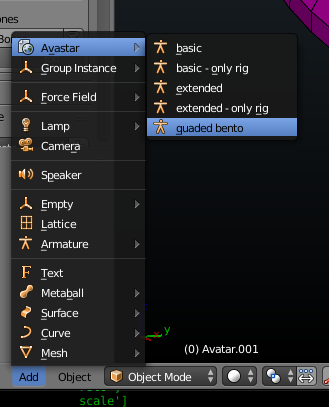
Set the options Create Avatar and Rig Type as desired (see below), then add a new preset
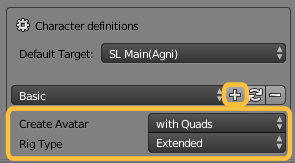
The following options can be used to create new Add Presets:
Option “Create Avatar”:
with Tris: triangulated meshes
with Quads: mostly quaded Meshes (only available when Sparkles is enabled)
Rig Only: no Meshes
Option “Rig Type”:
Basic: Old legacy Avatar with the 26 base bones
Extended: New Bento compatible Avatar with all new bento bones
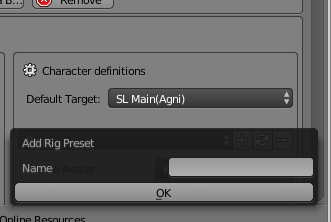
Finally you click on the small plus sign in the Rig. This opens a Pulldown box where you can define your new entry name.
When you now open the Add menu in the 3D Viewport then you find your new entry there.
Some Thoughts about Rotation and Translation
We know since a long time that adding translation in animations does not work nicely together with the SL Appearance Editor. Here is the reason (Note i use the terms joint and bone interchangeably in the following):
First you need to know that each joint (bone in Blender) contains information about the Location, Scale and Rotation of the joint in the scene. The Skeletal animation can in theory modify all this information over time.
Academic Sidenote: The combination of Location, Scale and Rotation can be defined in a specially constructed Matrix of size 4*4. This Matrix type is also named Quaternion.
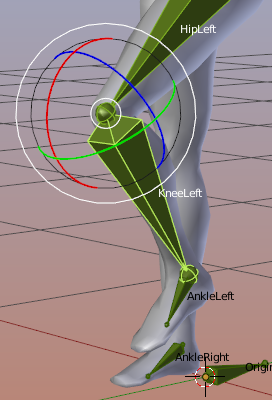
Separation of responsibility
The SL animation system has originally been constructed with some restrictions regarding animation such that:
- Appearance Sliders modify Scale and Location of bones.
- Skeletal animation can only modify Rotation of bones.
The strict separation of using Rotation only for Animation and Location+Scale only for the Appearance (Shape) worked nicely for the basic Skeleton (the 26 mBones) But now we got the face and hands with need for a lot more complicated animations.
As a consequence many animators have expressed the wish to get official support for Translation animation. So now we have unlimited possibilities to animate the SL characters. But the addition of Translation animations comes with a major issue…
The Price of Translation Animations
We now get a mixture between the more static Shape of an Avatar and its dynamic Animation. Why that? Because the Bento project gave up the strong separation of responsibility. So now we have this:
- Appearance Sliders modify Scale and Location of bones.
- Skeletal animation modifies Rotation and Location of bones.
So custom animations and custom poses now can influence the Appearance (Shape, face expression) and vice versa changing the Appearance influences the custom animations and poses.
Mixture of functionality
There is another topic here. The Appearance sliders should ideally be used for appearance and not for facial expression. But in reality the appearance sliders seriously mix up these 2 topics. Lets take a look at the Eye open Shape Slider:
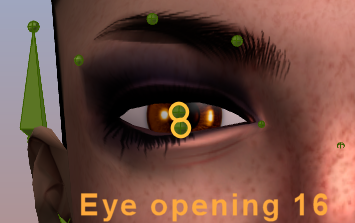
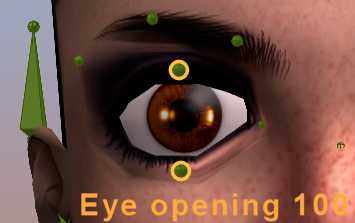
However this is actually less of a static “Shape” but more of a dynamic “Expression”. And there is exactly where things start to become messy. Of course it is desirable to be able to open the eyes as part of a facial animation. And actually it is not at all necessary to have a shape slider for opening the eyes when we can have an animation that does the same.
So the logical consequence seems to be to not use the Eye opening Slider at all when you plan to use facial animations. So we have to find out if we can separate the Appearance sliders into 2 sets. Let me see if we can do this from a functional point of view:
Expression:
Mouth Corner
Jaw Jut
Eye Opening
Upper Eyelid Fold
Unclear (to me)
Nostril Width
Shift Mouth
Outer Eye Corner
Inner Eye Corner
Color scheme:
Green: More a Shape Slider
Orange: More an Expression Slider
Dark Orange: Undecided
Shape: Nose, Eyes, Ears
Nose Size
Nose Width
Nose thickness
Upper Bridge
Nose Tip Angle
Lower Bridge
Bridge Width
Crooked Nose
Nostril Division
Nose Tip Shape
Ear Size
Ear Tip
Puffy Eye Lids
Eye Bags
Brow Size
Shape: Head, Mouth
Lip Width
Lip Fullness
Lip thickness
Lip ratio
Lip Cleft Depth
Lip Cleft
Mouth Position
Chin Depth
Chin Angle
Jaw Angle
Chin Neck
Jaw Shape
Forehead Angle
Upper Cheeks
Lower Cheeks
Egg Head
Head Stretch
But does this help us? I am not sure, maybe it does. At least we might be able to identify Sliders with less critical behavior (i guess many of the Nose Sliders can be easily used with facial expressions)
The big problem
All sliders actually affect Bone positions, so even Sliders which are only meant to be used for Shaping the face will also affect Expression animations. So are we stuck? …
A Demo: Eye lids
Here is a simple demo inspired by an answer given in the Bento Thread on the Second Life forum. Lets see what happens when we modify the Upper eyelid bone with different techniques. We begin with a simple pose (no animation)
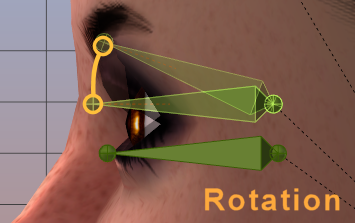
Using Rotation: Here we see the eye lid bones in the Default Face Shape. In addition i have opened the eyelid by adding a pose with a 20 degree rotation. We see the eye mesh moves along with the bone as expected.
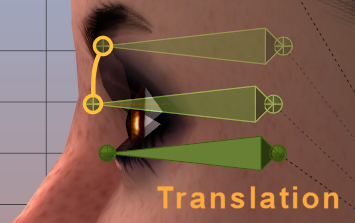
Using Translation: Here we see the eye lid bones in the Default Face Shape. In addition i have opened the eyelid by adding a pose with a lift of about 1 centimeter and a move slightly backward to get roughly the same position of the bone tail as in the previous image.
We see the eye mesh moves along with the bone as expected.
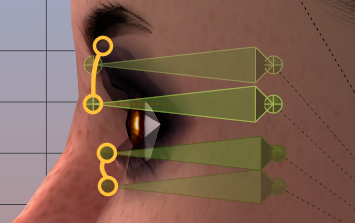
Using the Appearance editor: Here we use only the Appearance editor (no pose is involved). However in this case we are restricted to how the eye open Slider has been implemented.
You see the appearance editor uses Bone Translation. But it also moves the lower eyelid downwards. You also see that the upper eyelid can not be lifted as far as we did it with our eyelid pose (see images above).
Combining Appearance Editor with Poses
Now we get a nasty dependency that is introduced by the previously mentioned mixing of translations in the Shape and in the Animations
Appearance and Rotation:
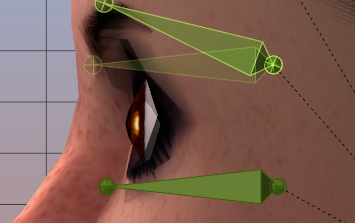
You see the rotation animation is Added to the Shape. However since the shape has already opened the eye the animation adds on top of this.
Appearance and Translation:
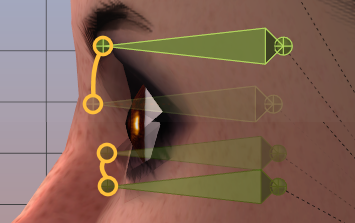
You see the Translation replaces the influence of the shape. So the Translation of the upper eyelid that is imposed by the Shape slider is replaced by the Translation that is imposed by the pose.
Since the animation only modifies the upper eyelid, the translation of the lower eyelid remains unchanged.
So you see whatever we try to do, the result of combining the Shape and the Pose might create not the desired results (opening/closing the eyes in this case)
So what can we do ?
The problem is that whatever we try to do, we never can create a custom pose that works equally well for all variations of the Shape. This becomes even worse when we take custom animation into account. Lets say we wanted to create the eye blink. This will not work …
Conclusion
So we seem to have basically 3 options provided we keep with the Animation system as it is:
Only use Shape Sliders
So all we have is Shape Sliders to define the appearance of the character. Well, this is better than we had before, where we could not modify the appearance of mesh characters at all. But on the other side we have more than 40 bones on the face now. We really want to use them for something.
Only use Facial Animation
So do not touch the Face appearance sliders and just define animations for the default shape. BTW the default face shape for Male and female do not differ except for the Head size. This sounds like the easiest approach. So users still can use the Shape Sliders OR use facial animations.
Make Animations for slider ranges
We do this already for Mesh clothing. We possibly can use the same strategy for human Face Animation as well. We could identify uncritical bones (nose bridge, nose tip, Nose base) and just leave those out of our animations or only do rotational animations.



Hi,
Have you made a tutorial explaining how to import the mesh bento via the viewer bento ??